Fuel Pump: Service and Repair
Fuel Pump And Associated Parts:
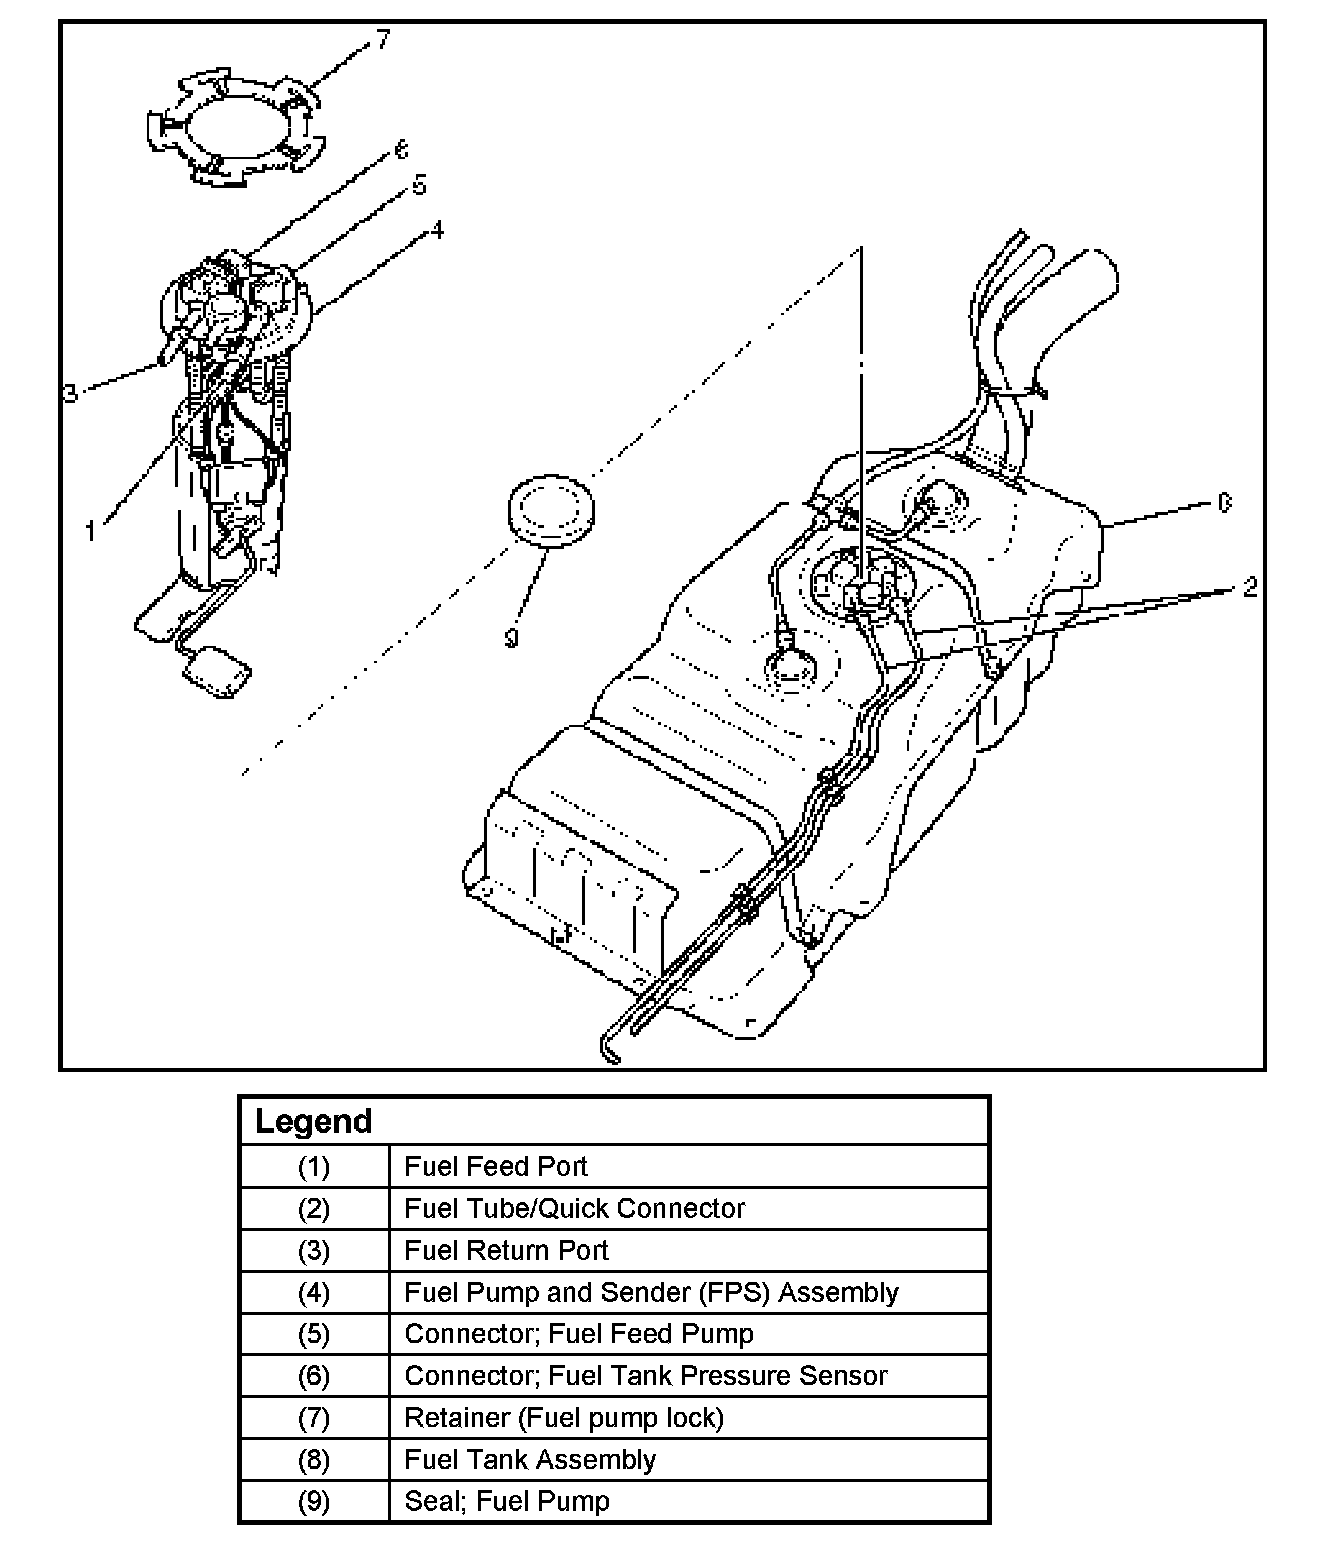
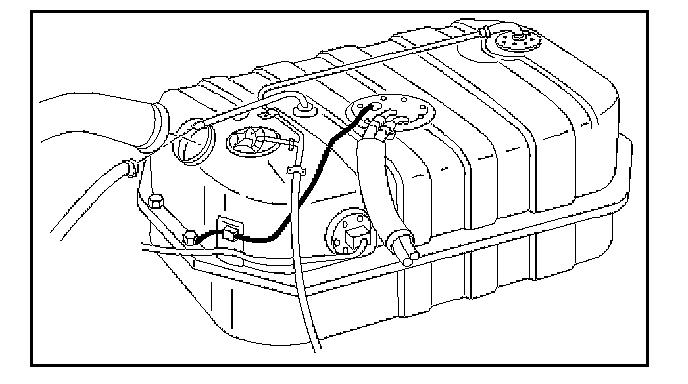
Fuel Pump Assembly
REMOVAL PROCEDURE # 1
CAUTION: When repair to the fuel system has been completed, start engine and check the fuel system for loose connection or leakage. For the fuel system diagnosis, refer to Computers and Control Systems.
1. Remove fuel tank assembly (8). Refer to Fuel Tank Removal.
2. Remove Fuel Tube/Quick Connector (2).
NOTE: Refer to Fuel Tube/Quick Connector Fittings when performing fuel tube repairs.
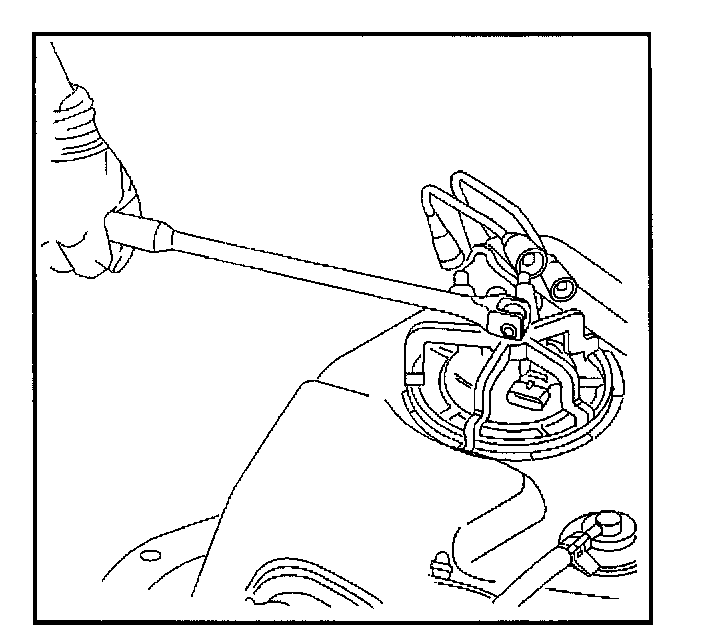
3. Remove the retainer (7) with tool J-39763 and remove the fuel pump and sender (FPS) assembly (4).
NOTE: After removing pump assembly (4), cover fuel tank to prevent any dust entering.
INSTALLATION
1. Install FPS assembly (4) with the retainer (7) and new seal; fuel pump (9) by J-39763.
2. Install Fuel Tube/Quick Connector (2).
NOTE: Refer to Fuel Tube/Quick Connector Fittings when performing fuel tube repairs.
3. Install fuel tank assembly (8). Refer to Fuel Tank INSTALLATION.
REMOVAL PROCEDURE # 2
1. Disconnect the negative battery cable.
2. Drain all fuel from fuel tank from filler neck.

3. Remove the fuel pump relay from the fuse and relay box at right side of engine room.
4. Remove fuel tank. Refer to Fuel Tank REMOVAL PROCEDURE.
5. Using J-39763, twist the fuel pump counter-clock wise to release from fuel tank.

6. Lift fuel pump to remove from fuel tank.
INSTALLATION PROCEDURE
1. Insert the fuel pump assembly into fuel tank and place them at its position.

2. Using J-39763, twist fuel pump assembly clock wise into the lock.
3. Install the fuel tank. Refer to Fuel Tank INSTALLATION PROCEDURE.
4. Install the fuel pump relay.
5. Connect the negative battery cable.