Part 2
Oil Pan Extension
NOTE:
Install new lower timing cover.
2 Install the bolts, but do not tighten fully at this stage.
Special Service Tool

Lower Timing Cover Alignment tool, 303-1433

NOTE:
Tighten the bolts in the indicated sequence.
M8: 20 Nm
M6: 12 Nm
3 Remove the special tools.

Torque to: 12 Nm

Torque to: 10 Nm

Special Service Tool

Rear Crankshaft Seal Installer, 303-1442
Special Service Tool

Rear Crankshaft Cover Alignment Tool, 303-1443
4 Remove the special tool.

NOTE:
Tighten the bolts in the indicated sequence.
Torque to: 11 Nm

Torque to: 11 Nm

Torque to: 11 Nm

NOTE:
Lubricate the fuel rail high-pressure fuel pump bucket with clean engine oil.

CAUTION: Tighten the Torx screws a turn at a time until the correct torque is achieved.
NOTE:
Lubricate the fuel rail high-pressure fuel pump O-ring seal with clean engine oil.
Torque to: 11 Nm
5 Loosen the Torx screws half a turn each.

NOTE:
Lubricate the fuel rail high-pressure fuel pump bucket with clean engine oil.

CAUTION: Tighten the Torx screws a turn at a time until the correct torque is achieved.
NOTE:
Lubricate the fuel rail high-pressure fuel pump O-ring seal with clean engine oil.
Torque to: 11 Nm
6 Loosen the Torx screws half a turn each.

CAUTION: Care must be taken when positioning the fuel rail high-pressure fuel pump cover to one side.
NOTE:
Fuel rail high-pressure fuel pump cover shown removed for clarity.
Torque to: 11 Nm
CAUTION: Care must be taken when positioning the fuel rail high-pressure fuel pump cover to one side.
NOTE:
Fuel rail high-pressure fuel pump cover shown removed for clarity.
Torque to: 11 Nm

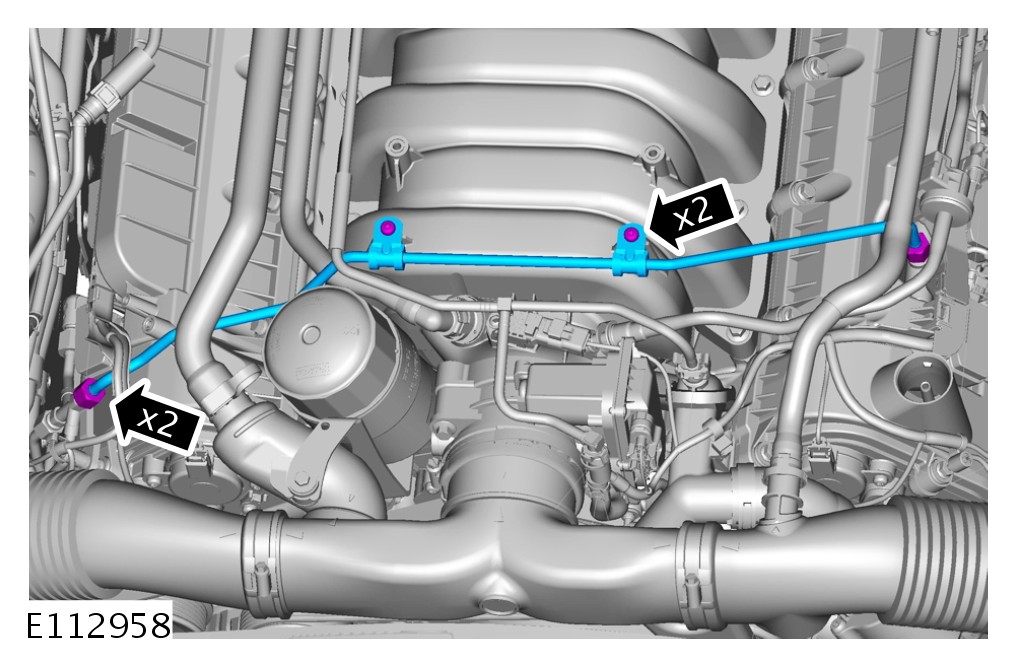
CAUTION: Install new high-pressure fuel supply lines.
CAUTION: Lubricate only the union threads with clean engine oil.
NOTE:
Remove and discard the blanking caps.
NOTE:
Install the bolt and unions fully finger tight before final tightening.

NOTE:
Do not tighten at this stage.
NOTE:
Remove and discard the blanking caps.

Unions (1): 21 Nm
M6 (2): 11 Nm
M8 (3): 25 Nm
M5 nut (4): 6 Nm

Torque to: 21 Nm

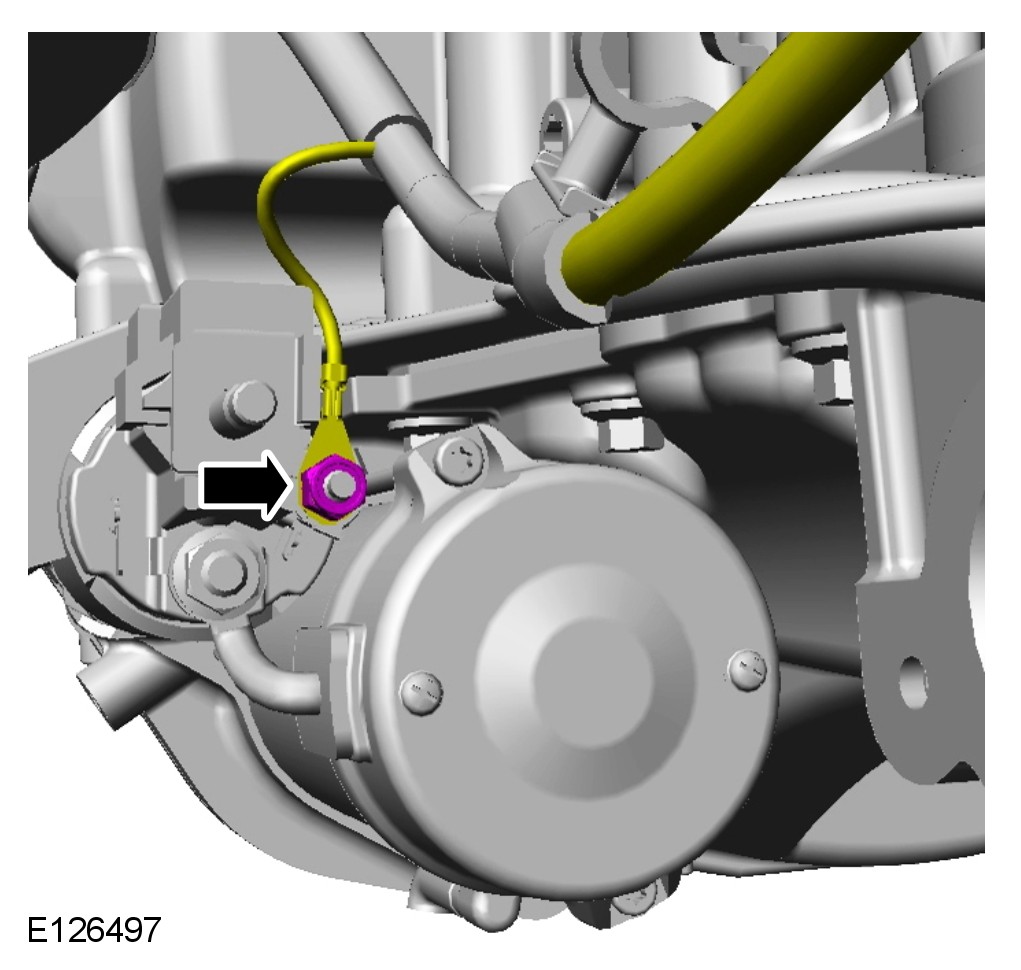
NOTE:
Install the bolt and unions finger tight before final tightening.
NOTE:
Remove and discard the blanking caps.
Unions: 21 Nm
M6: 11 Nm
Torque to: 21 Nm

M10: 29 Nm
M6: 11 Nm


Torque to: 25 Nm
Unions: 21 Nm
M6: 8 Nm

Torque to: 21 Nm


Torque to: 40 Nm


Torque to: 25 Nm

Torque to: 12 Nm

CAUTION: Install all the bolts finger tight before final tightening.
Torque to: 25 Nm


CAUTION: Install all the bolts finger tight before final tightening.
NOTE:
Tighten the bolts in the indicated sequence.
Torque to: 48 Nm

CAUTION: Install all the bolts finger tight before final tightening.
CAUTION: The bolts can only be used 3 times, mark the bolts with a center punch. If 2 punch marks are visible, discard the bolts.
CAUTION: Install the bolts in the noted position.
NOTE:
Make sure that the crankshaft is not rotated.
NOTE:
Make sure the crankshaft and flexplate mating faces are clean before installation.
NOTE:
Tighten the retaining bolts working diagonally.
Step 1: 45 Nm
Step 2: 90 degree

For additional information, refer to Engine Installation
For additional information, refer to Crankshaft Pulley Service and Repair
7 Lower the
vehicle.
For additional information, refer to Battery Disconnect and Connect Battery Disconnect and Connect