Drive Belt: Service and Repair
Accessory Drive Belt
This is a "Trustmark Authoring Standards (TAS) Repair Procedure"
- TAS style procedures can be identified by steps that have no accompanying step text and the magenta color of the electrical connectors and fasteners such as nuts, bolts, clamps or clips.
- TAS removal and installation procedures use a sequence of color illustrations to indicate the order to be followed when removing/disassembling or installing/assembling a component.
- Many of the TAS procedures will have the installation information within the removal steps.
- The TAS color illustrations use a variety of symbols to indicate important details of the procedures. It is important to understand these symbols in order to properly used the TAS procedures.
Refer to How to Use TAS Procedures and TAS Symbol Glossary at Vehicle | Description and Operation for additional information on these TAS procedures.
For additional information, refer to How to Use TAS Procedures How to Use TAS Procedures
For additional information, refer to TAS Symbol Glossary TAS Symbols Glossary
Removal
NOTE:
Removal steps in this procedure may contain installation details.
For additional information, refer to Air Cleaner Outlet Pipe T-Connector - Vehicles Without: Supercharger Air Cleaner Outlet Pipe T-Connector
For additional information, refer to Air Cleaner Outlet Pipe LH Air Cleaner Outlet Pipe LH
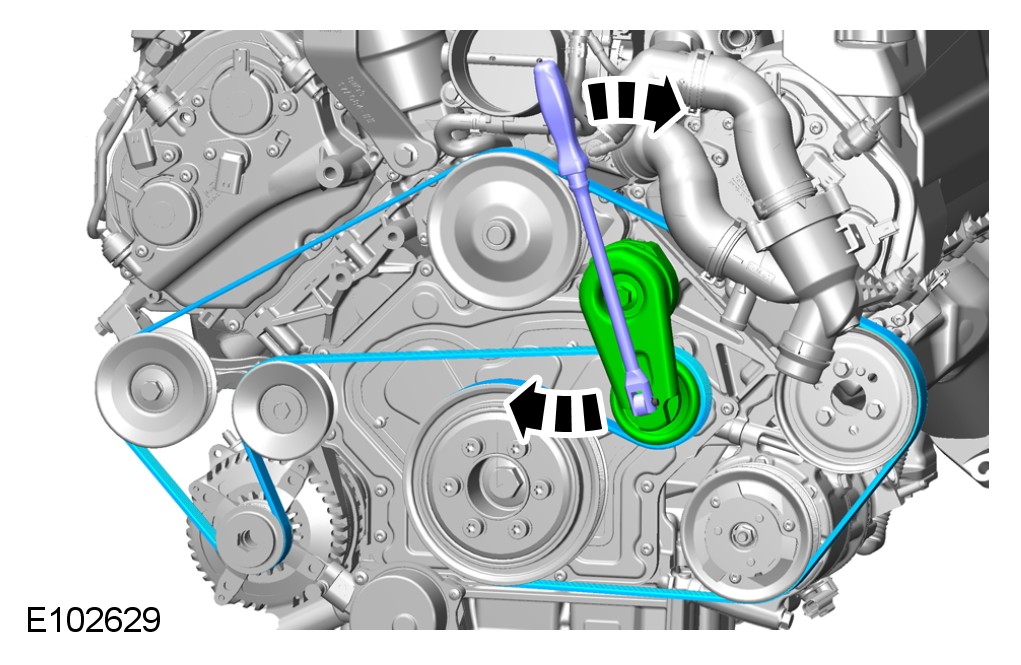
CAUTION: Clean and inspect the accessory drive belt pulleys for damage.
NOTE:
Engine shown removed for clarity.
NOTE:
Note the fitted position.
Installation
CAUTION: Make sure that the accessory drive belt is correctly located on each pulley.
1 To install, reverse the removal procedure.