Compressor Shaft Seal: Service and Repair
Removal1. Discharge the A/C system.
2. Remove compressor shaft nut and front plate.
Remove Felt Ring:
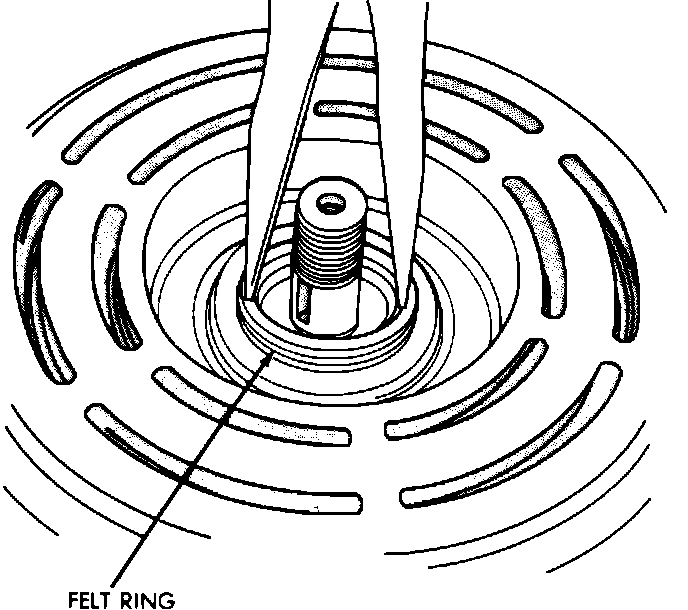
3. Using a suitable pair of snap ring pliers, insert the ends into the holes in the felt ring metal retainer and lift it out.
Remove Clutch Shims:
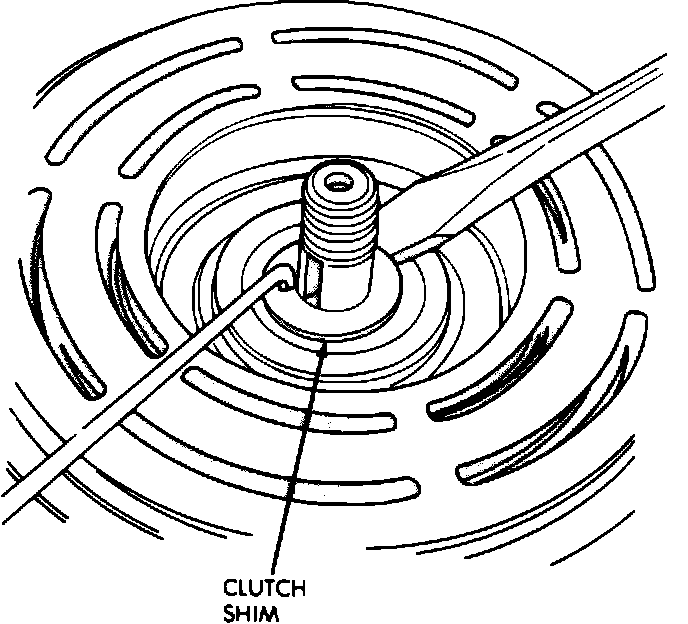
4. Remove the shaft shims.
R & R Front Seal Snap Ring:
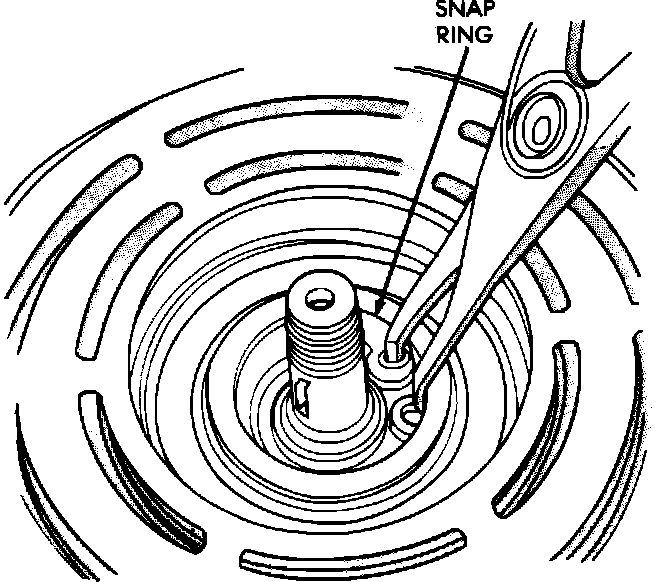
5. Remove the shaft seal retaining snap ring.
R & R Shaft Seal Seat:
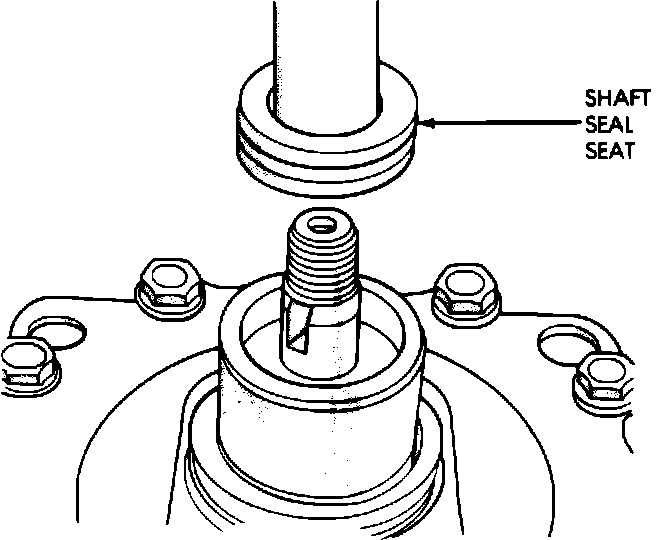
6. Remove the shaft seal seat, using a suitable tool.
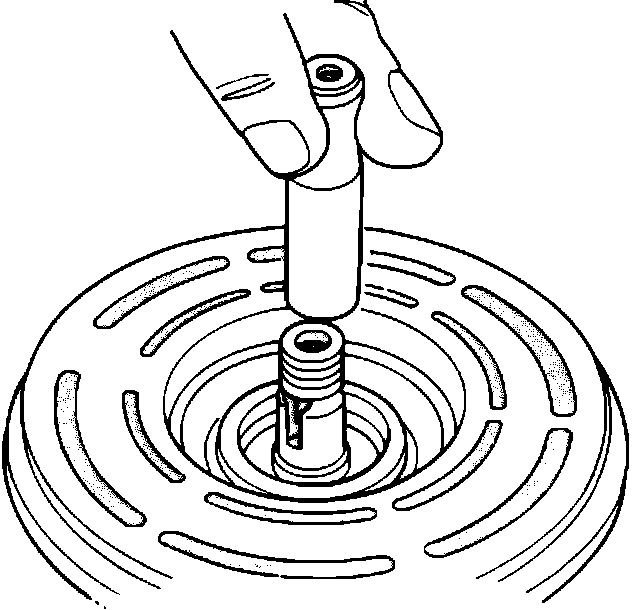
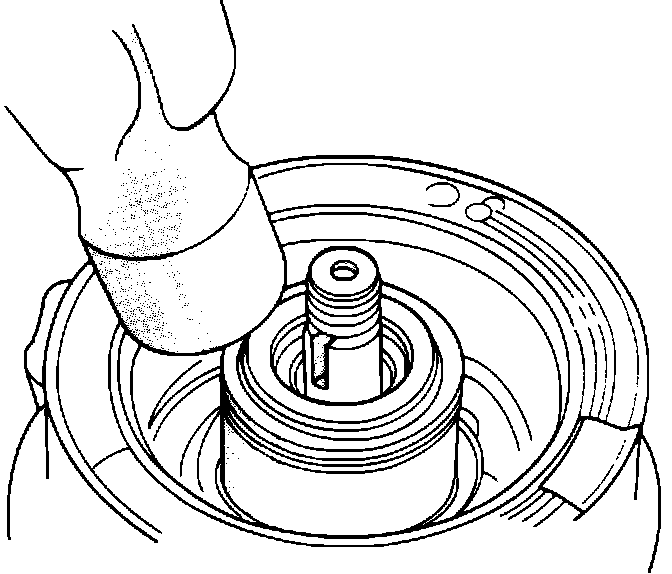
Remove Shaft Seal:
7. Remove the shaft seal by lifting it out with a suitable seal puller.
Installation
1. Thoroughly clean and dry seal cavity.
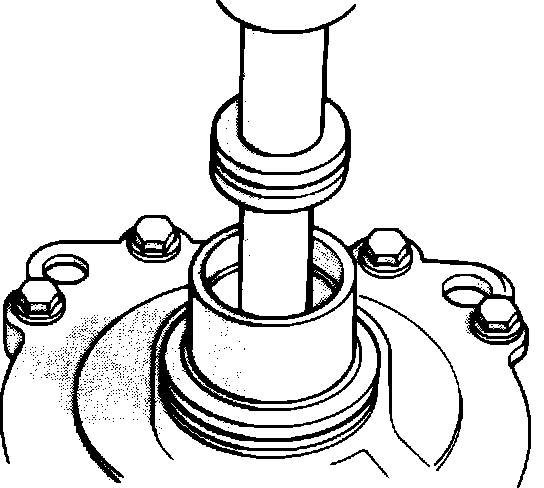
Seal Protector Sleeve:
2. Install seal protector over compressor shaft.
3. Lightly coat seal mating surfaces with refrigeration oil.
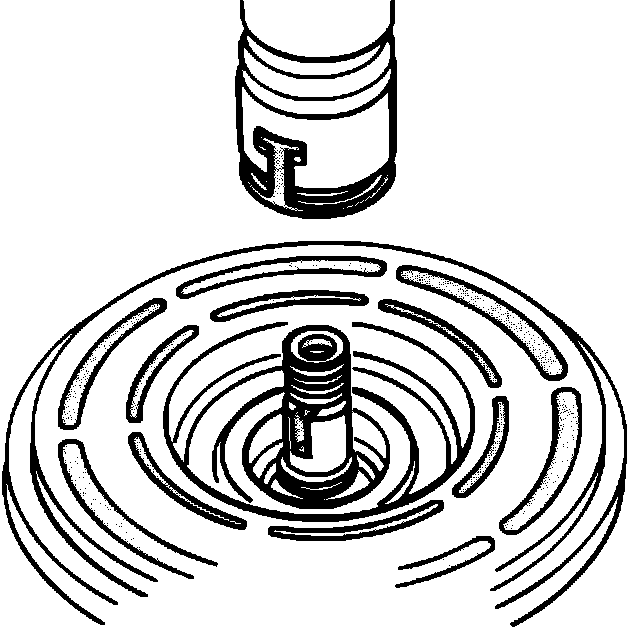
4. Engage seal installation tool on new seal.
Install Shaft Seal:
5. Install new seal in compressor. Twist tool in opposite direction to disengage tool from seal.
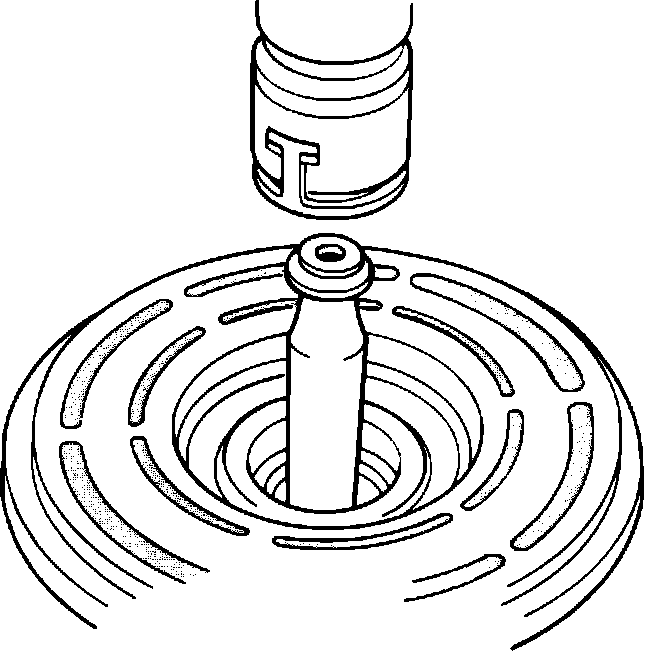
Install Seal Retainer:
6. Lightly coat seal retainer with refrigeration oil. Place seal retainer on top of seal.
R & R Front Seal Snap Ring:
7. Install seal retaining snap ring with beveled side outward and flat side toward the compressor.
8. Install the shaft shims.
Install Felt Ring:
9. Install new felt ring.
R & R Compressor Shaft Nut:

10. Reinstall front plate and shaft nut, torquing shaft nut to 25-30 ft.lbs. (34-40 N-m)
Checking Air Gap:

11. Check the air gap between the front plate and the pulley with a feeler gauge. The gap should be 0.016-0.031 inch.
- If the air gap does not meet specifications, remove the front plate and adjust the shim thickness accordingly.