Repair Procedures
REMOVAL
CAUTION:
- Use fender covers to avoid damaging painted surfaces.
- To avoid damaging the cylinder head, wait until the engine coolant temperature drops below normal temperature before removing it.
- When handling a metal gasket, take care not to fold the gasket or damage the contact surface of the gasket.
- To avoid damage, unplug the wiring connectors carefully while holding the connector portion.
NOTE:
- Mark all wiring and hoses to avoid mis-connection.
- Turn the crankshaft pulley so that the No. 1 piston is at top dead center.
Engine removal is required for this procedure.
1. Remove exhaust manifold.
2. Remove intake manifold.
3. Remove timing chain.
4. Remove water temperature control assembly.
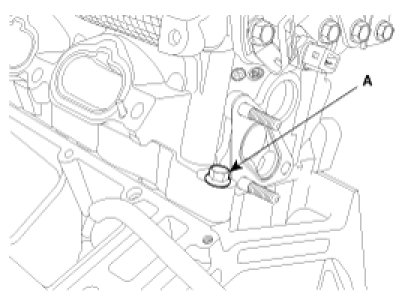
5. Remove camshaft bearing cap(A).
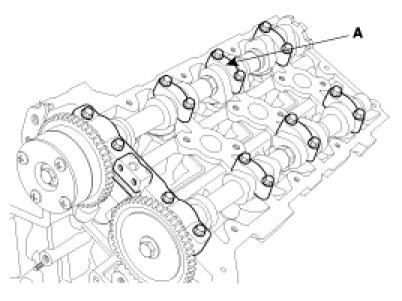
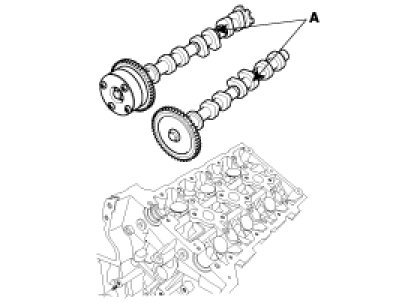
6. Remove camshaft assembly(A).
7. Remove cylinder head bolts, then remove cylinder head.
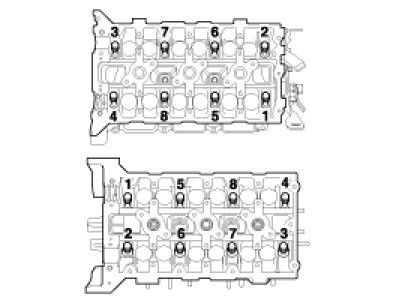
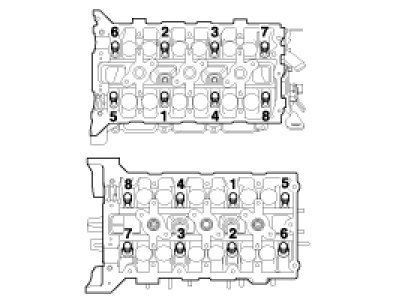
(1) Uniformly loosen and remove the 16 cylinder head bolts, in several passes, in the sequence shown. Remove the 16 cylinder head bolts and plate washers.
CAUTION:
Head warpage or cracking could result from removing bolts in an incorrect order.
(2) Lift the cylinder head from the dowels on the cylinder block and place the cylinder head on wooden blocks on a bench.
CAUTION:
Be careful not to damage the contact surfaces of the cylinder head and cylinder block
INSTALLATION
NOTE:
- Thoroughly clean all parts to be assembled.
- Always use a new head and manifold gasket.
- The cylinder head gasket is a metal gasket. Take care not to bend it.
- Rotate the crankshaft, set the No.1 piston at TDC.
1. Install the cylinder head.
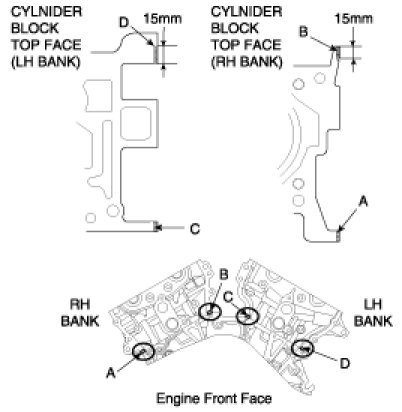
A. The sealant locations on cylinder head and cylinder block must be free of engine oil and ETC.
B. Apply sealant on cylinder block top face before assembling cylinder head gaskets.
The part must be assembled within 5 minutes after sealant was applied.
NOTE:
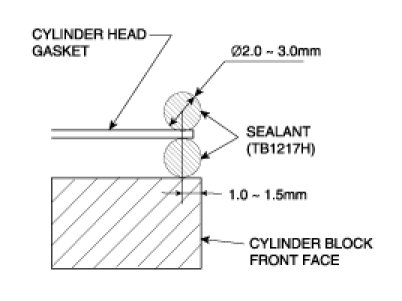
Refer to below illustration to apply the sealant.
Bead width : 2.0 - 3.0 mm
Sealant locations : 1.0 - 1.5mm from block surface
Recommended sealant :Liquid sealant TB1217H
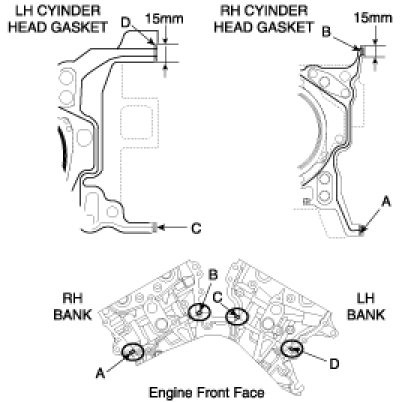
C. Apply sealant on cylinder head gaskets after assembling cylinder head gaskets on cylinder block.
The part must be assembled within 5 minutes after sealant was applied.
NOTE:
Be careful of the installation direction.

D. Install the cylinder head.
NOTE:
Remove the extruded sealant after assembling cylinder heads.
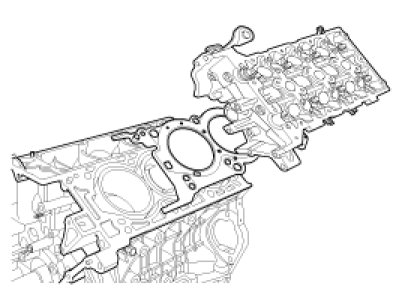
2. Place the cylinder head carefully in order not to damage the gasket with the bottom part of the end.
3. Install cylinder head bolts.
(1) Do not apply engine oil on the threads and under the heads of the cylinder head bolts.
(2) Using SST(09221-4A000), install and tighten the cylinder head bolts and plate washers, in several passes, in the sequence shown.
Tightening torque
1st step : 39.2Nm (4.0kgf.m, 28.9lb-ft)
2nd step : 120°
3rd step : 90°
18.62 - 23.52Nm(1.9 - 2.4kgf.m, 13.74 - 17.36lb-ft)(A)
NOTE:
Always use new cylinder head bolt.

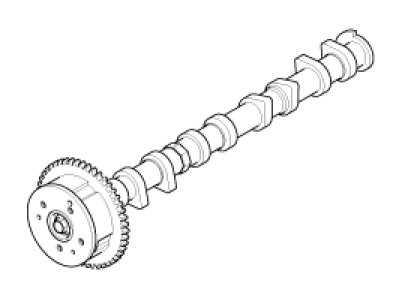
4. Install the CVVT and camshaft sprocket.
Tightening torque
64.68 - 76.44Nm(6.6 - 7.8 kgf.m, 47.74 - 56.4lb-ft)
NOTE:
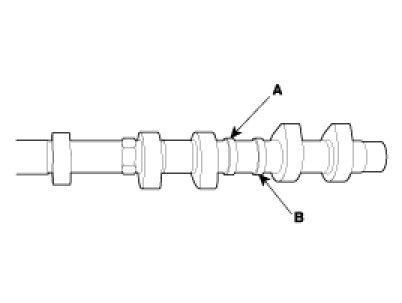
- Install camshaft-inlet to dowel pin of CVVT assembly.
At this time, attend not to be installed to oil hole of camshaft-inlet.
- Hold the hexagonal head wrench portion of the camshaft with a vise, and install the bolt and CVVT assembly.
- Do not rotate CVVT assembly when camshaft is installed to dowel pin of CVVT assembly.
5. Install camshafts(A).
NOTE:
- Apply a light coat of engine oil on camshaft journals.
- Assemble the key groove of camshaft rear side to the same level of head top surface.
- Be careful the right, left bank, intake, exhaust side before assembling.
Intake camshaft

Exhaust camshaft


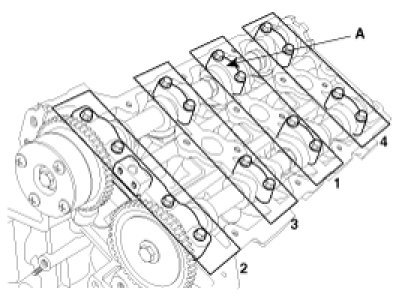
6. Install camshaft bearing caps with the order below.
Tightening torque
1st step : 5.9Nm(0.6kgf.m, 4.3lb-ft)
2nd step : 9.80 - 11.76Nm(1.0 - 1.2kgf.m, 7.23 - 8.68lb-ft)
NOTE:
Be careful the right, left bank, intake, exhaust side before assembling.

A : L(LH),R(RH)
B : I(Intake),None(Exhaust)
C : Journal number
D : Front mark
CAUTION:
Rotate the crankshaft not to contact the valves to the pistons by making the pistons below 10mm(0.3937in.) from the top of cylinder block.
7. Install water temperature control assembly.
8. Install timing chain.
9. Check and adjust valve clearance.
10. Install the exhaust manifold.
11. Install the intake manifold.