Attachment II
A. VEHICLE INSPECTION PROCEDURE1. Verify the vehicle is within both of the following ranges:
^ VIN: JM3LW28G*Y0 100001-149215
^ Build Date: before March 13, 2000
- If vehicle is within the above ranges, proceed to STEP 2.
- If vehicle is not within the above ranges, return it to the customer or inventory.
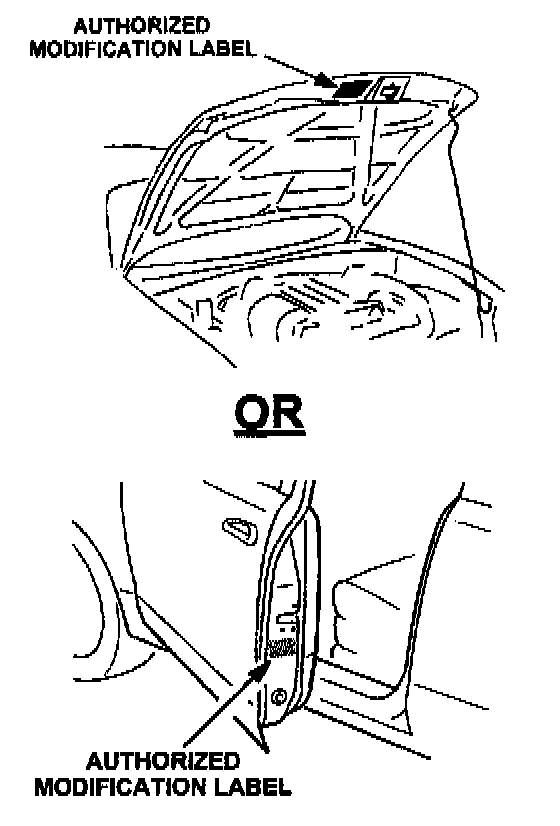
2. Perform a Vehicle Status Inquiry using your MDCS System and inspect vehicle for an Authorized Modification Label SSP43 attached to the drivers side door or under hood. Refer to illustration.
Note
^ Be sure to verify the SSP number as the vehicle may have multiple labels.
- If MDCS displays SSP43 N and an Authorized Modification Label is not present, the SSP has not been performed. Proceed to B. REPAIR PROCEDURE."
- If MDCS displays SSP43 N and an Authorized Modification Label is present, contact the Warranty Department. They will update the vehicle history.
- If MDCS displays SSP43 D and an Authorized Modification Label is not present, proceed to "C. AUTHORIZED MODIFICATION LABEL INSTALLATION."
- If MDCS displays SSP43 D and an Authorization Modification Label is present, the SSP has already been completed. Return the vehicle to the customer or inventory.
- If MDCS does not display SSP43 N or SSP43 D, this SSP does not apply to the vehicle. Return vehicle to the customer or inventory.
B. REPAIR PROCEDURE
1. Remove both front combination light assemblies as follows:
A. Disconnect negative battery cable.
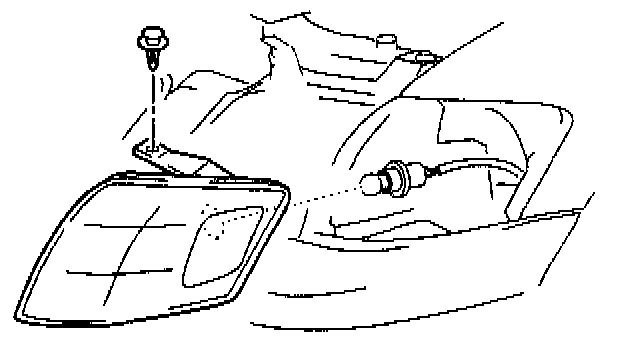
B. Remove screw as shown.
C. Using a fiber stick, slide assembly forward from body.
D. Rotate and remove light socket from assembly
E. Perform above steps on other light assembly
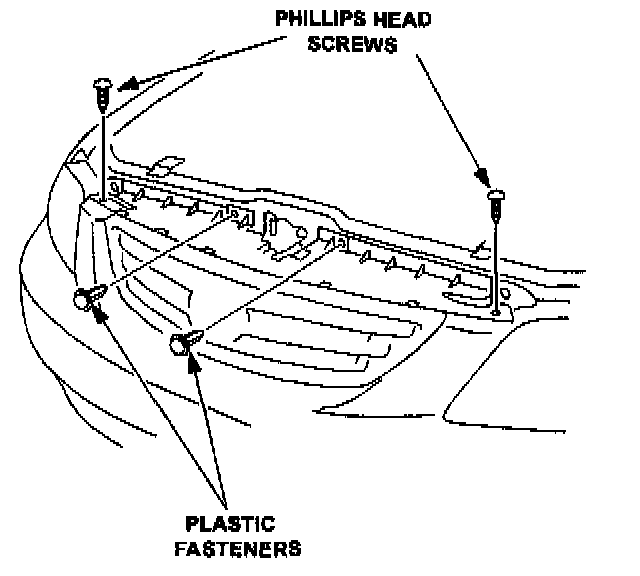
2. Remove two (2) Phillips head screws and two (2) plastic fasteners securing grille.
Note
^ Do not remove any other fasteners. The grille is to be removed with the bumper as an assembly.
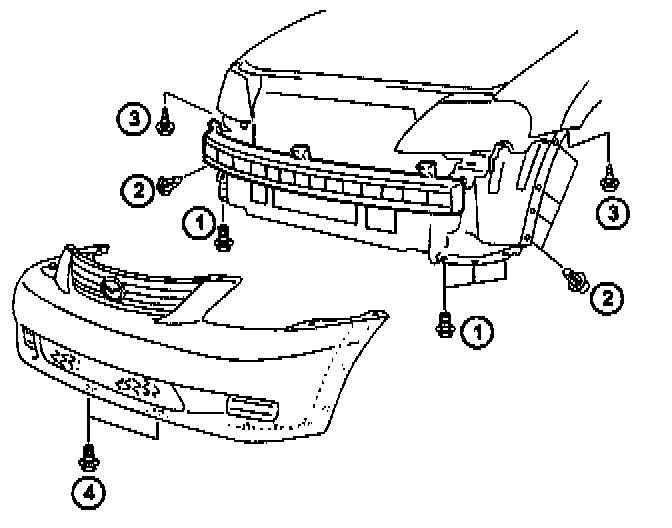
3. Remove the eighteen (18) fasteners that secure the bumper to the vehicle in the order shown in the illustration.
Note
^ Be sure to remove fog light connectors if applicable.
4. Remove the bumper and grille as an assembly from the vehicle.
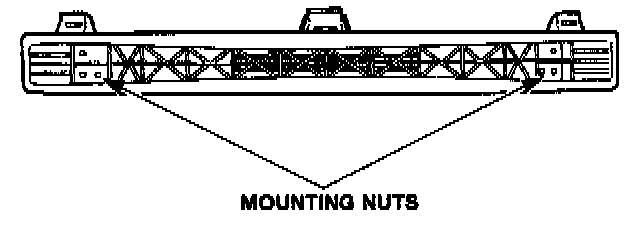
5. Remove the six (6) mounting nuts from the front plastic bumper reinforcement.
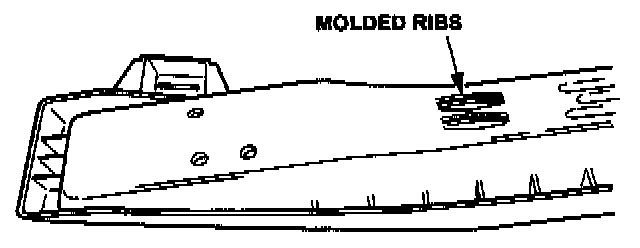
6. Inspect the back of the reinforcement for two molded ribs located inward approximately sixteen inches (16") from each end of the bumper.
- If no ribs are on the reinforcement, proceed to next step.
- If there are ribs on the reinforcement, a factory modified part has already been installed. Re-install all components in reverse order and proceed to "C. AUTHORIZED MODIFICATION LABEL INSTALLATION."
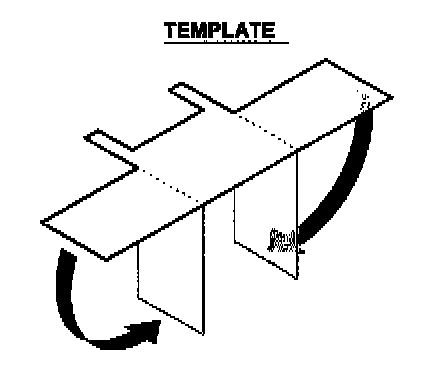
7. Bend template as shown.
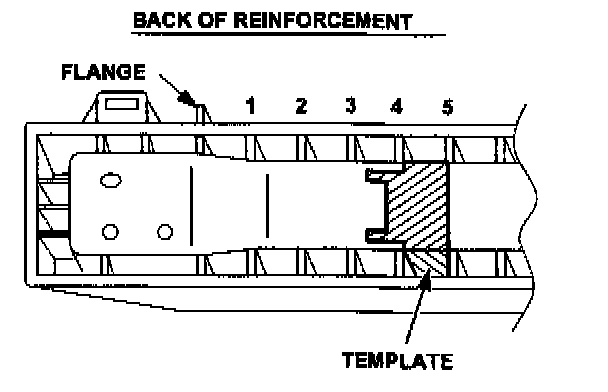
8. Insert template into 5th slot inward from flange as shown.
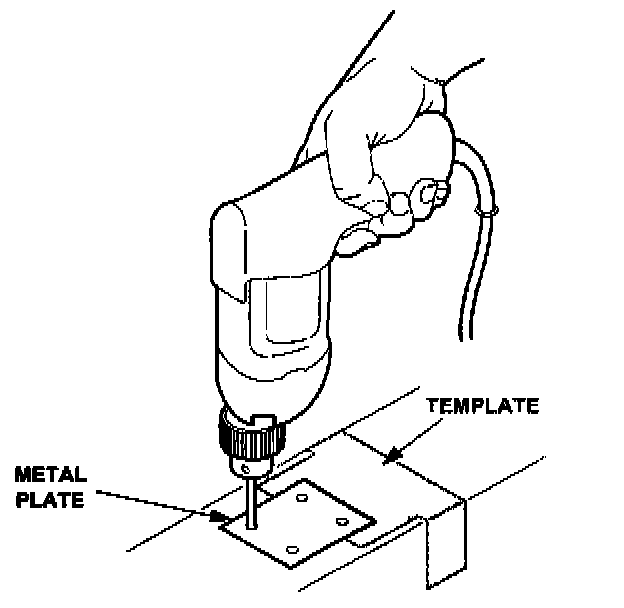
9. Remove adhesive protector from metal plate and position it into the slot of the template as shown.
Note
^ Be sure to apply sufficient pressure to plate to ensure that it stays in the correct position.
Using the holes of the template as a reference, drill four 6 mm holes into the bumper reinforcement.
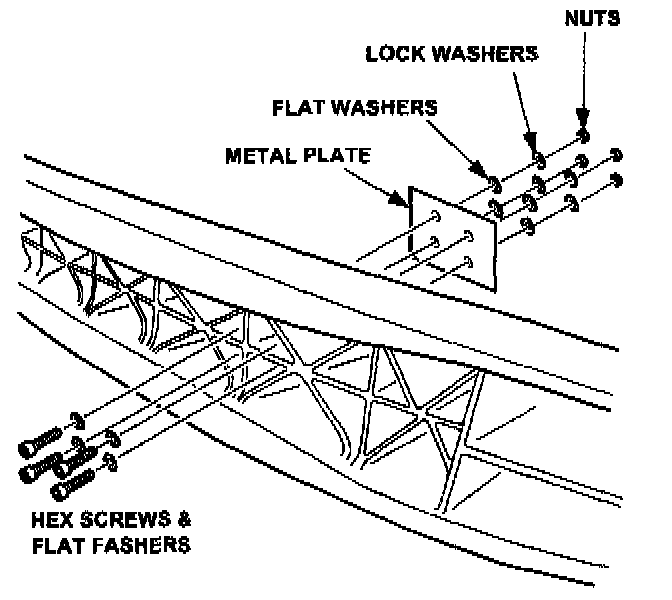
10. Assemble the components shown in the illustration.
Note
^ Use a 5 mm hex wrench (140 mm {5-1/2"} or longer).
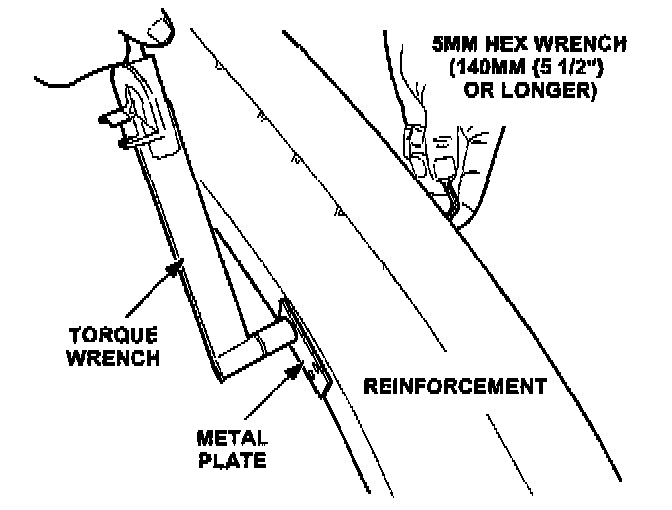
11. Tighten the nuts tot he proper torque.
Tightening torque
65-75 kgf-cm {57 - 65 in-lbf}
12. Repeat STEPS 7-11 on the other side of the bumper reinforcement.
13. Re-install all components in reverse order.
C. AUTHORIZED MODIFICATION LABEL INSTALLATION
Complete an "Authorized Modification Label" with the SSP number written on the sticker and affix it to the underside of the hood. Refer back to the illustration under "A. VEHICLE INSPECTION PROCEDURE."