Dimmer Switch: Testing and Inspection
PANEL LIGHT CONTROL SWITCH INSPECTION1. Remove the panel light control switch.
2. Connect the negative battery cable.
3. Connect the connector to the panel light control switch.
4. Measure the voltage at the panel light control switch as indicated below.
5. Disconnect the panel light control switch connector before inspecting for continuity at terminal D.
- If not as specified, inspect the parts listed under "Action."
- If the parts and wiring harnesses are okay but the system still does not work properly, replace the panel light control switch.
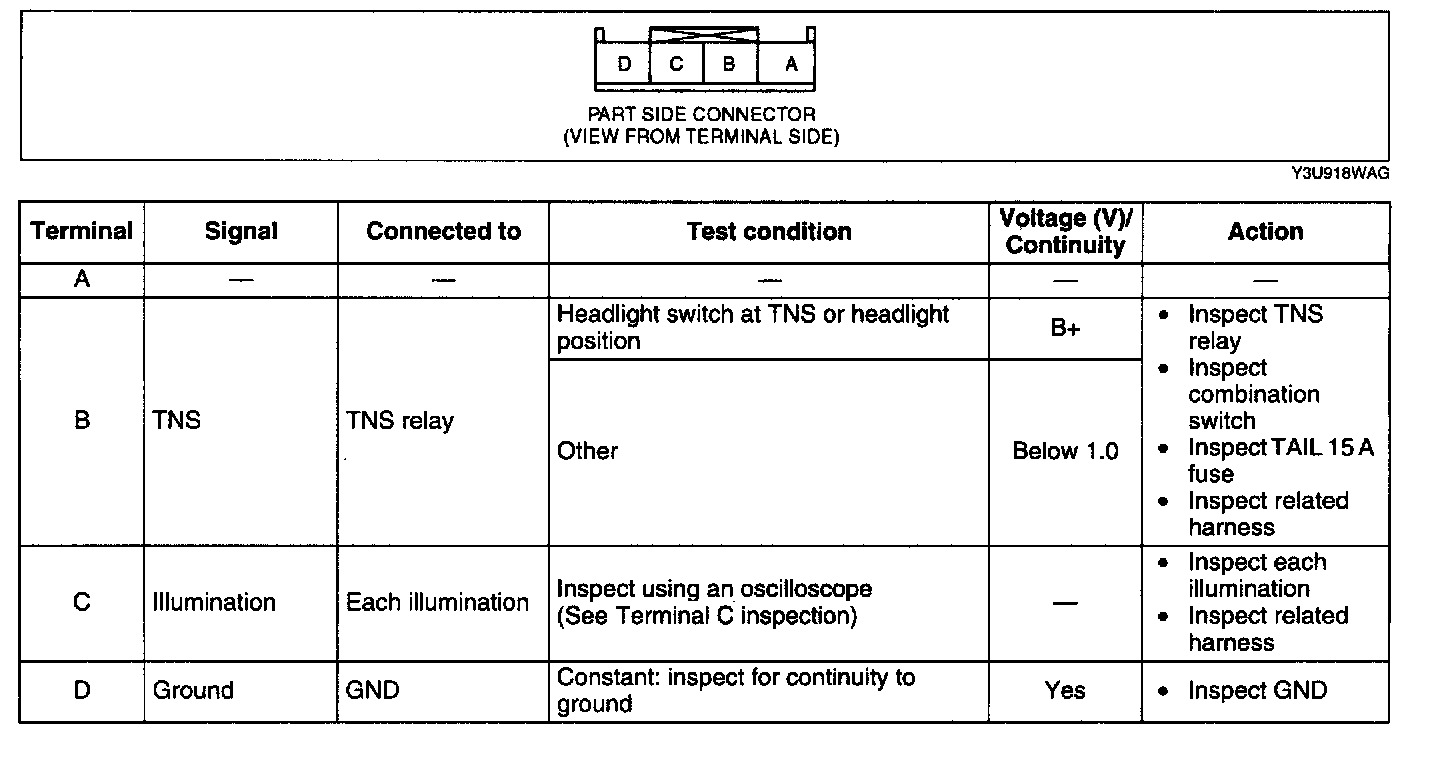
Terminal Voltage List (Reference)
Terminal C inspection
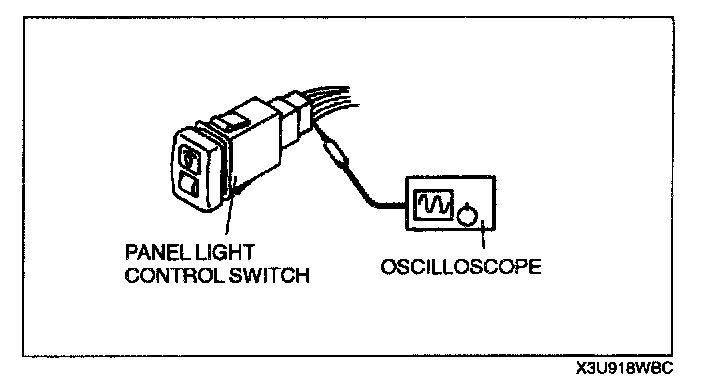
1. Measure the wave pattern of the C terminal on the panel light control switch using an oscilloscope.
2. Set the headlight switch to either the TNS or headlight position.
3. Set the panel light control switch to the brightest position.
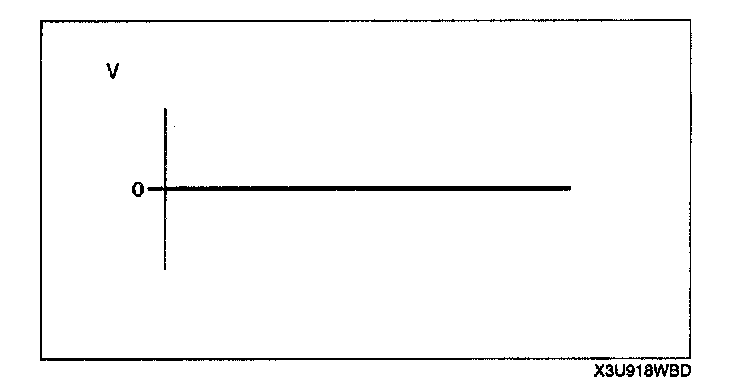
4. Verify that the pattern on the screen is as shown in the figure.
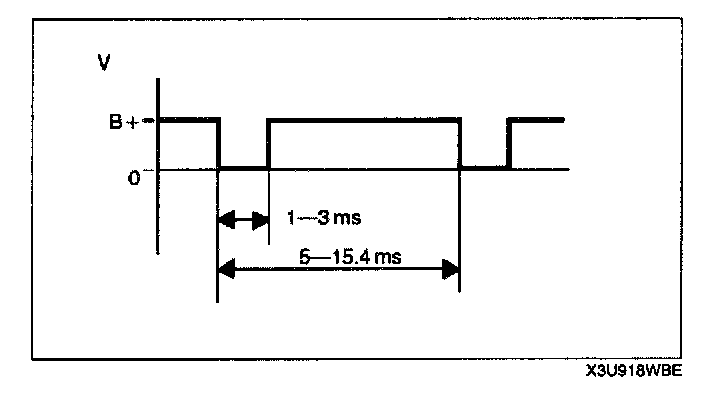
5. Verify that the pattern on the screen matches the pattern shown in the figure as the pane light control switch is gradually turned to the darkest position.