Trunk / Liftgate: Service and Repair
LIFTGATE REMOVAL/INSTALLATIONWARNING: When removing the stay damper, serious injury may occur if the stay damper is removed without supporting the liftgate. Always perform the procedure with at least another person.
CAUTION: If replacing the rear window glass, leave the power liftgate (PLG) unoperated for two days after the rear window glass installation. If the power liftgate (PLG) is operated automatically with the sealant not hardened after the rear window glass installation, the liftgate may deform. It is recommended that you refrain from operating the power liftgate (PLG) for seven days after the rear L window glass installation. Manual opening/closing will not cause liftgate deformation.
1. Disconnect the negative battery cable
2. Disconnect the PLG arm. (Liftgate side) (Vehicles with PLG)
3. Remove the following parts.
1. Trunk box
2. Seat side box
3. Trunk end trim
4. Third-row seat
5. Rear scuff plate inner
6. Third-row seat belt lower anchor installation bolt
7. Trunk side trim
8. Roof side trim
9. Second-row seat belt upper anchor installation bolt
10. C-pillar trim
11. Third-row seat belt upper anchor installation bolt
12. D-pillar trim
13. Liftgate upper trim
14. Liftgate side trim
15. Liftgate lower trim
4. Pull down the headliner.
5. Disconnect the rear washer hose.
6. Disconnect the liftgate wiring harness connector.
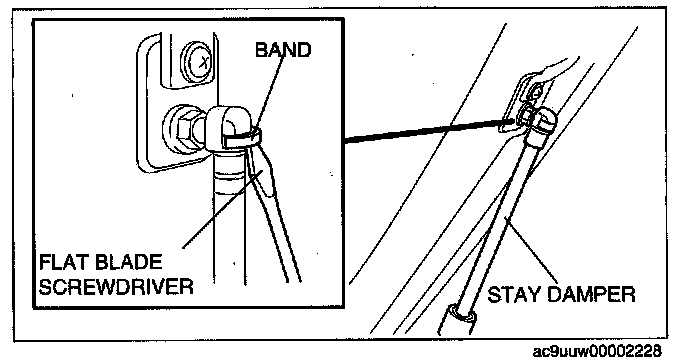
7. Disconnect the stay damper band with using the flat blade screwdriver.
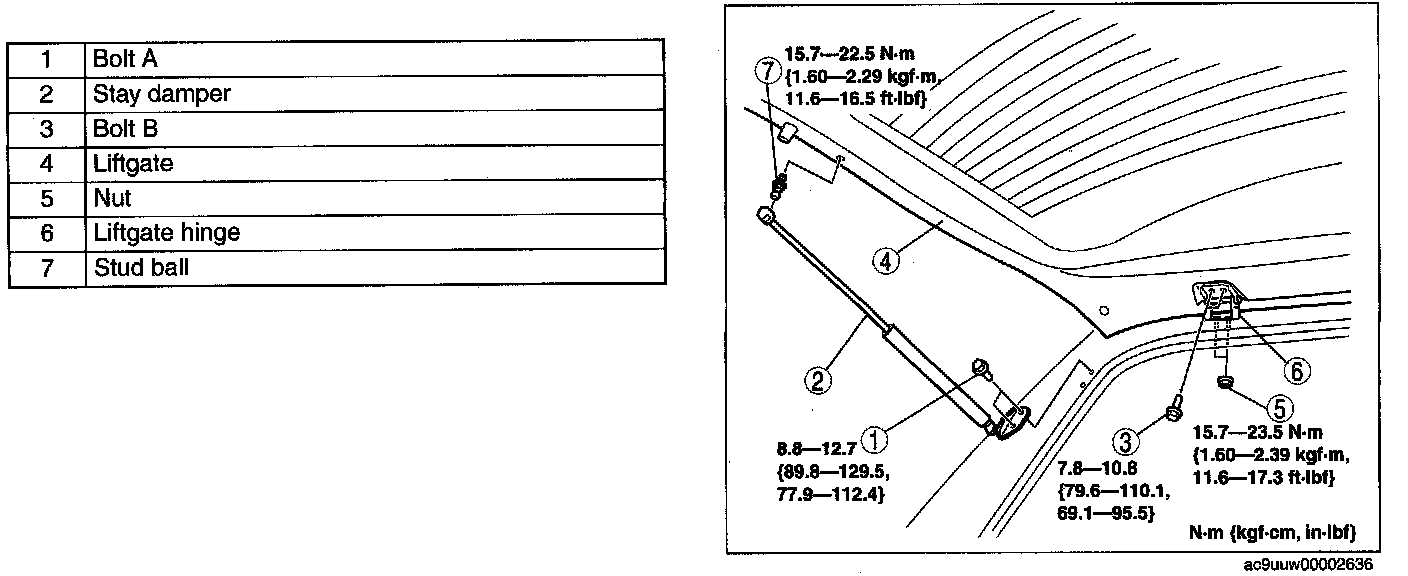
8. Remove in the order indicated in the figure.
9. If replacing with a new Liftgate, the old rear window glass may be reinstalled if it is reuseable. If not, install new rear window glass.
10. Install in the reverse order of removal.
11. Adjust the Liftgate.