 |
arnffw00000611
OIL PUMP REMOVAL/INSTALLATION [F2]
id011194800600
1. Disconnect the negative battery cable.
2. Drain the engine oil. (See ENGINE OIL REPLACEMENT [F2].)
3. Remove the under cover.
4. Remove the oil pan. (See OIL PAN REMOVAL/INSTALLATION [F2].)
5. Remove the timing belt. (See TIMING BELT REMOVAL/INSTALLATION [F2].)
6. Remove the timing belt pulley. (See FRONT OIL SEAL REPLACEMENT [F2].)
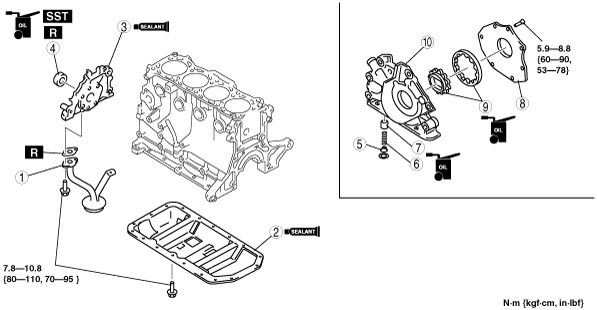
7. Remove in the order shown in the figure.
8. Install in the reverse order of removal.
9. Fill with the specified amount and type of engine oil. (See ENGINE OIL REPLACEMENT [F2].)
10. Start the engine and inspect for engine oil leakage.
arnffw00000611
|
|
1
|
Oil strainer
|
|
2
|
Baffle plate
|
|
3
|
Oil pump
(See Oil Pump Installation Note.)
|
|
4
|
Oil seal
(See Oil Seal Installation Note.)
|
|
5
|
Plug
|
|
6
|
Plunger spring
|
|
7
|
Control plunger
|
|
8
|
Oil pump cover
|
|
9
|
Inner and outer rotor
|
|
10
|
Oil pump body
|
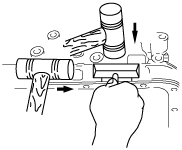
Baffle Plate Removal Note
1. Remove the baffle plate mounting bolts.
2. Use a separate tool to separate the baffle plate.
arnffw00000612
|
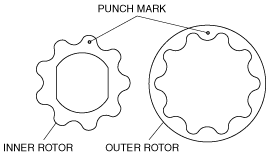
Inner and Outer Rotor Installation Note
1. Install the inner and outer rotor with the punch mark facing the oil pump cover.
arnffw00000613
|
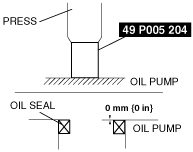
Oil Seal Installation Note
1. Apply clean engine oil to the oil seal.
2. Push the oil seal slightly in by hand.
3. Press the oil seal in evenly using the SST.
arnffw00000614
|
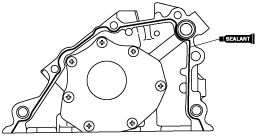
Oil Pump Installation Note
1. Apply silicone sealant to the oil pump as shown in the figure.
arnffw00000615
|
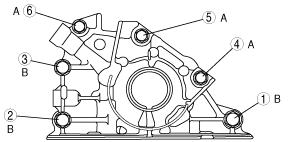
2. Tighten the oil pump bolts in the order shown.
arnffw00000616
|
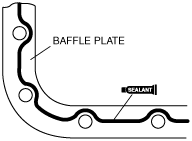
Baffle Plate Installation Note
1. Apply silicone sealant to the baffle plate along the inside of the bolt holes and overlap the ends.
bf2eze00000047
|
2. Install the baffle plate before the sealant hardens.