1. Component views
Exhaust manifold
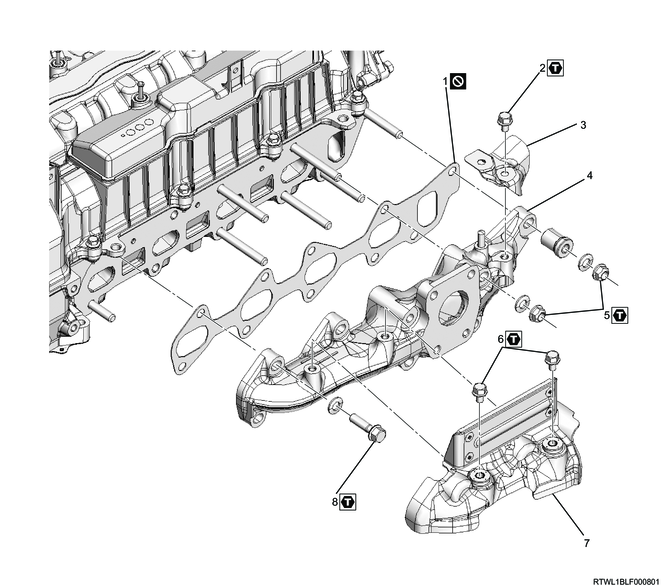
Part name
- Gasket
- Bolt
- Heat protector
- Exhaust manifold
- Nut
- Bolt
- Heat protector
- Bolt
Tightening torque
2: 25 N・m { 2.5 kgf・m / 18 lb・ft }
5-1: 30 N・m { 3.1 kgf・m / 22 lb・ft }
5-2: 52 N・m { 5.3 kgf・m / 38 lb・ft }
5-3: 52 N・m { 5.3 kgf・m / 38 lb・ft }
6: 25 N・m { 2.5 kgf・m / 18 lb・ft }
8-1: 30 N・m { 3.1 kgf・m / 22 lb・ft }
8-2: 52 N・m { 5.3 kgf・m / 38 lb・ft }
8-3: 52 N・m { 5.3 kgf・m / 38 lb・ft }
2. Exhaust manifold installation
1) Install the gasket to the cylinder head.
Note
- Face the protruding section of the gasket toward the engine front side.
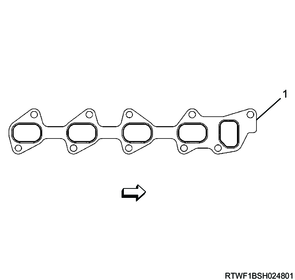
Legend
- Protrusion
Caution
- Do not reuse the gasket.
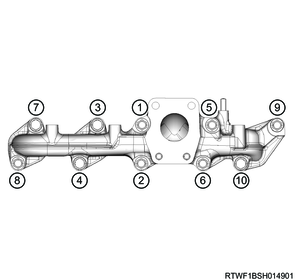
2) Referring to the diagram, temporarily tighten the exhaust manifold to the cylinder head.
Tightening torque: 30 N・m { 3.1 kgf・m / 22 lb・ft }
Washer installation direction
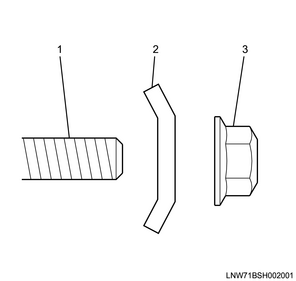
Legend
- Stud bolt
- Washer
- Nut
Spacer and washer installation direction
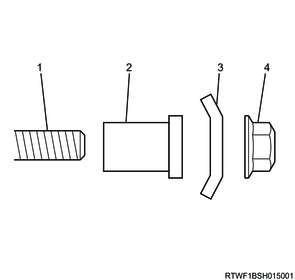
Legend
- Stud bolt
- Spacer
- Washer
- Nut
3) Securely tighten the exhaust manifold to the cylinder head.
Tightening torque: 52 N・m { 5.3 kgf・m / 38 lb・ft } 1st time
Tightening torque: 52 N・m { 5.3 kgf・m / 38 lb・ft } 2nd time
Note
- Retighten to the same torque to prevent variations in the tightening torque.
Caution
- Do not over-tighten since it will expand or contract due to the heat of the manifold.
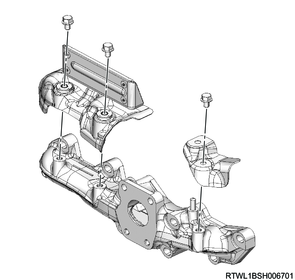
4) Install the heat protector to the exhaust manifold.
Tightening torque: 25 N・m { 2.5 kgf・m / 18 lb・ft }