 |
ac5wzw00011031
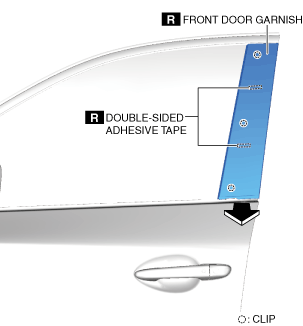
FRONT DOOR GARNISH REMOVAL/INSTALLATION
id091600446300
Replace parts
|
Front door garnish
Number of parts: 1
Used place: Front door garnish
|
Double-sided adhesive tape
Number of parts: 2
Used place: Rear door garnish
|
|
Removal
1. Remove the front beltline molding. (See FRONT BELTLINE MOLDING REMOVAL/INSTALLATION.)
2. Remove the double-sided adhesive tape in the position shown in the figure using a utility knife.
3. Pull the front door garnish in the direction of the arrow shown in the figure and remove it.
ac5wzw00011031
|
Installation
1. Remove any grease or dirt from the front door garnish installation surface of the front door.
2. Peel off the backing of the double-sided adhesive tape.
3. Install the front door garnish.
4. Install the front beltline molding. (See FRONT BELTLINE MOLDING REMOVAL/INSTALLATION.)