 |
ac5wzw00013848
REAR SPOILER REMOVAL/INSTALLATION
id091600801600
Replace parts
|
Double-sided adhesive tape
Number of parts: 2
Used place: Rear spoiler
|
1. Disconnect the negative battery terminal. (See NEGATIVE BATTERY TERMINAL DISCONNECTION/CONNECTION.)
2. Remove the liftgate upper trim. (See LIFTGATE UPPER TRIM REMOVAL/INSTALLATION.)
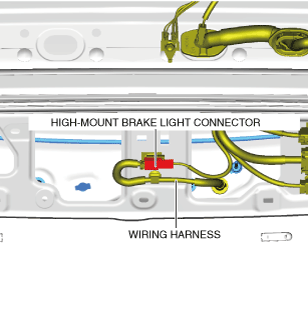
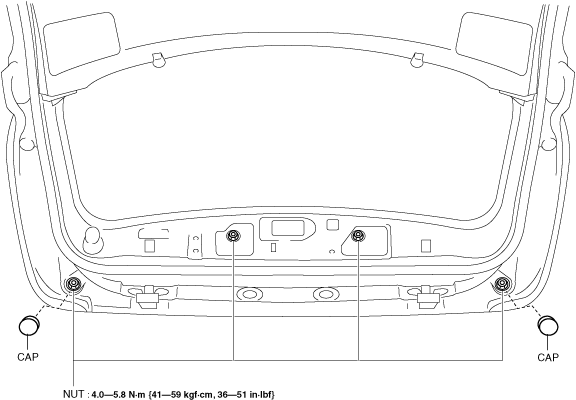
3. Remove caps.
ac5wzw00013848
|
4. Remove the nuts.
5. Disconnect the high-mount brake light connector.
ac5wzw00011052
|
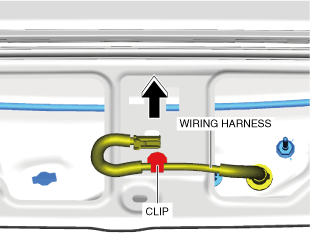
6. Move the wiring harness and remove it from the clip.
ac5wzw00011053
|
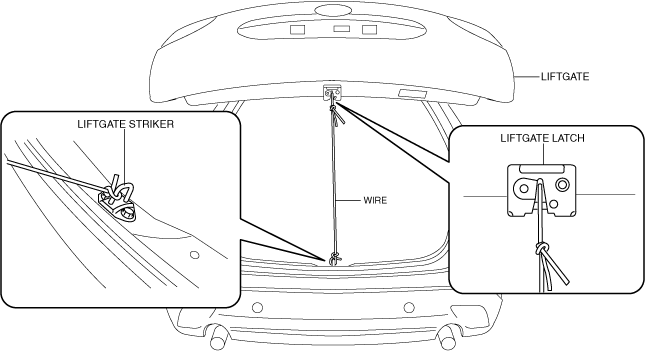
7. Attach a piece of wire between the liftgate striker and liftgate latch to hold the liftgate in the half-opened position as shown below.
ac5uuw00007266
|
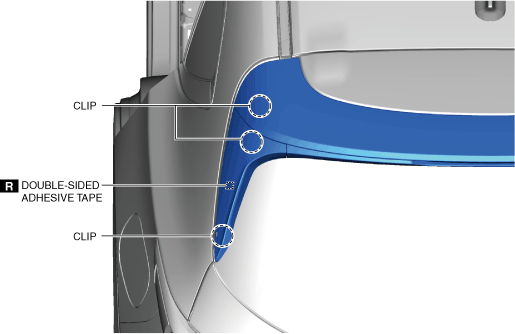
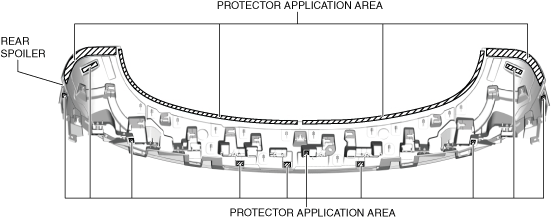
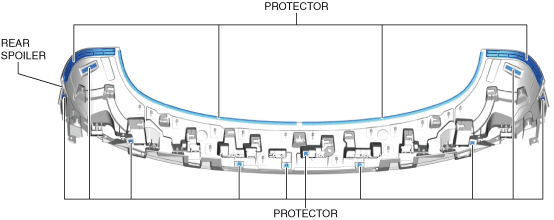
8. Remove the double-sided adhesive tape in the position shown in the figure using the utility knife.
ac5jjw00011010
|
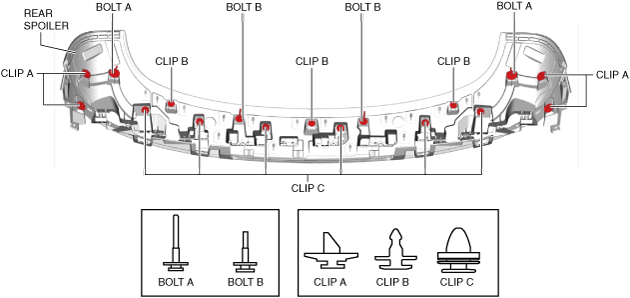
9. Disengage the clips using a remover tool.
10. Perform the same procedure from Steps 8 and 9 for the opposite side of the vehicle.
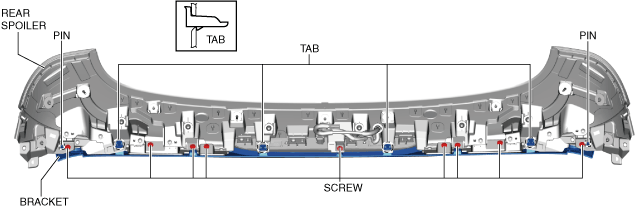
11. Pull the rear spoiler in the direction of the arrow shown in the figure and remove it while detaching clips.
ac5uuw00007267
|
12. Install in the reverse order of removal. (See Rear Spoiler Installation Note.)
Rear Spoiler Installation Note
1. When a rear spoiler is to be reused, affix new double-sided adhesive tape.
2. When replacing the rear spoiler, perform the following procedure:
ac5wzw00013849
|
ac5wzw00013850
|
ac5wzw00013851
|
ac5wzw00013852
|