 |
ac5wzw00011058
REAR SASH MOLDING REMOVAL
id091600805100
Replace parts
|
Rear sash molding
Number of parts: 1
Used place: Rear sash molding
|
1. Remove the rear beltline molding. (See REAR BELTLINE MOLDING REMOVAL/INSTALLATION.)
2. Remove the rear door garnish. (See REAR DOOR GARNISH REMOVAL/INSTALLATION.)
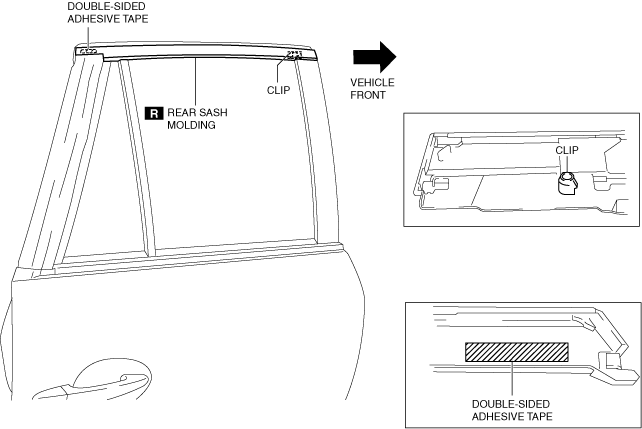
3. Remove the double-sided adhesive tape in the position shown in the figure using a utility knife.
ac5wzw00011058
|
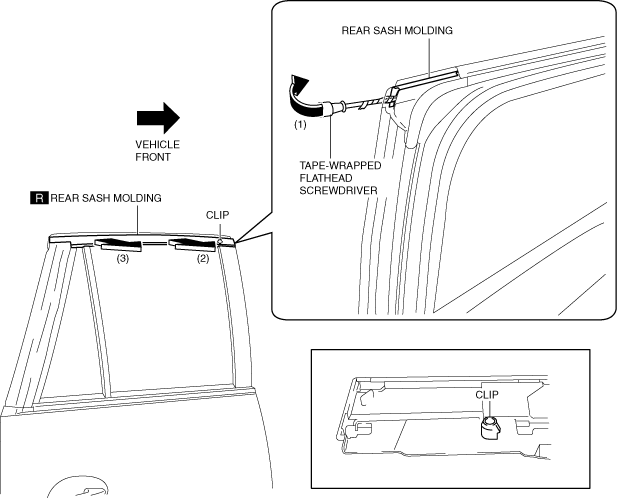
4. Insert a tape-wrapped flathead screwdriver into the position shown in the figure, move it in the direction of arrow (1) to detach the clip.
ac5wzw00011059
|
5. Pull the rear sash molding in the direction of the arrows in the order of (2), (3) shown in the figure and remove it.