 |
ac5uuw00007390
REAR SASH MOLDING INSTALLATION
id091600807100
Replace parts
|
Rear sash molding
Number of parts: 1
Used place: Rear sash molding
|
1. Remove any grease or dirt from the rear sash molding installation surface of the rear door.
ac5uuw00007390
|
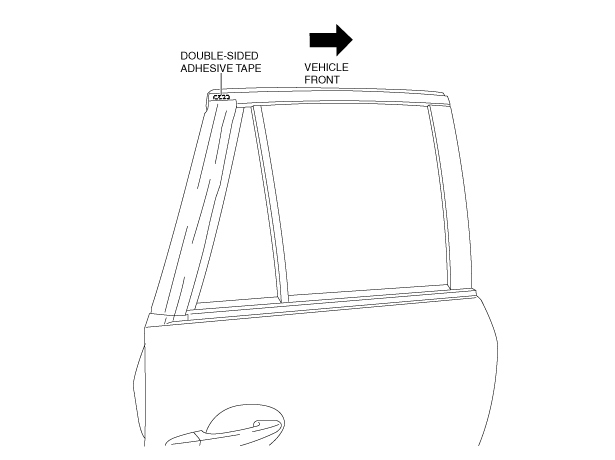
2. Peel off the backing of the double-sided adhesive tape.
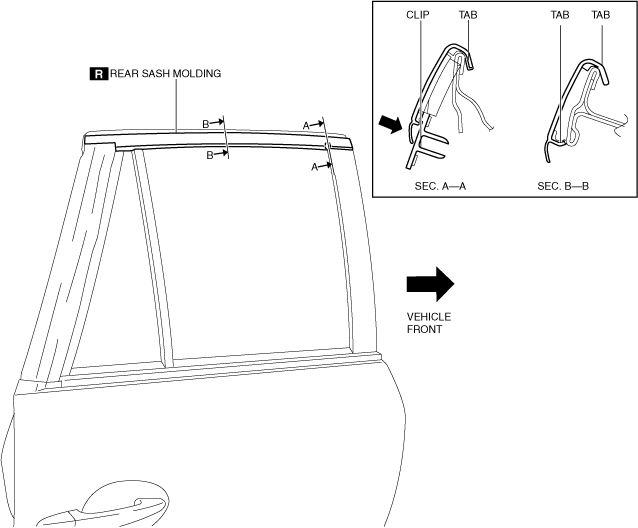
3. After aligning the clip to the rear sash molding installation hole, hook the rear sash molding tab to the rear door.
ac5uuw00007391
|
4. Press in the rear sash molding in the direction of the arrow shown in the figure and attach the clip to the rear door.
5. Press in the rear sash molding in the direction of the arrow shown in the figure from vehicle front and install the tab to the rear door.
6. Install the rear door garnish (See REAR DOOR GARNISH REMOVAL/INSTALLATION.)
7. Install the rear beltline molding (See REAR BELTLINE MOLDING REMOVAL/INSTALLATION.)