 |
ac5uuw00001904
REAR SEAT BACK REMOVAL/INSTALLATION
id091300912400
6:4 Split Type
1. Remove the trunk board. (See TRUNK BOARD REMOVAL/INSTALLATION.)
2. Press the push knob to fold the rear seat back.
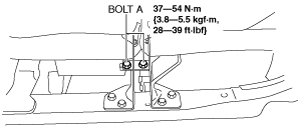
3. Remove bolts A.
ac5uuw00001904
|
4. Remove the plate in the direction of the arrow (1) shown in the figure.
ac5uuw00001905
|
5. Remove bolts B.
ac5uuw00001906
|
6. Remove bolts C.
ac5uuw00001907
|
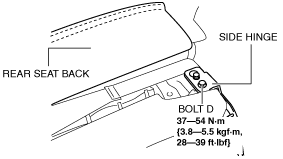
7. Remove bolt D
ac5uuw00001909
|
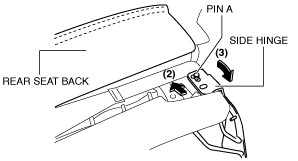
8. After moving the rear seat in the direction of the arrow (2) shown in the figure, remove pin A while moving the side hinge in the direction of the arrow (3).
ac5wzw00003127
|
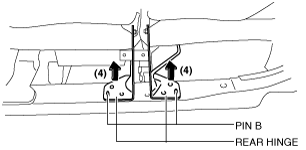
9. Move the rear hinge in the direction of the arrow (4) shown in the figure and set pin B aside.
ac5wzw00003128
|
10. Remove the rear seat back.
4:2:4 Split Type
1. Remove the trunk board. (See TRUNK BOARD REMOVAL/INSTALLATION.)
2. Remove the rear seat. (See REAR SEAT REMOVAL/INSTALLATION.)
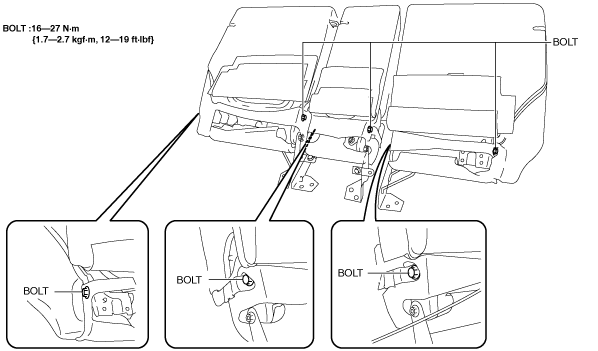
3. Remove bolts.
ac5wzw00003129
|
4. Remove the rear seat back.
5. Install in the reverse order of removal.