 |
ac5wzw00007495
TRUNK SIDE TRIM REMOVAL/INSTALLATION
id091700803100
With 6:4 Split-type Rear Seat
1. Disconnect the negative battery cable. (See NEGATIVE BATTERY CABLE DISCONNECTION/CONNECTION [SKYACTIV-G 2.0, SKYACTIV-G 2.5].) (See NEGATIVE BATTERY CABLE DISCONNECTION/CONNECTION [SKYACTIV-G 2.0, SKYACTIV-G 2.5 (WITHOUT i-stop)].) (See NEGATIVE BATTERY CABLE DISCONNECTION/CONNECTION [SKYACTIV-D 2.2].)
2. Remove the following parts:
3. Pull up the cover in the direction the of arrow shown in the figure.
ac5wzw00007495
|
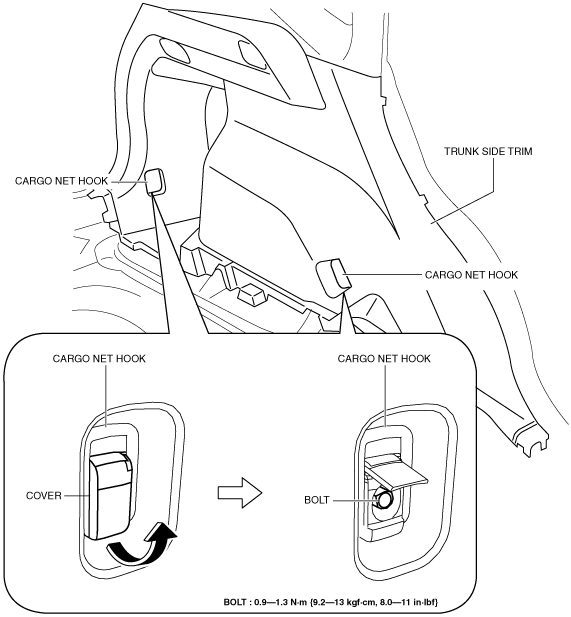
4. Remove the bolt, then remove the cargo net hooks.
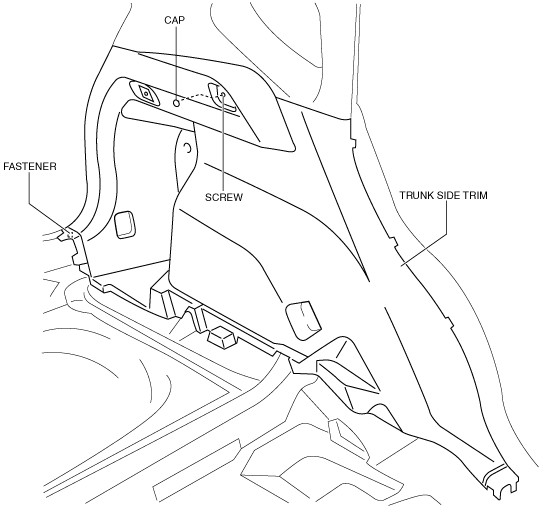
5. Remove the fastener.
ac5wzw00007496
|
6. Remove the cap, then remove the screw.
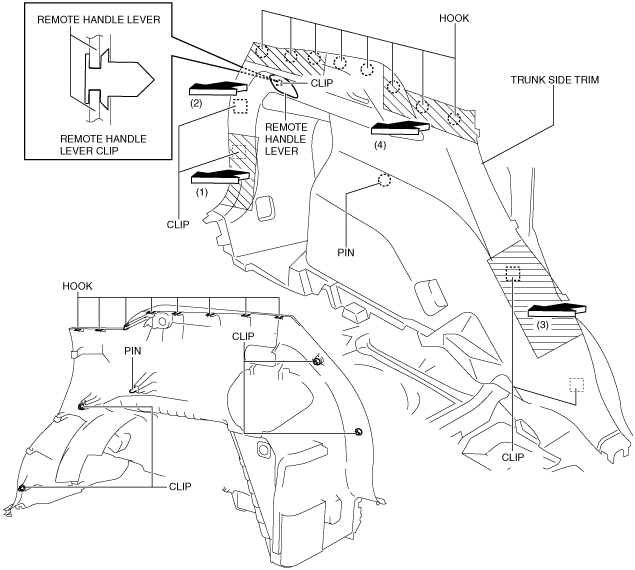
7. Hold D-pillar trim with your hands and pull the trunk side trim in the direction of the arrow (1), (2), (3), (4) and remove clips, hooks and pin.
ac5wzw00007497
|
8. Disconnect the connector.
9. Install in the reverse order of removal.
With 4:2:4 Split-type Rear Seat
1. Disconnect the negative battery cable. (See NEGATIVE BATTERY CABLE DISCONNECTION/CONNECTION [SKYACTIV-G 2.0, SKYACTIV-G 2.5].) (See NEGATIVE BATTERY CABLE DISCONNECTION/CONNECTION [SKYACTIV-G 2.0, SKYACTIV-G 2.5 (WITHOUT i-stop)].) (See NEGATIVE BATTERY CABLE DISCONNECTION/CONNECTION [SKYACTIV-D 2.2].)
2. Remove the following parts:
3. Pull up the cover in the direction the of arrow shown in the figure.
ac5wzw00007495
|
4. Remove the bolt, then remove the cargo net hooks.
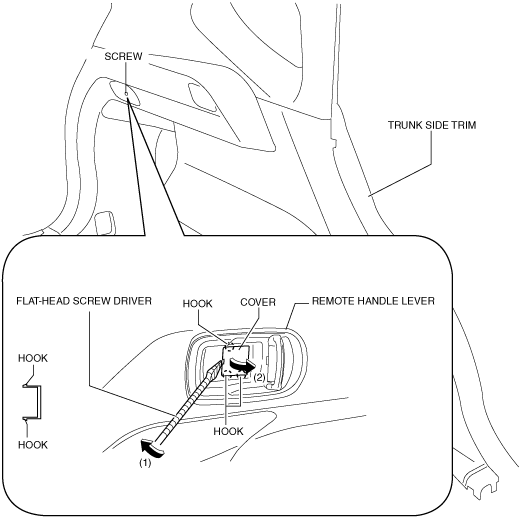
5. Move hooks in the direction of arrow (1) shown in the figure using a tape-lapped flathead screwdriver.
ac5wzw00007498
|
6. Remove the cover in the direction of arrow (2) shown in the figure.
7. Remove the screw.
8. Remove the fastener.
ac5wzw00007499
|
9. Remove the cap, then remove the screw.
10. Hold D-pillar trim with your hands and pull the trunk side trim in the direction of the arrow (1), (2), (3), (4) and remove clips, hooks, pin and clip.
ac5wzw00007500
|
11. Set the remote handle lever out of the way.
ac5wzw00002807
|
12. Disconnect the connector.
13. Install in the reverse order of removal.