|
ac8wzw00002297
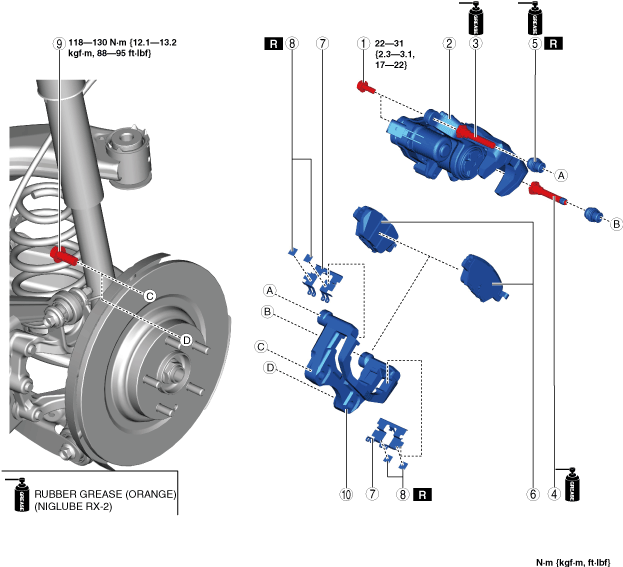
REAR BRAKE MOUNTING SUPPORT REMOVAL/INSTALLATION
id041100001300
Replacement Part
|
Dust boot
Quantity: 2
Location of use: Rear brake mounting support
|
Oil and Chemical Type
|
Rubber grease (Orange)
Type: NIGLUBE RX-2
|
1. Switch to the maintenance mode. (See MAINTENANCE MODE.)
2. Disconnect the negative battery terminal. (See NEGATIVE BATTERY TERMINAL DISCONNECTION/CONNECTION.)
3. Remove the wheel and tire. (See WHEEL AND TIRE REMOVAL/INSTALLATION.)
4. Disconnect the electric parking brake motor gear unit connector.
ac8wzw00002297
|
5. Remove in the order indicated in the table.
6. Install in the reverse order of removal.
7. End the maintenance mode. (See MAINTENANCE MODE.)
8. After installation, add brake fluid, bleed the air, and inspect for fluid leakage. (See BRAKE FLUID AIR BLEEDING.)
9. After installation, pump the brake pedal a few times and inspect the following:
ac8wzw00002298
|
|
1
|
Bolt
|
|
2
|
Rear brake caliper, Electric parking brake motor gear unit
|
|
3
|
Slide pin (main)
|
|
4
|
Slide pin (sub)
|
|
5
|
Dust boot
|
|
6
|
Disc pad component
|
|
7
|
Guide plate
|
|
8
|
Tape
|
|
9
|
Bolt
|
|
10
|
Mounting support
|
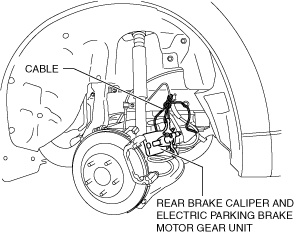
Rear Brake Caliper, Electric Parking brake motor gear unit Removal Note
1. Remove the rear brake caliper and electric parking brake motor gear unit as a single unit, and suspend them in a place out of the way using a cable.
ac5jjw00011374
|