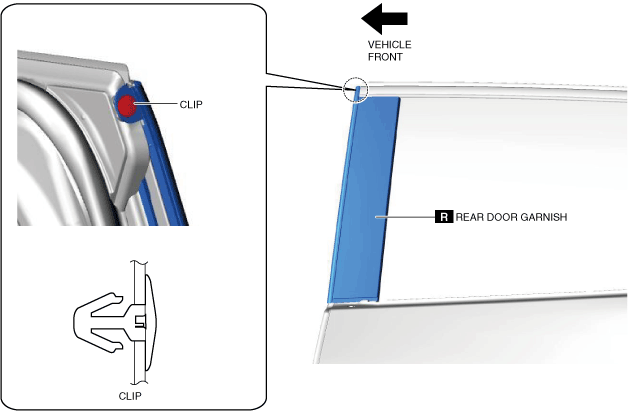
 |
REAR DOOR GARNISH REMOVAL/INSTALLATION
id091600445700
Front Side
Removal
Replacement part
|
Rear door garnish
Quantity: 1
Location of use: Rear door garnish
|
Double-sided adhesive tape
Quantity: 3
Location of use: Rear door garnish
|
1. Remove the rear beltline molding. (See REAR BELTLINE MOLDING REMOVAL/INSTALLATION.)
2. Remove the clip.
ac8wzw00000753
|
3. Peel off the double-sided adhesive tape using a utility knife.
ac8wzw00000754
|
4. Pull the rear door garnish in the direction of the arrow shown in the figure, detach the clips, and remove the rear door garnish.
Installation
1. Remove any grease or dirt from the installation area of the rear door garnish.
2. Peel off the tape backing from the double-sided adhesive tape from the rear door garnish, and install the rear door garnish.
3. Press the double-sided adhesive tape area of the rear door garnish.
4. Install the rear beltline molding. (See REAR BELTLINE MOLDING REMOVAL/INSTALLATION.)
Rear Side
Removal
Replacement part
|
Rear door garnish
Quantity: 1
Location of use: Rear door garnish
|
Double-sided adhesive tape
Quantity: 2
Location of use: Rear door garnish
|
1. Remove the rear beltline molding. (See REAR BELTLINE MOLDING REMOVAL/INSTALLATION.)
2. Peel off the double-sided adhesive tape using a utility knife.
ac8wzw00000755
|
3. Pull the rear door garnish in the direction of the arrow shown in the figure, detach the clips, and remove the rear door garnish.
Installation
1. Remove any grease or dirt from the installation area of the rear door garnish.
2. Peel off the tape backing from the double-sided adhesive tape from the rear door garnish, and install the rear door garnish.
3. Press the double-sided adhesive tape area of the rear door garnish.
4. Install the rear beltline molding. (See REAR BELTLINE MOLDING REMOVAL/INSTALLATION.)