 |
ac8wzw00003497
BEEP SOUND ADJUSTMENT
id092200024100
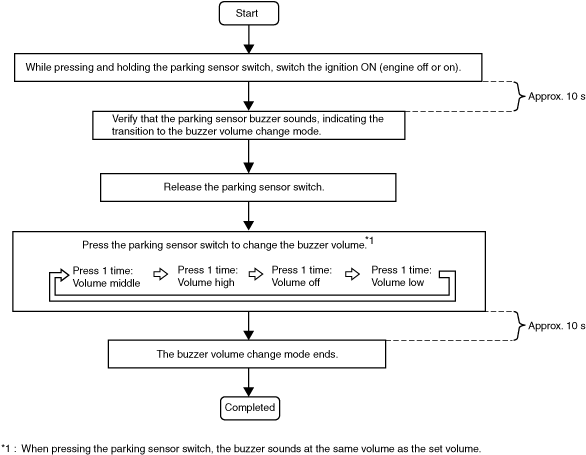
With Parking Sensor Switch
Front parking sensor buzzer (With front ultrasonic sensor)
ac8wzw00003497
|
Rear parking sensor buzzer
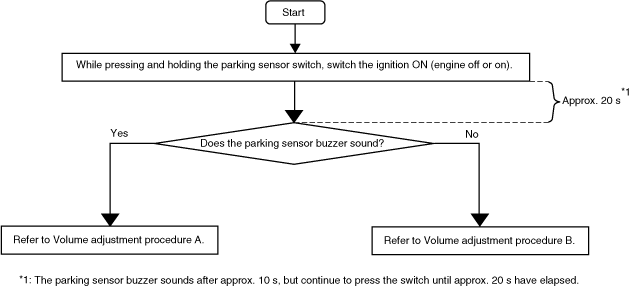
1. Perform the following procedure to determine the correct adjustment procedure.
ac8wzw00003498
|
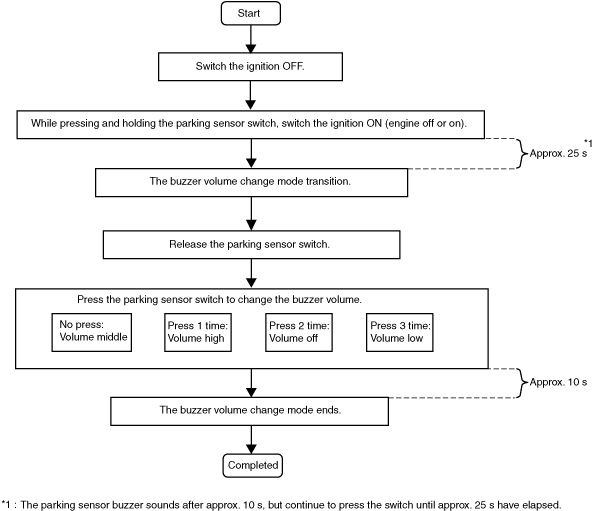
Volume adjustment procedure A
ac8wzw00003499
|
Volume adjustment procedure B
ac8wzw00003500
|
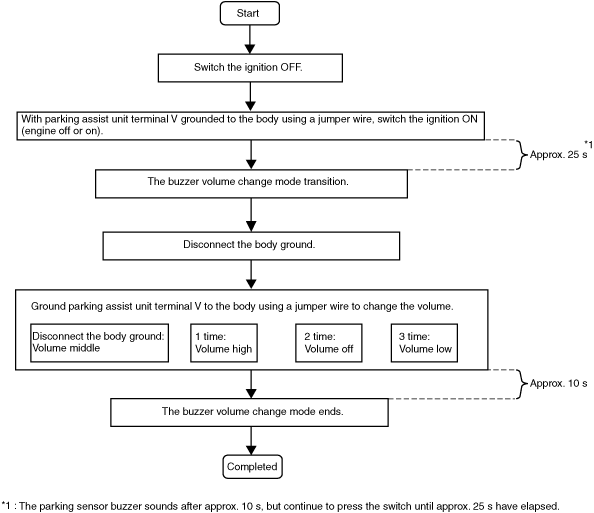
Without Parking Sensor Switch
Front parking sensor buzzer
1. Disconnect the negative battery cable. (See NEGATIVE BATTERY TERMINAL DISCONNECTION/CONNECTION.)
2. Remove the glove compartment. (See GLOVE COMPARTMENT REMOVAL/INSTALLATION.)
3. Connect the negative battery cable. (See NEGATIVE BATTERY TERMINAL DISCONNECTION/CONNECTION.)
4. Ground parking assist unit terminal V to the body using a jumper wire.
ac8wzw00003501
|
5. Switch the ignition ON.
6. Verify that the parking sensor buzzer sounds once.
7. Disconnect the body ground.
8. Ground parking assist unit terminal V to the body for approx. 0.5 s using a jumper wire to change the parking sensor buzzer volume.
ac8wzw00003502
|
9. Disconnect the body ground and wait for approx. 10 s.
Rear parking sensor buzzer
1. Disconnect the negative battery cable. (See NEGATIVE BATTERY TERMINAL DISCONNECTION/CONNECTION.)
2. Remove the glove compartment. (See GLOVE COMPARTMENT REMOVAL/INSTALLATION.)
3. Connect the negative battery cable. (See NEGATIVE BATTERY TERMINAL DISCONNECTION/CONNECTION.)
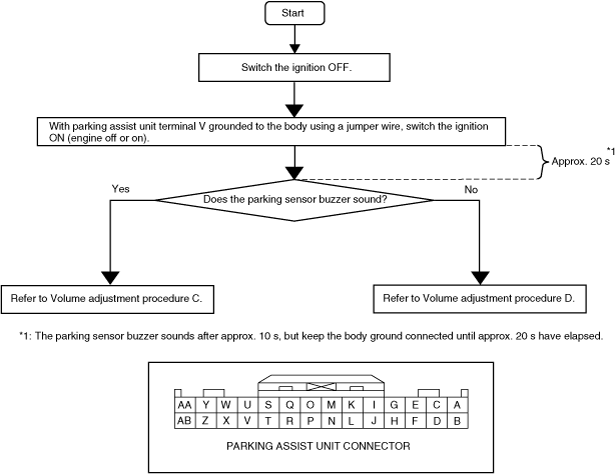
4. Perform the following procedure to determine the correct adjustment procedure.
ac8wzw00003503
|
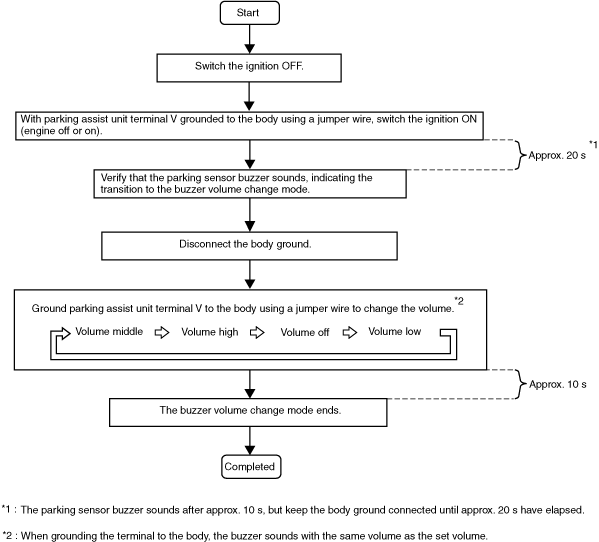
Volume adjustment procedure C
ac8wzw00003504
|
Volume adjustment procedure D
ac8wzw00003505
|