 |
ac8wzw00004722
REAR ULTRASONIC SENSOR SHORT-CORD REMOVAL/INSTALLATION
id092200031100
Replacement part
|
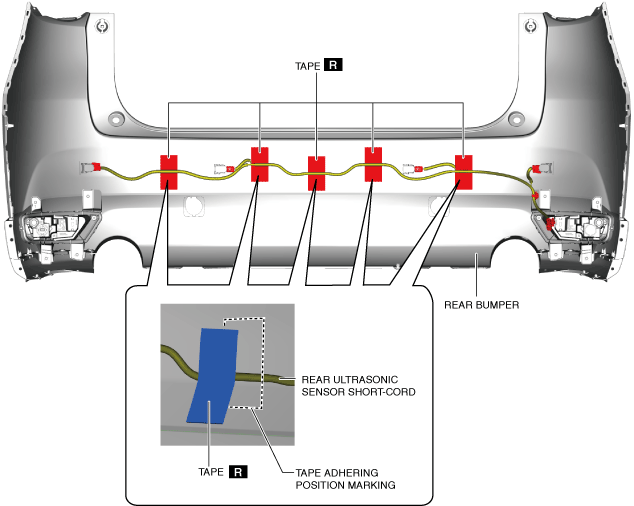
Tape
Quantity: 5
Location of use: Rear ultrasonic sensor short-cord
|
1. Disconnect the negative battery terminal. (See NEGATIVE BATTERY TERMINAL DISCONNECTION/CONNECTION.)
2. Remove the rear combination light. (See REAR COMBINATION LIGHT REMOVAL/INSTALLATION.)
3. Remove the rear splash shield. (See SPLASH SHIELD REMOVAL/INSTALLATION.)
4. Remove the rear bumper. (See REAR BUMPER REMOVAL/INSTALLATION.)
5. Peel off the tape from the rear bumper.
ac8wzw00004722
|
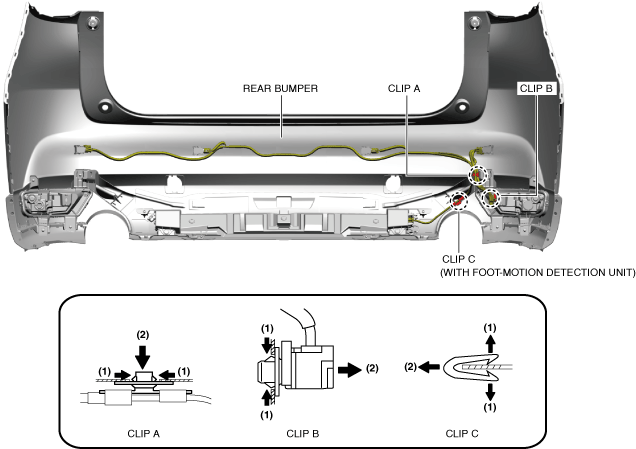
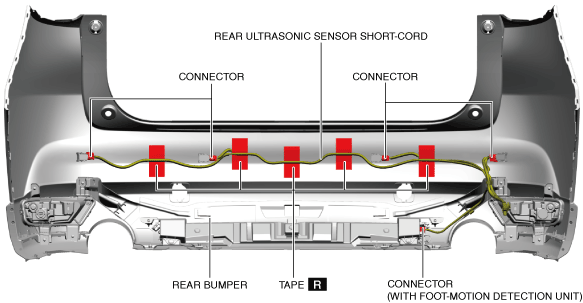
6. Disconnect the connectors.
7. While pressing the tabs of clips A and B in the direction of arrows (1) shown in the figure, press clips A and B in the direction of arrows (2) and detach the tabs of clips A and B from the rear bumper.
ac8wzw00004723
|
8. While spreading the tabs of clip C in the direction of arrows (1) shown in the figure, pull clip C in the direction of arrow (2) and detach the tabs of clip C from the rear bumper. (With foot-motion detection unit)
9. Remove the rear ultrasonic sensor short-cord.
10. Install in the reverse order of removal. (See Rear Ultrasonic Sensor Short-cord Installation Note.)
Rear Ultrasonic Sensor Short-cord Installation Note
ac8wzw00000576
|