 |
ac30zw00001374
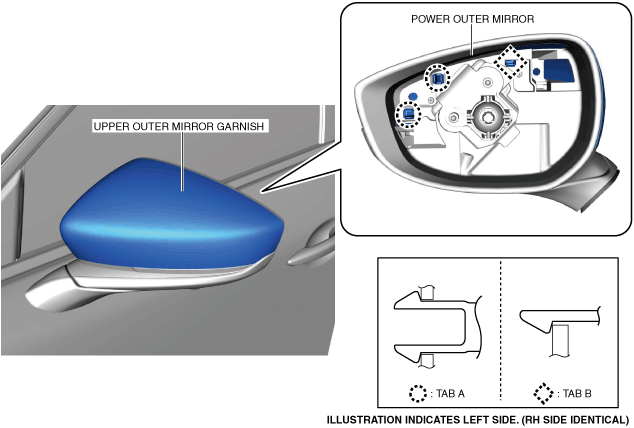
OUTER MIRROR GARNISH REMOVAL/INSTALLATION
id091200702000
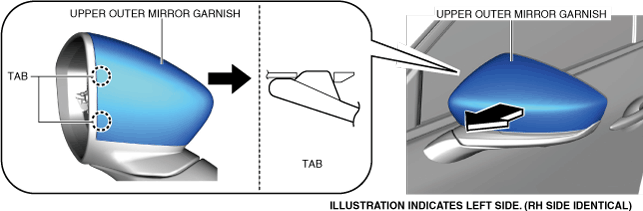
Upper Outer Mirror Garnish
1. Disconnect the negative lead-acid battery terminal. (See NEGATIVE LEAD-ACID BATTERY TERMINAL DISCONNECTION/CONNECTION.)
2. Remove the outer mirror glass. (See OUTER MIRROR GLASS REMOVAL.) (See OUTER MIRROR GLASS INSTALLATION.)
3. Using the remover tool, detach tabs A and B.
ac30zw00001374
|
4. Move the upper outer mirror garnish in the direction of the arrow shown in the figure and remove the upper outer mirror garnish while removing the tabs.
ac30zw00001375
|
5. Install in the reverse order of removal.
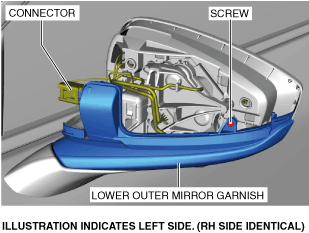
Lower Outer Mirror Garnish
1. Disconnect the negative lead-acid battery terminal. (See NEGATIVE LEAD-ACID BATTERY TERMINAL DISCONNECTION/CONNECTION.)
2. Remove the outer mirror glass. (See OUTER MIRROR GLASS REMOVAL.) (See OUTER MIRROR GLASS INSTALLATION.)
3. Remove the upper outer mirror garnish. (See Upper Outer Mirror Garnish.)
4. Disconnect the connectors.
ac30zw00001376
|
5. Remove the screw.
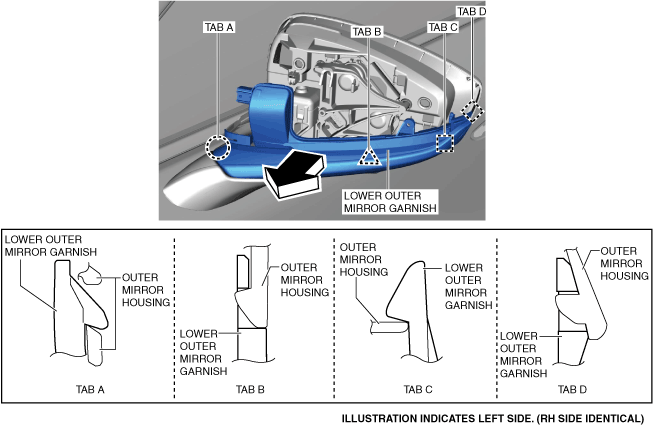
6. While pulling the lower outer mirror garnish in the direction of the arrow shown in the figure, use a tape-wrapped flathead screwdriver to detach it in the order of tab A, tab B, tab C, and tab D.
a30zzw00000601
|
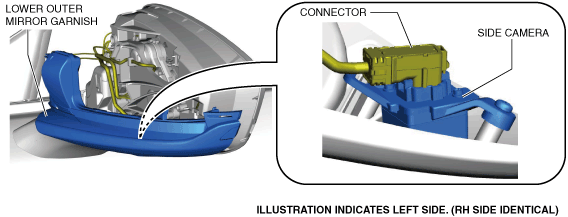
7. Disconnect the connectors. (With 360° view monitor system)
a30zzw00000602
|
8. Remove the lower outer mirror garnish.
9. Install in the reverse order of removal.
10. Perform the 360° view monitor system aiming. (With 360° view monitor system) (See 360°VIEW MONITOR SYSTEM AIMING.)