 |
a30zzw00005225
PARKING LOCK ACTUATOR REMOVAL/INSTALLATION [ET6A-EL, ET6AX-EL]
id0517n3130000
1. Disconnect the negative battery terminal. (See NEGATIVE BATTERY TERMINAL DISCONNECTION/CONNECTION.)
2. Remove the following parts as a single unit. (See INTAKE-AIR SYSTEM REMOVAL/INSTALLATION [SKYACTIV-G 2.0].)
3. Remove the battery. (See BATTERY REMOVAL/INSTALLATION [SKYACTIV-G 2.0].)
4. Remove the battery tray and PCM component as a single unit. (See BATTERY REMOVAL/INSTALLATION [SKYACTIV-G 2.0].)
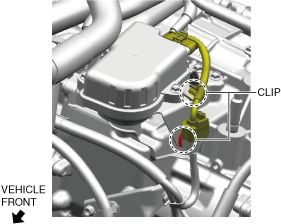
5. Disconnect the clip shown in the figure.
a30zzw00005225
|
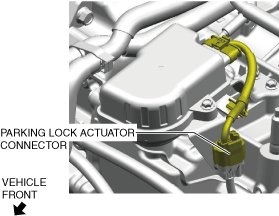
6. Disconnect the parking lock actuator connector.
a30zzw00005226
|
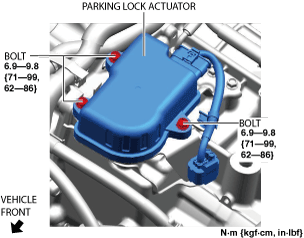
7. Remove the parking lock actuator.
a30zzw00005227
|
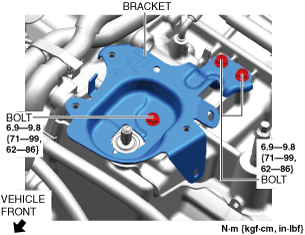
8. Remove the bracket.
a30zzw00005228
|
9. Install in the reverse order of removal.
10. Perform the “Parking Lock Actuator Initialization Procedure ”. (See PARKING LOCK ACTUATOR INITIALIZATION PROCEDURE [ET6A-EL, ET6AX-EL].)