 |
amxzzw00000571
KEYLESS CONTROL MODULE REMOVAL/INSTALLATION
id091400438400
L.H.D.
1. Disconnect the negative battery cable. (See BATTERY REMOVAL/INSTALLATION [L8, LF].)
2. Remove the side panel. (See SIDE PANEL REMOVAL/INSTALLATION.)
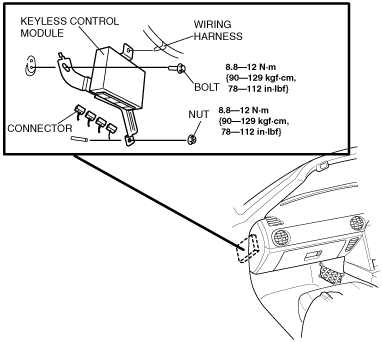
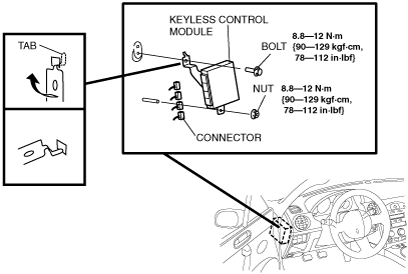
3. Remove the bolt and nut.
amxzzw00000571
|
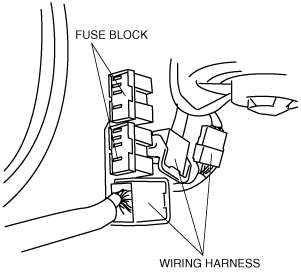
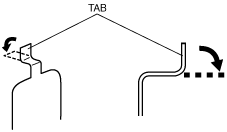
4. While inclining the keyless control module along the body panel in the direction indicated by the arrow, disengage the bracket tab from the hole in the body panel.
5. Disconnect the keyless control module connector.
6. Remove the keyless control module.
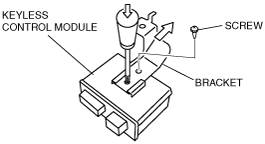
7. Remove the screw, then remove the bracket.
e6u914zw1006
|
8. Install in the reverse order of removal.
R.H.D.
amxzzw00000572
|
1. Disconnect the negative battery cable. (See BATTERY REMOVAL/INSTALLATION [L8, LF].)
2. Remove the keyless control module installation bolt and nut.
amxzzw00000573
|
3. Remove the side panel. (See SIDE PANEL REMOVAL/INSTALLATION.)
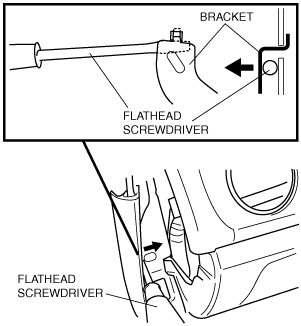
4. Insert a flathead screwdriver between the bracket and the body from the installation hole of the side cover and move it in the direction shown by the arrow to remove the keyless control module.
amxzzw00000574
|
amxzzw00000575
|
5. Remove the keyless control module.
6. Remove the screw, then remove the bracket.
e6u914zw1006
|
7. Install in the reverse order of removal.