 |
amxzzw00003813
AIR MIX ACTUATOR REMOVAL/INSTALLATION [MANUAL AIR CONDITIONER]
id0740a2802400
L.H.D.
1. Disconnect the negative battery terminal. (See NEGATIVE BATTERY TERMINAL DISCONNECTION/CONNECTION.)
2. Remove the following parts:
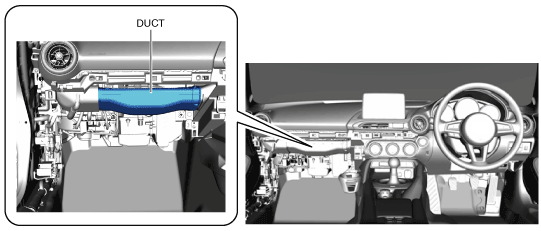
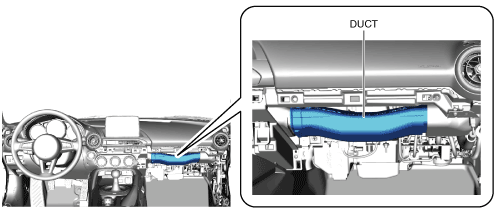
3. Remove the duct.
amxzzw00003813
|
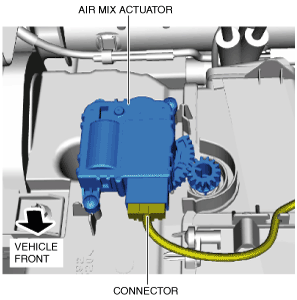
4. Disconnect the connector.
amxuuw00003920
|
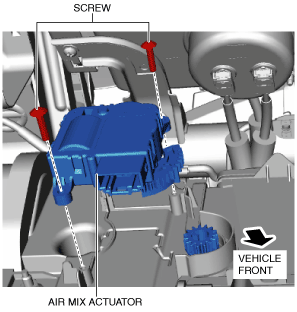
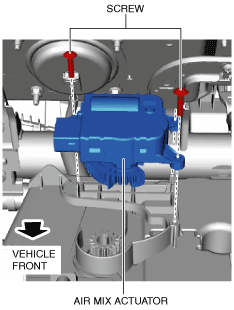
5. Remove the screws.
amxuuw00003921
|
6. Remove the air mix actuator.
7. Install in the reverse order of removal.
R.H.D.
1. Disconnect the negative battery terminal. (See NEGATIVE BATTERY TERMINAL DISCONNECTION/CONNECTION.)
2. Remove the following parts:
3. Remove the duct.
amxzzw00003097
|
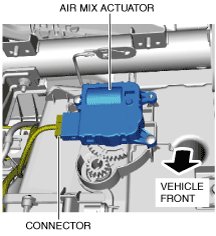
4. Disconnect the connector.
amxzzw00003098
|
5. Remove the screws.
amxzzw00003099
|
6. Remove the air mix actuator.
7. Install in the reverse order of removal.