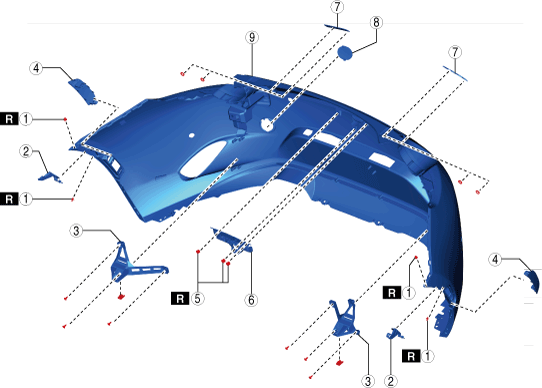
REAR BUMPER DISASSEMBLY/ASSEMBLY


id091000800800

1.  Remove the following parts:

(1)  Back-up light (See BACK-UP LIGHT BULB REMOVAL/INSTALLATION.)
(2)  Rear fog light (with rear fog light) (See REAR FOG LIGHT REMOVAL/INSTALLATION.)
(3)  License plate light (See LICENSE PLATE LIGHT REMOVAL/INSTALLATION.)
(4)  Trunk lid opener switch (See TRUNK LID OPENER SWITCH REMOVAL/INSTALLATION.)
(5)  Ultrasonic sensor (with parking sensor system) (See ULTRASONIC SENSOR REMOVAL/INSTALLATION.)
(6)  Rear mount camera (with rear mount camera) (See REAR MOUNT CAMERA REMOVAL/INSTALLATION.)
(7)  License plate light short-cord (See LICENSE PLATE LIGHT SHORT-CORD REMOVAL/INSTALLATION.)

2.  Disassemble in the order shown in the figure.

amxzzw00005347

1
Rivet A
2
Bracket A
3
Rear bumper retainer No.2
4
Cap
5
Rivet B (with rear mount camera)
6
Bracket B (with rear mount camera)
7
Ornament
8
Towing hook cover
9
Rear bumper face

3.  Assemble in the reverse order of disassembly.
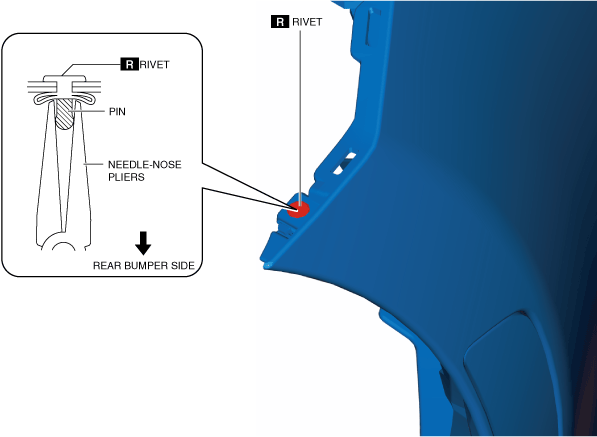
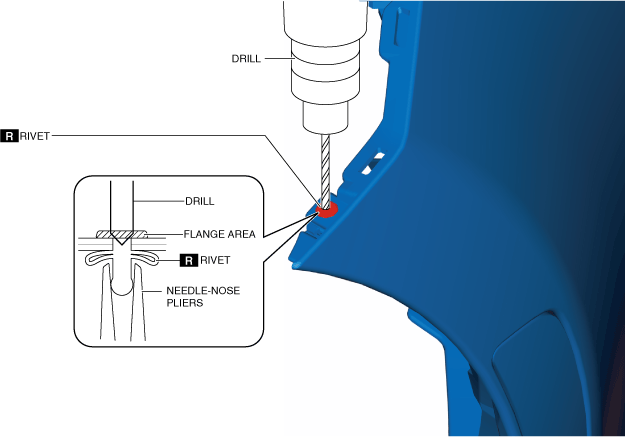

Rivet Removal Note

1.  Remove the rivet using the following procedure.

(1)  Pinch the rivet pin from the rear bumper side using needle-nose pliers and secure them.
amxzzw00005348
(2)  Set the following diameter drill to the drill.
Drill bit diameter
Rivet A : 4.3 mm {0.17 in}
Rivet B : 4.9 mm {0.19 in}
Caution
•  Always use a drill bit of the specified diameter when removing the rivet. If an inappropriate diameter drill bit is used, the rear bumper face and the bracket may be damaged.
(3)  Gouge off the rivet flange using a drill and remove the rivet.
amxzzw00005349
(4)  Remove any rivet shavings from the rear bumper face.