 |
amxzzw00005734
SUNVISOR REMOVAL/INSTALLATION
id091700605500
Upholstered-type
Light-weight type
Removal
1. Operate the retractable hardtop switch to open the front roof. (With retractable hardtop)
2. Open the convertible top. (With convertible top)
3. Disconnect the negative battery terminal. (See NEGATIVE BATTERY TERMINAL DISCONNECTION/CONNECTION.)
4. Remove the following parts.
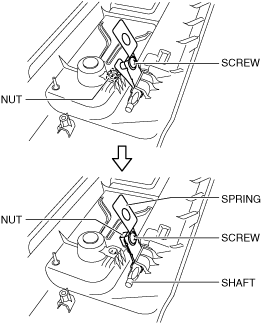
5. Remove the screw.
amxzzw00005734
|
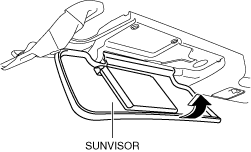
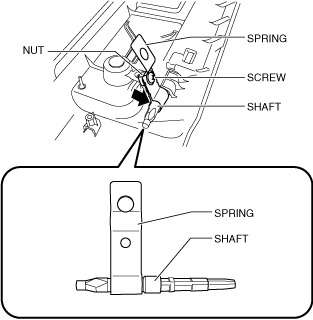
6. Open the sunvisor in the direction of the arrow shown in the figure.
amxzzw00005735
|
7. Remove the nut shown in the figure.
8. Install the screw and nut to the spring.
amxzzw00005736
|
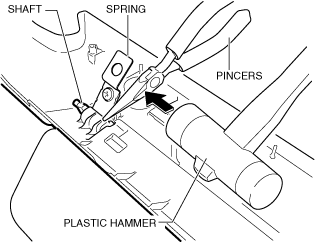
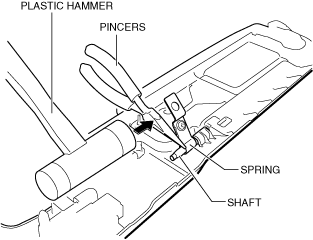
9. Align pincers with the side surface of the spring, lightly tap it using a plastic hammer, and remove the shaft and spring as a single unit.
amxzzw00005737
|
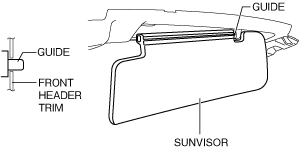
10. Pull out the guide and remove the sunvisor from the front header trim.
amxzzw00005743
|
Installation
1. Insert the guide and install the sunvisor to the front header trim.
amxzzw00005743
|
2. Close the sunvisor in the direction of the arrow shown in the figure.
amxzzw00005739
|
3. Set the flat surface of the arrow part shown in the figure for the shaft downward.
amxzzw00005740
|
4. Set the spring to the position shown in the figure.
5. If a new sunvisor is installed, install the screw and nut to the spring.
6. Lightly tap the pincers aligned with the edge of the spring using a plastic hammer until the shaft contacts the end of the installation hole, and install the shaft.
amxzzw00005741
|
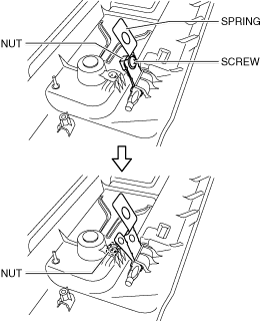
7. Remove the screw and nut from the spring.
8. Install the nut to the position shown in the figure.
amxzzw00005742
|
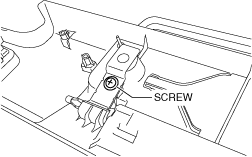
9. Install the screw.
amxzzw00005734
|
10. Install the following parts.
11. Connect the negative battery terminal. (See NEGATIVE BATTERY TERMINAL DISCONNECTION/CONNECTION.)