 |
amxzzw00005570
CONVERTIBLE TOP DISASSEMBLY/ASSEMBLY
id091600207705
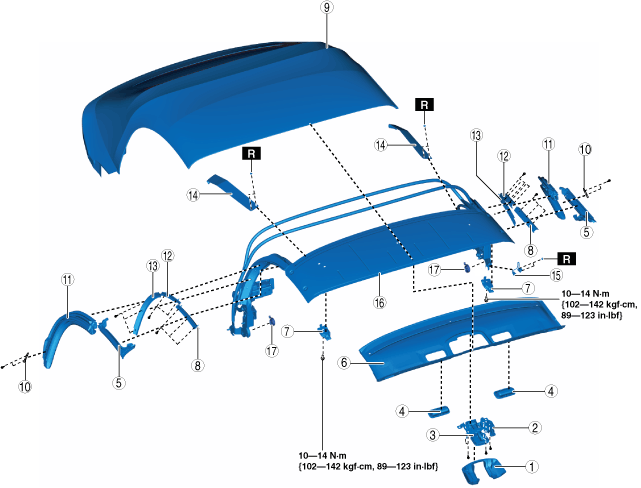
1. Disassemble in the order indicated in the table.
amxzzw00005570
|
|
1
|
Top lock cover
|
|
2
|
Top lock center
|
|
3
|
Top lock
|
|
4
|
Top handle
|
|
5
|
Link weatherstrip No.1
|
|
6
|
Header cover
|
|
7
|
Male wedge
|
|
8
|
Retainer No.1
(See Retainer Removal Note.)
(See Retainer Installation Note.)
|
|
9
|
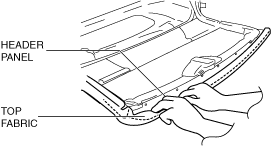
Top fabric
(See Top Fabric Removal Note.)
(See Top Fabric Installation Note.)
|
|
10
|
Slider
|
|
11
|
Link weatherstrip No.2
|
|
12
|
Retainer No.2
(See Retainer Removal Note.)
(See Retainer Installation Note.)
|
|
13
|
Retainer No.3
(See Retainer Removal Note.)
(See Retainer Installation Note.)
|
|
14
|
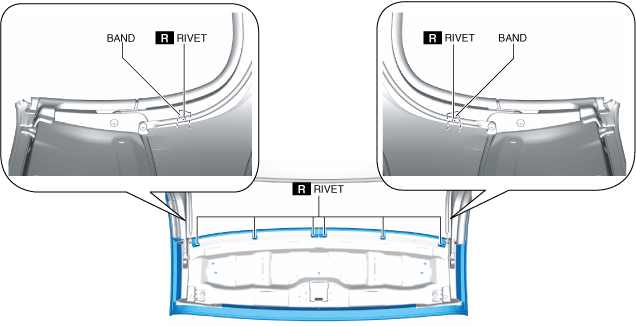
Tension band
|
|
15
|
Convertible top switch
|
|
16
|
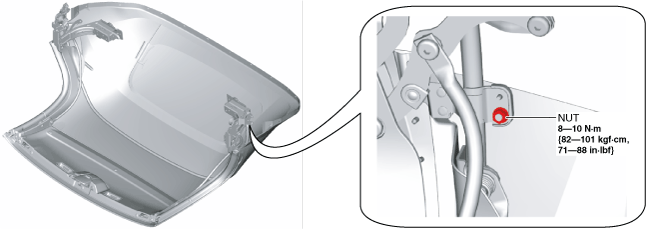
Roof panel
|
|
17
|
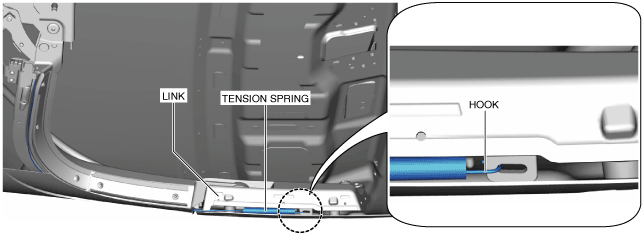
Roof link spring
|
2. Assemble in the reverse order of disassembly.
Retainer Removal Note
1. Mark around the retainer installation screws with paint before removing them.
Top Fabric Removal Note
1. When removing the top fabric, perform the following procedure.
amxzzw00004665
|
amxzzw00005571
|
amxuuw00005027
|
amxzzw00005572
|
amxzzw00005573
|
amxzzw00004668
|
Retainer Installation Note
1. Install the retainers to the link, aligning the retainer marks with the retainer installation screws.
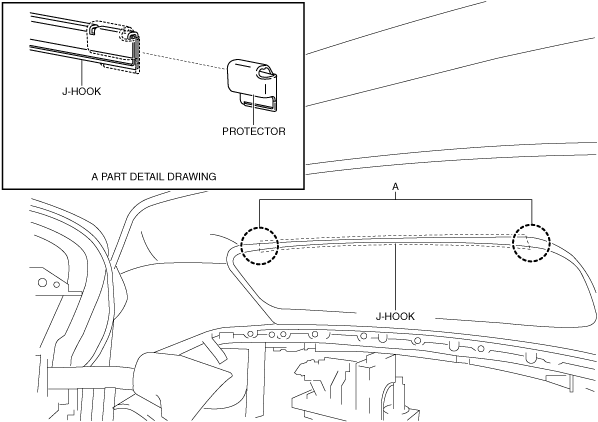
Top Fabric Installation Note
1. After replacing the top fabric, install the protectors to the J-hook. (with inner fabric)
amxzzw00005574
|
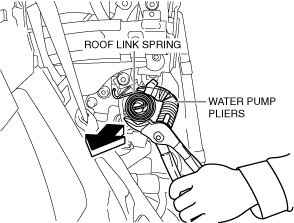
Roof Link Spring Removal/Installation note
1. Remove the following parts:
2. Close the convertible top.
3. Remove the roof link spring in the direction of the arrow shown in the figure using the water pump pliers.
amxzzw00005337
|
4. Install in the reverse order of removal.