 |
amxzzw00002674
ACTIVE BONNET SENSOR REMOVAL/INSTALLATION
id081300000700
1. Switch the ignition to LOCK.
2. Remove the battery cover.
3. Disconnect the negative battery cable and wait for 1 min or more. (See BATTERY REMOVAL/INSTALLATION [L8, LF].)
4. Remove the front bumper. (See FRONT BUMPER REMOVAL/INSTALLATION.)
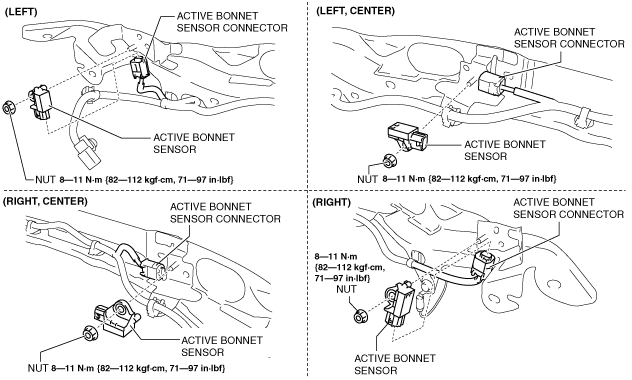
5. Remove the nuts.
amxzzw00002674
|
6. Disconnect the active bonnet sensor connectors. (See Connector Disconnection Note.)
7. Remove the active bonnet sensors.
8. Install in the reverse order of removal.
9. Switch the ignition ON.
10. Verify that the active bonnet warning light is illuminated for approx. 6 s and then remains turned off.
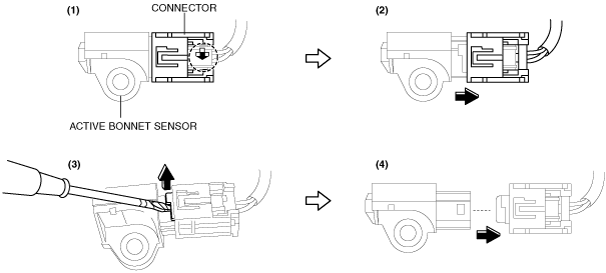
Connector Disconnection Note
1. Press the area (1) indicated by the arrow and slide it as shown in the figure (2).
amxzzw00002675
|
2. Lift up the location shown in the figure using a tape-wrapped flathead screwdriver (3) and disconnect the connector (4).