FRONT BUMPER REINFORCEMENT REMOVAL/INSTALLATION
id091000800600
1. Disconnect the negative battery cable. (See NEGATIVE BATTERY CABLE DISCONNECTION/CONNECTION.)
2. Remove the following parts:
- (1) Front bumper (See FRONT BUMPER REMOVAL.) (See FRONT BUMPER INSTALLATION.)
- (2) Front combination light (See FRONT COMBINATION LIGHT REMOVAL/INSTALLATION.)
- (3) Energy-absorbing form (with energy-absorbing form) (See ENERGY-ABSORBING FORM REMOVAL/INSTALLATION.)
- (4) Front under cover No.1 (See FRONT UNDER COVER No.1 REMOVAL/INSTALLATION.)
- (5) Bumper stiffener lower (See BUMPER STIFFENER LOWER REMOVAL/INSTALLATION.)
- (6) Seal plate (See SEAL PLATE REMOVAL/INSTALLATION.)
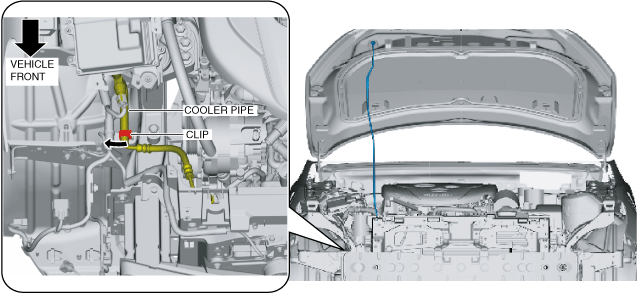
3. Detach the clip and set the cooler pipe aside in the direction of the arrow shown in the figure. (SKYACTIV-G 1.3, SKYACTIV-G 1.5)
-
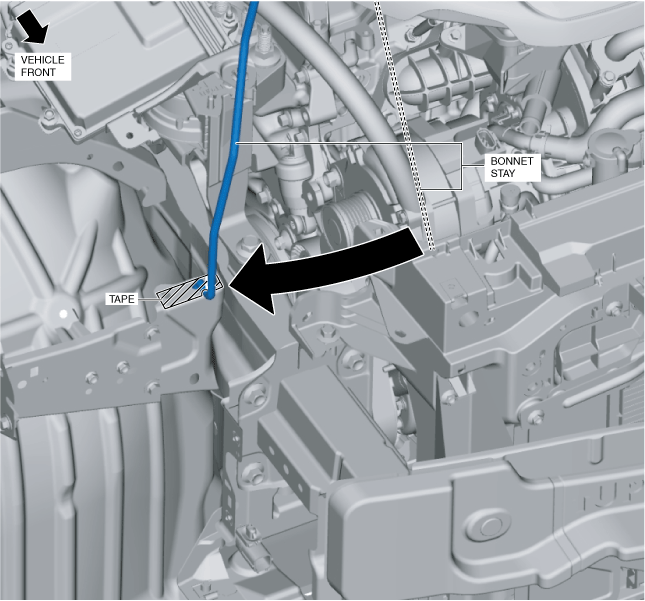
Warning
-
• Secure the bonnet stay using packing tape so that it does not detach. Otherwise, the bonnet may fall and cause injury.
4. Relocate the bonnet stay to the position shown in the figure.
-
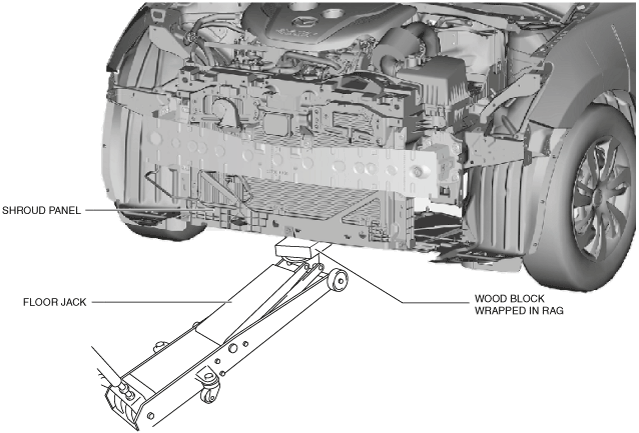
Caution
-
• When removing the front bumper reinforcement, always use a floor jack to support the shroud panel. Otherwise, the shroud panel or the radiator may fall and be damaged.
5. Support the radiator using a floor jack.
-
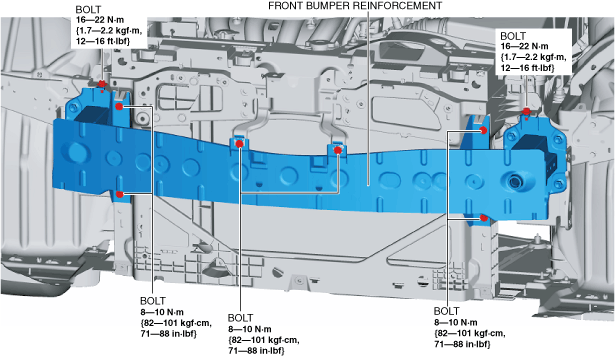
Caution
-
• Remove the front bumper reinforcement installation bolt using two people, one person supports the front bumper reinforcement. If all the front bumper reinforcement installation bolts are removed without supporting the front bumper reinforcement, it may fall off and be damaged.
6. Remove the bolts.
Front Bumper Reinforcement Type A
Front Bumper Reinforcement Type B
7. Remove the bolts.
8. Remove the front bumper reinforcement.
9. Install in the reverse order of removal.
10. Adjust the headlight aiming. (See HEADLIGHT AIMING.)