 |
am2zzw00008799
FRONT FENDER PANEL REMOVAL/INSTALLATION
id091000801000
1. Disconnect the negative battery cable. (See NEGATIVE BATTERY CABLE DISCONNECTION/CONNECTION.)
2. Remove the following parts:
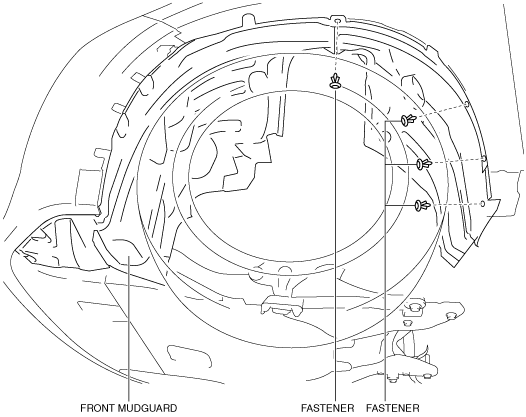
3. Remove the fasteners.
am2zzw00008799
|
4. Partially peel back the front mudguard.
5. Remove the clip. (with stone guard)
am2zzw00015003
|
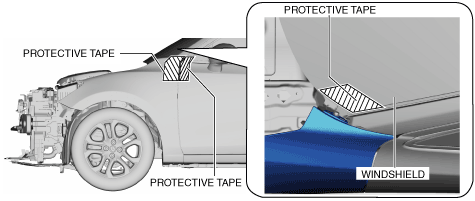
6. Affix the protective tape to the position shown in the figure to prevent scratches and damage.
am2zzw00008801
|
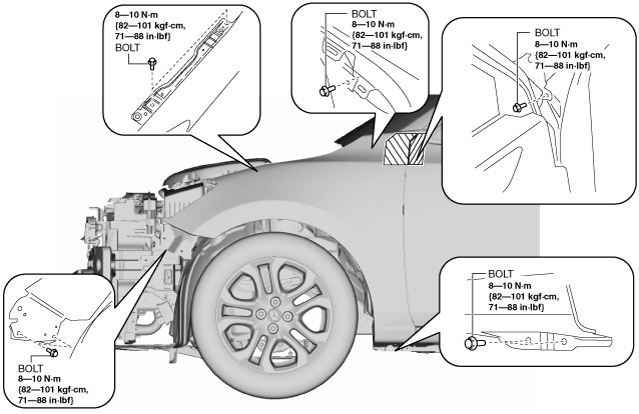
7. Remove the bolts.
adejjw00010307
|
8. Remove the front fender panel.
9. Install in the reverse order of removal. (See Front Fender Panel Replacement Note.)
Front Fender Panel Replacement Note
am2zzw00014791
|
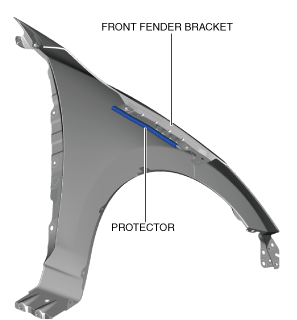
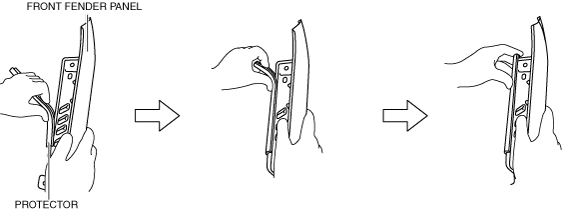
1. Verify the up/down direction of the protector and align the end of the protector with the position shown in the figure of the front fender panel.
am2zzw00014792
|
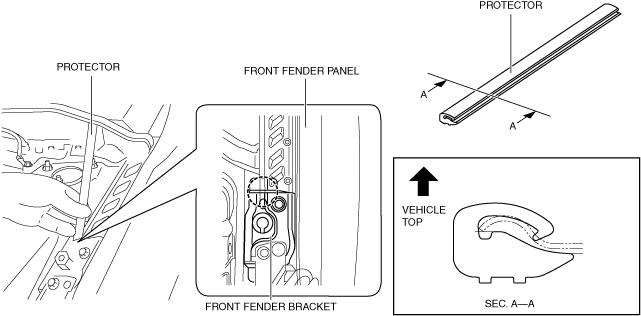
2. Install the protector using the following procedure.
am2zzw00014793
|
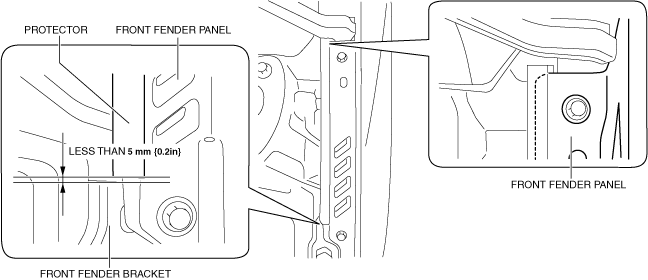
3. Verify that the protector is under the following conditions.
am2zzw00014794
|