 |
am2zzw00008905
LIFTGATE REMOVAL/INSTALLATION
id091100521200
1. Disconnect the negative battery cable. (See NEGATIVE BATTERY CABLE DISCONNECTION/CONNECTION.)
2. Remove the dad antenna amplifier. (See DAB ANTENNA AMPLIFIER REMOVAL/INSTALLATION.)
3. Remove the liftgate upper trim. (See LIFTGATE UPPER TRIM REMOVAL/INSTALLATION.)
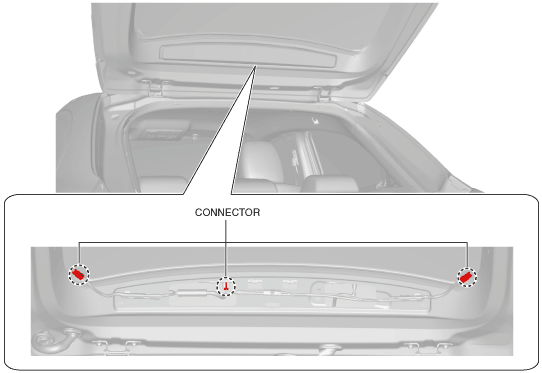
4. Disconnect the rear defogger connector and the high-mount brake light connectors.
am2zzw00008905
|
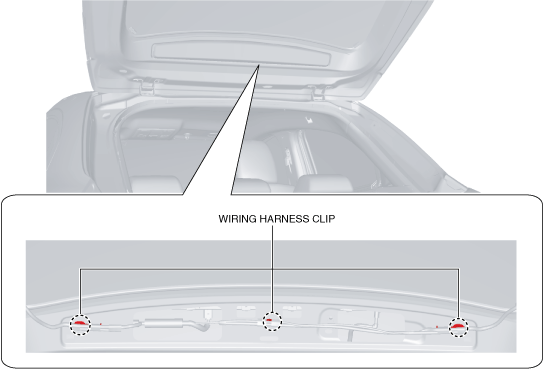
5. Remove the wiring harness clips from the liftgate.
am2zzw00015322
|
6. Disconnect the rear washer hose.
am2zzw00015323
|
7. Remove the liftgate lower trim. (See LIFTGATE LOWER TRIM REMOVAL/INSTALLATION.)
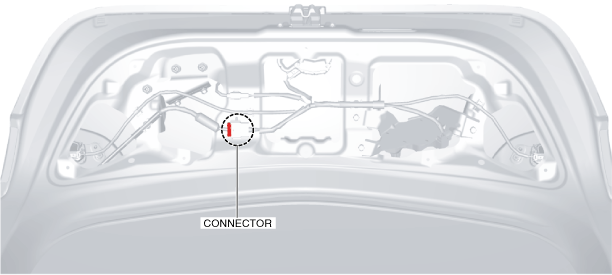
8. Disconnect the short-cord connector.
am2zzw00015324
|
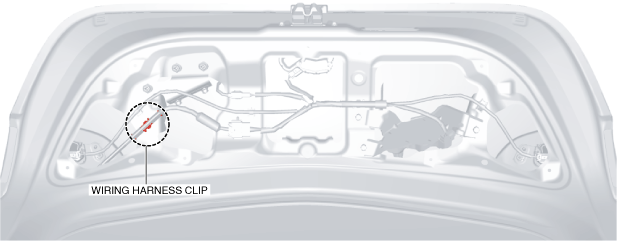
9. Remove the wiring harness clip from the liftgate.
am2zzw00015325
|
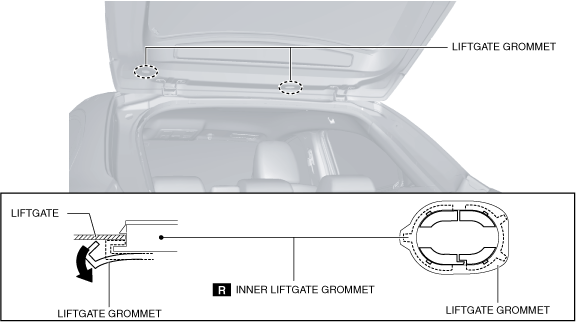
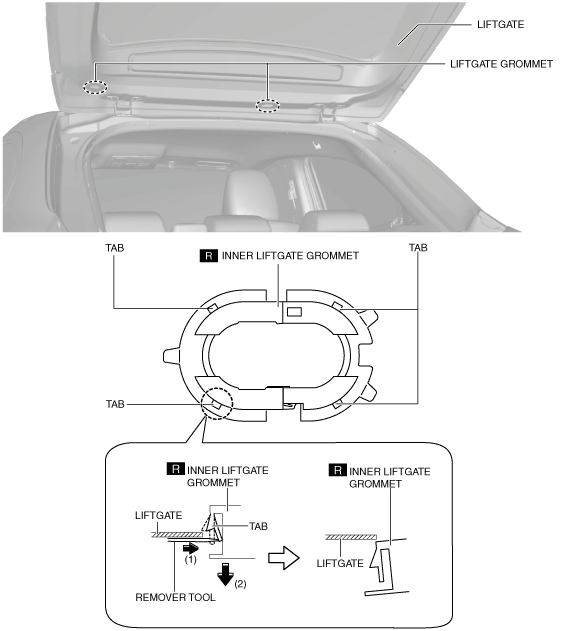
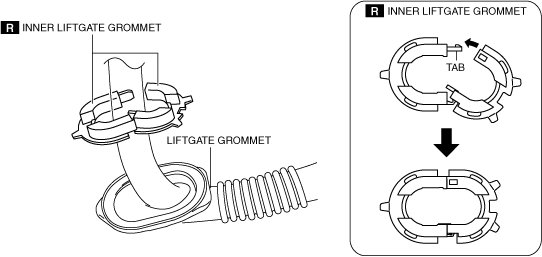
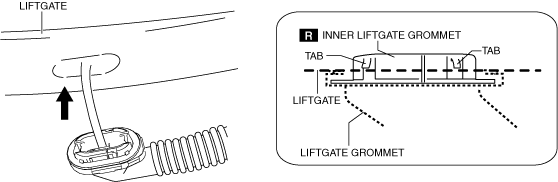
10. Partially peel the liftgate grommet in the direction of the arrow shown in the figure.
am2zzw00015326
|
11. While pressing the tab of the inner liftgate grommet in the direction of arrow (1) shown in the figure using the remover tool, pull the inner liftgate grommet in the direction of arrow (2) shown in the figure to detach the tab of the inner liftgate grommet from the liftgate.
am2zzw00008911
|
12. Detach all the tabs of the inner liftgate grommet from the liftgate and remove the inner liftgate grommet.
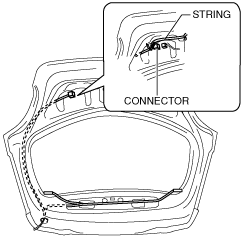
13. Tie a string to the wiring harness.
adejjw00011997
|
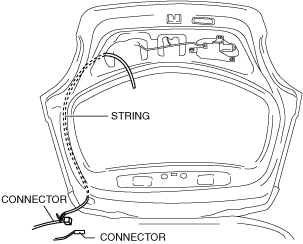
14. Pull out the liftgate wiring harness while grasping the end of the string so that the end of the string does not enter the liftgate.
am2zzw00015327
|
15. Untie the string from wiring harness.
16. Pull out the rear washer hose from the liftgate.
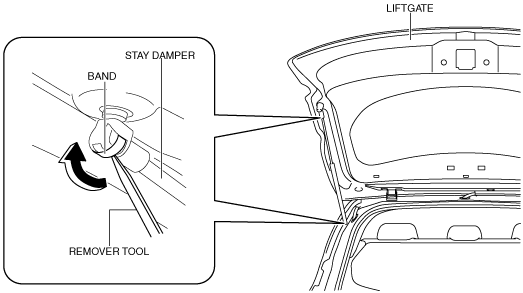
17. Insert the remover tool in the position shown in the figure.
am2zzw00008912
|
18. Move the remover tool in the direction of the arrow shown in the figure and remove the band.
19. Remove the stay damper.
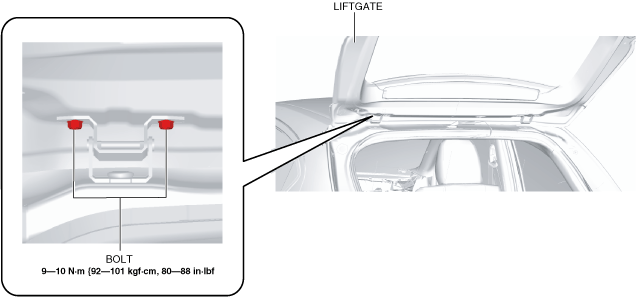
20. Remove the bolts.
am2zzw00015328
|
21. Remove the liftgate.
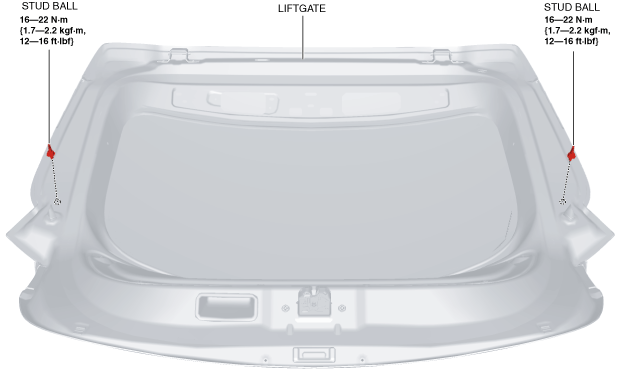
22. Remove the stud balls.
am2zzw00015329
|
23. Install in the reverse order of removal. (See Liftgate Grommet Installation Note.)
24. Adjust the liftgate. (See LIFTGATE ADJUSTMENT.)
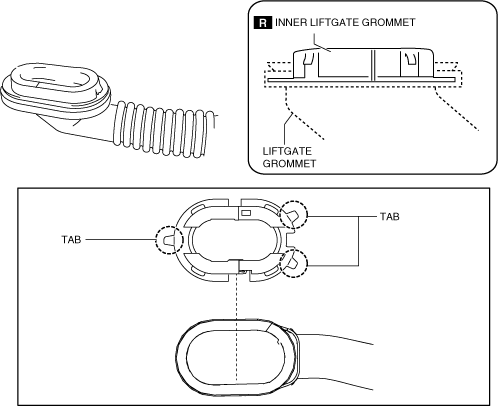
Liftgate Grommet Installation Note
1. Install the liftgate grommet using the following procedure:
am2zzw00015284
|
am2zzw00015330
|
am2zzw00015285
|