|
am2zzw00014325
FUEL-FILLER LID OPENER CABLE REMOVAL/INSTALLATION
id091400510800
L.H.D.
5HB
1. Disconnect the negative battery cable. (See NEGATIVE BATTERY CABLE DISCONNECTION/CONNECTION.)
2. Remove the following parts:
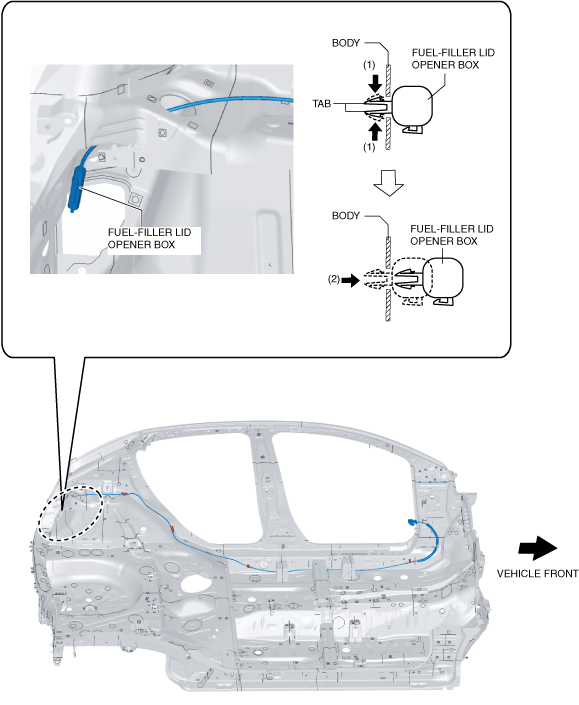
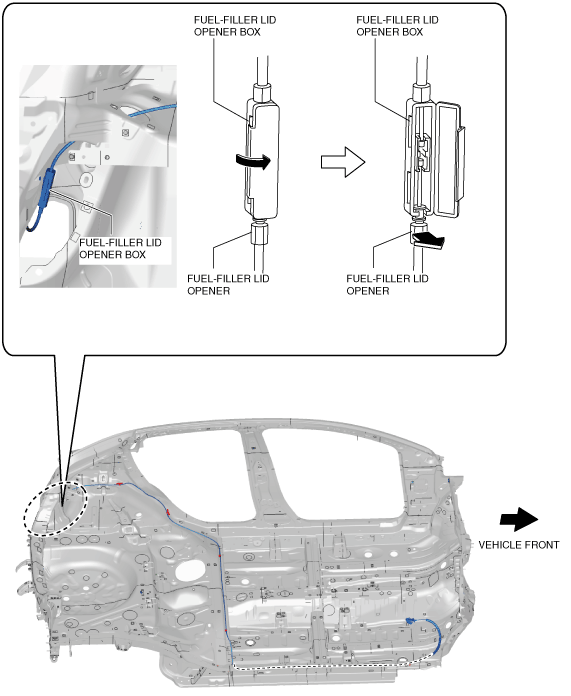
3. Open the fuel-filler lid opener box and disconnect the fuel-filler lid opener from the fuel-filler lid opener box.
am2zzw00014325
|
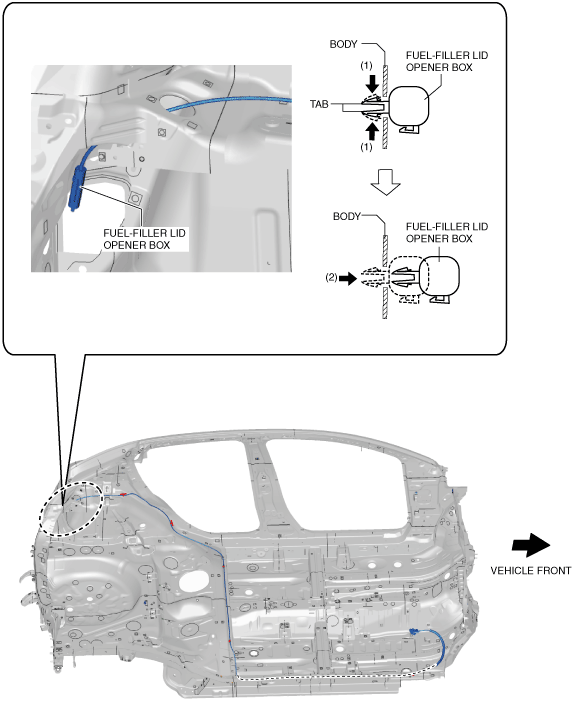
4. While pressing the tabs in the directions of arrows (1) shown in the figure, press it in the direction of arrow (2) to detach the tabs from the fuel-filler lid opener box.
am2zzw00014326
|
5. Remove the fuel-filler lid opener box.
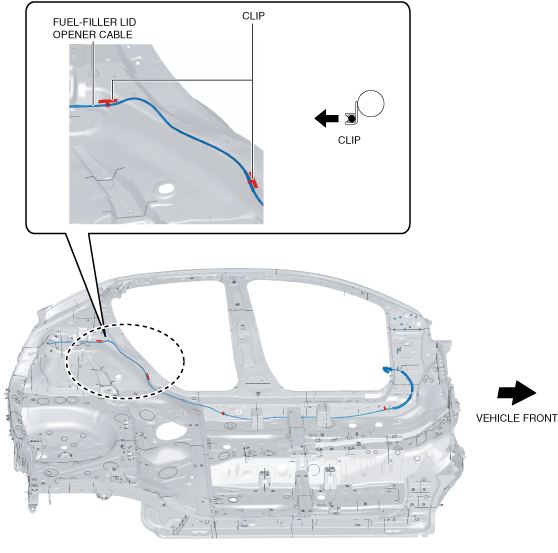
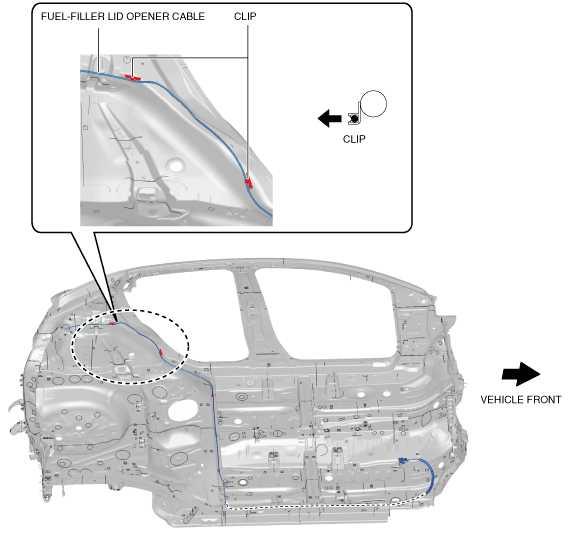
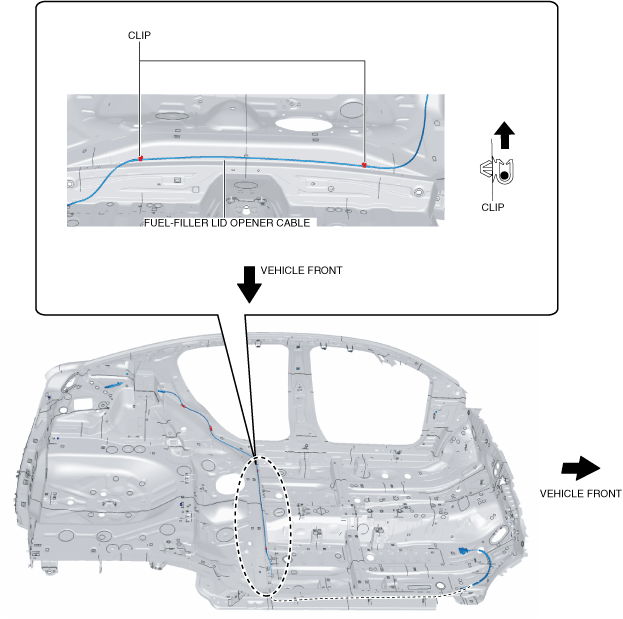
6. Remove the fuel-filler lid opener cable from the clips.
am2zzw00014327
|
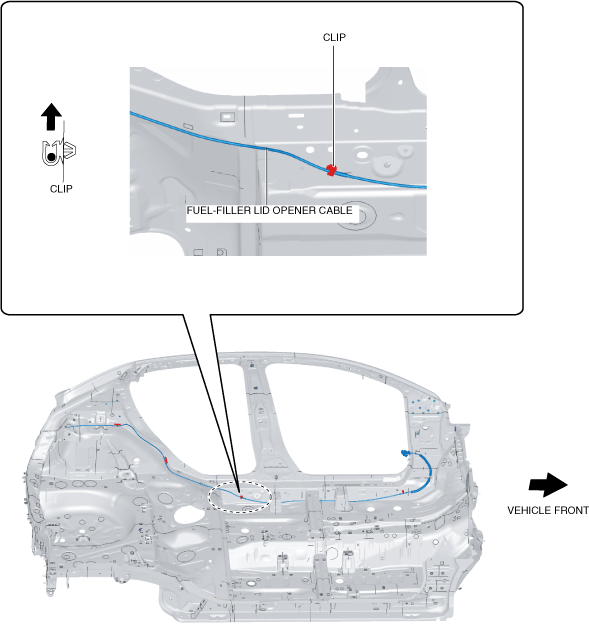
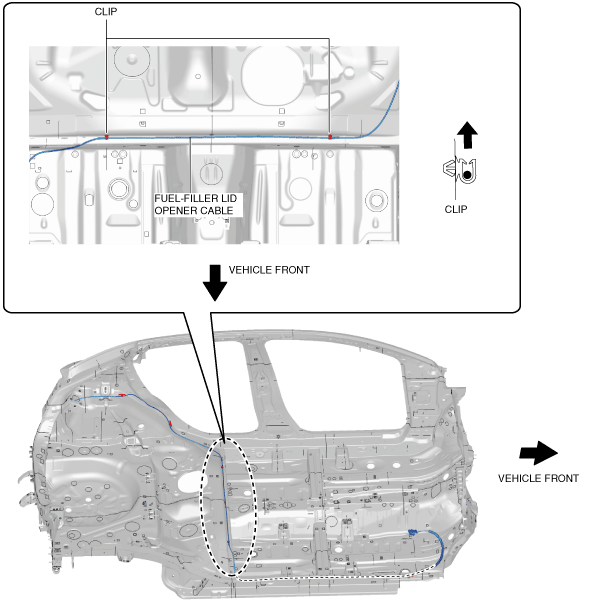
7. Peel back the floor mat and remove the fuel-filler lid opener cable from the clip shown in the figure.
am2zzw00014328
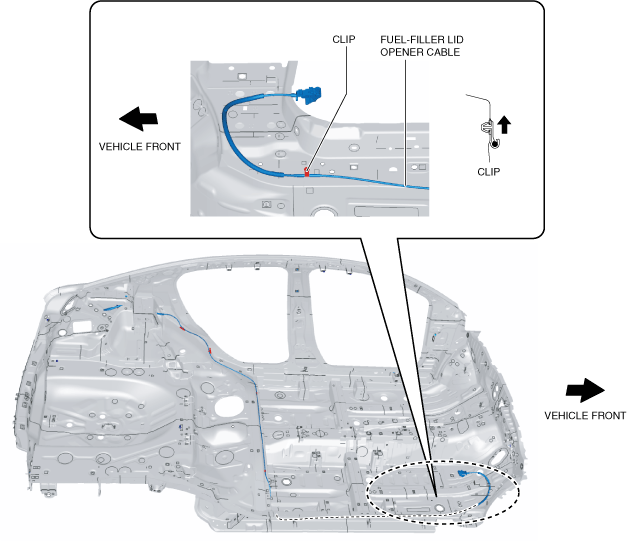
|
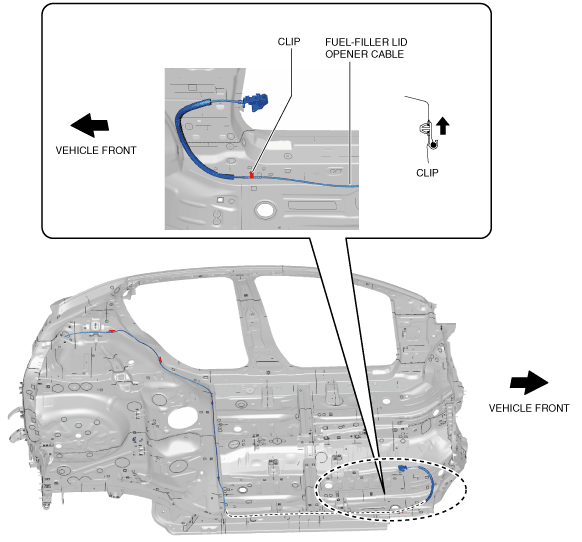
8. Peel back the floor mat and remove the fuel-filler lid opener cable from the clip shown in the figure.
am2zzw00014329
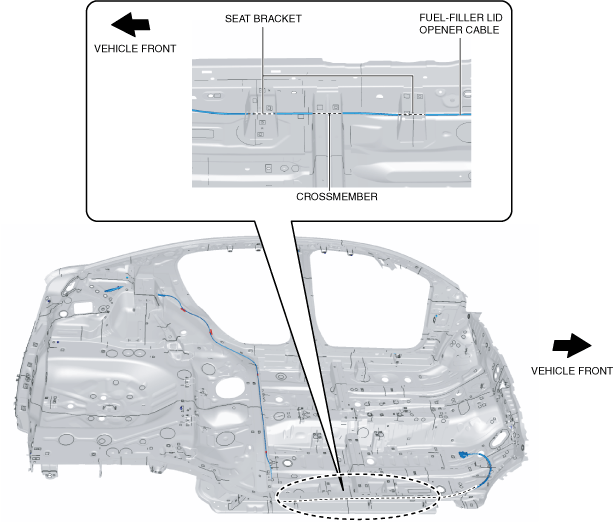
|
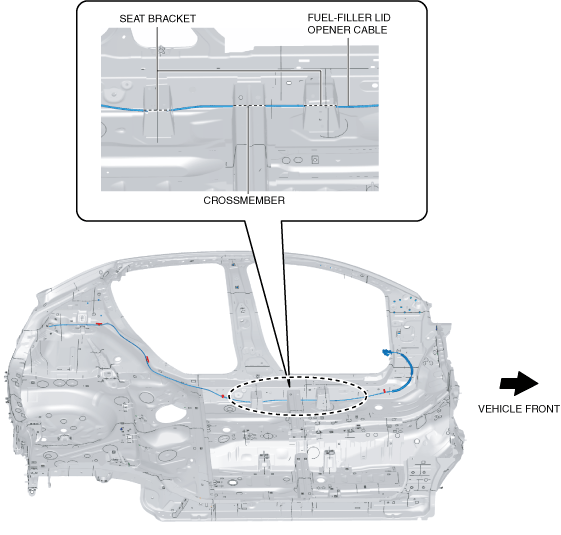
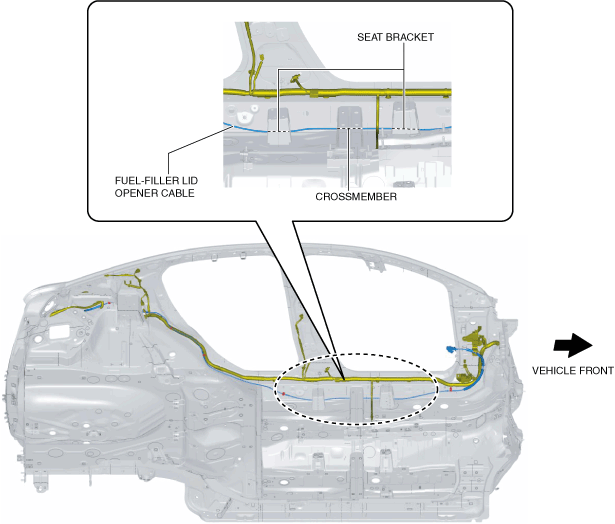
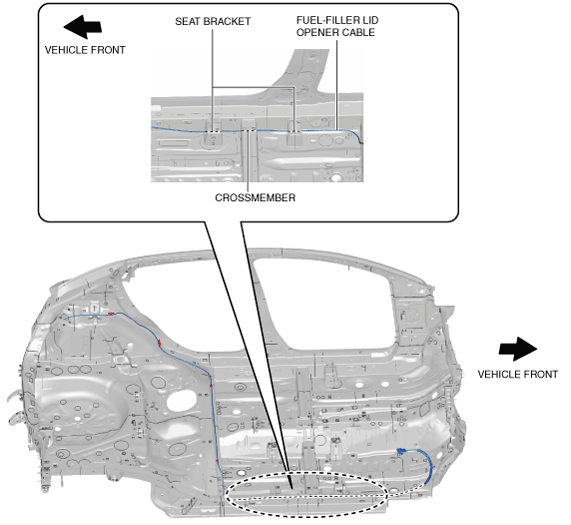
9. Pull out the fuel-filler lid opener cable out from the crossmember and the seat brackets.
am2zzw00014330
|
10. Install in the reverse order of removal.
4SD
1. Disconnect the negative battery cable. (See NEGATIVE BATTERY CABLE DISCONNECTION/CONNECTION.)
2. Remove the following parts:
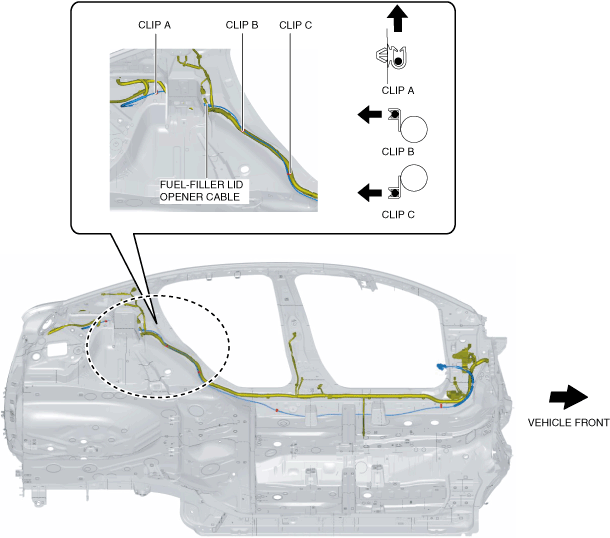
3. Remove the fuel-filler lid opener cable from the clips A, B, and C.
am2zzw00015400
|
4. Peel back the floor mat and remove the fuel-filler lid opener cable from the clip shown in the figure.
am2zzw00015401
|
5. Peel back the floor mat and remove the fuel-filler lid opener cable from the clip shown in the figure.
am2zzw00015402
|
6. Pull out the fuel-filler lid opener cable out from the crossmember and the seat brackets.
am2zzw00015403
|
7. Install in the reverse order of removal.
R.H.D
5HB
1. Disconnect the negative battery cable. (See NEGATIVE BATTERY CABLE DISCONNECTION/CONNECTION.)
2. Remove the following parts:
3. Open the fuel-filler lid opener box and disconnect the fuel-filler lid opener from the fuel-filler lid opener box.
am2zzw00007830
|
4. While pressing the tabs in the directions of arrows (1) shown in the figure, press it in the direction of arrow (2) to detach the tabs from the fuel-filler lid opener box.
am2zzw00007831
|
5. Remove the fuel-filler lid opener box.
6. Remove the fuel-filler lid opener cable from the clips.
am2zzw00007832
|
7. Peel back the floor mat and remove the fuel-filler lid opener cable from the clips shown in the figure.
am2zzw00012253
|
8. Peel back the floor mat and remove the fuel-filler lid opener cable from the clip shown in the figure.
am2zzw00007833
|
9. Pull out the fuel-filler lid opener cable out from the crossmember and the seat brackets.
am2zzw00007834
|
10. Install in the reverse order of removal.
4SD
1. Disconnect the negative battery cable. (See NEGATIVE BATTERY CABLE DISCONNECTION/CONNECTION.)
2. Remove the following parts:
3. Remove the fuel-filler lid opener cable from the clips A, B, and C.
am2zzw00014331
|
4. Peel back the floor mat and remove the fuel-filler lid opener cable from the clips shown in the figure.
am2zzw00014332
|
5. Peel back the floor mat and remove the fuel-filler lid opener cable from the clip shown in the figure.
am2zzw00014333
|
6. Pull out the fuel-filler lid opener cable out from the crossmember and the seat brackets.
am2zzw00014334
|
7. Install in the reverse order of removal.