 |
ada2226w002
OIL CONTROL VALVE (OCV) REMOVAL/INSTALLATION [ZY]
id0110008013c0
1. Disconnect the negative battery cable.
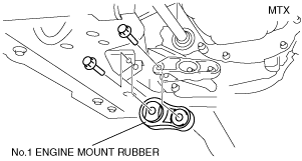
2. Remove the No.1 engine mount rubber.
ada2226w002
|
ada2226w010
|
3. Remove the front pipe installation nut on the exhaust manifold side. (See EXHAUST SYSTEM REMOVAL/INSTALLATION [ZY].)
4. Disconnect the front drive shaft (RH) from the joint shaft side. (See DRIVE SHAFT REMOVAL/INSTALLATION.)
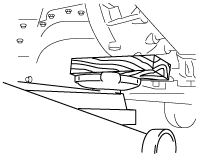
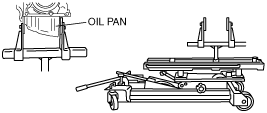
5. Support the engine using the either of the following procedures.
aaxjjw00003911
|
am3zzw00004622
|
6. Remove the No.3 engine mount.
7. Disconnect the OCV connector.
8. Remove the OCV installation bolt.
9. Raise the engine jack installed to the oil pan until the OCV is clear of the frame, then remove the OCV.
dda110zw4016
|
10. Install the new O-ring.
11. Install the OCV.
12. Tighten the OCV installation bolt.
13. Connect the OCV connector.
14. Lower the engine jack installed to the oil pan and install the No.3 engine mount. (See ENGINE REMOVAL/INSTALLATION [ZY].)
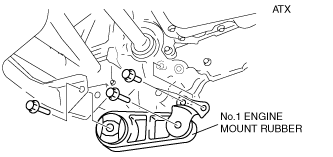
15. Install the No.1 engine mount rubber.
ada2226w004
|
ada2226w011
|
16. Install the front drive shaft (RH). (See DRIVE SHAFT REMOVAL/INSTALLATION.)
17. Install the front pipe installation nut. (See EXHAUST SYSTEM REMOVAL/INSTALLATION [ZY].)