1. Disconnect the negative battery cable.
2. Discharge the refrigerant from the system. (See REFRIGERANT RECOVERY.) (See REFRIGERANT CHARGING.)
3. Drain the engine coolant. (See ENGINE COOLANT REPLACEMENT [ZJ, ZY].)
4. Remove the dashboard. (See DASHBOARD REMOVAL/INSTALLATION.)
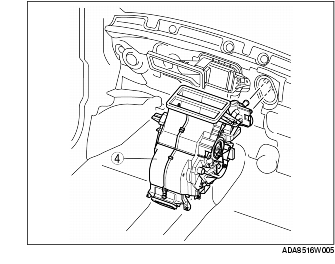
5. Remove the blower unit.
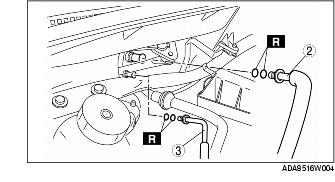
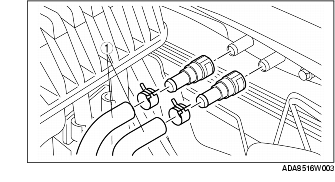
6. Remove in the order indicated in the table. Do not allow compressor oil to spill.
7. Install in the reverse order of removal.
8. Perform the refrigerant system performance test. (See REFRIGERANT SYSTEM PERFORMANCE TEST.)
1. When installing a new A/C unit or evaporator, add a supplemental amount of ATMOS GU10 compressor oil into the refrigerant cycle.
Supplemental amount (approximate quantity)