|
am6zzb00000472
REAR SIDE FRAME REMOVAL [PANEL REPLACEMENT]
id098008801200
Symbol Mark
am6zzb00000472
|
Removal Procedure
4SD
1. Remove the floor side panel No.1 and floor side panel No.2. (See FLOOR SIDE PANEL REMOVAL [PANEL REPLACEMENT].)
2. Rough cut the location in area A shown in the figure.
am3zzb00000395
|
3. Remove a part (shaded area) of the rear floor pan.
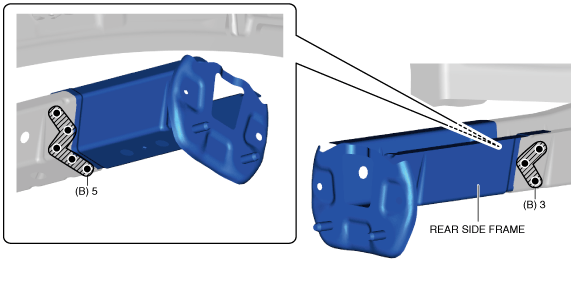
4. Drill the spot welds in the 8 locations in area B shown in the figure.
am3zzb00000396
|
5. Remove the rear side frame.
5HB
1. Remove the floor side panel No.1 and floor side panel No.2. (See FLOOR SIDE PANEL REMOVAL [PANEL REPLACEMENT].)
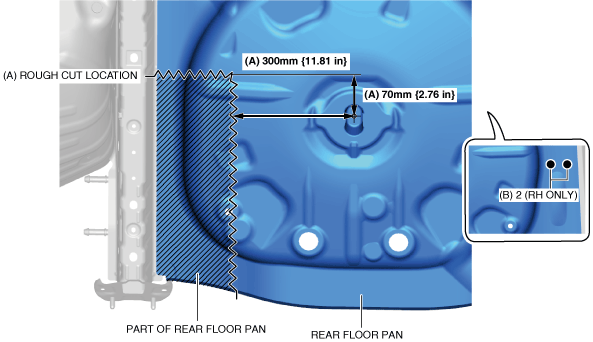
2. Rough cut the location in area A shown in the figure.
3. Drill the spot welds in the 2 locations in area B shown in the figure. (RH only).
am3zzb00000397
|
4. Remove a part (shaded area) of the rear floor pan.
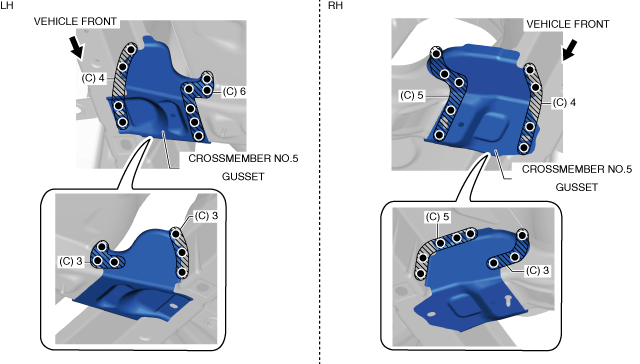
5. Drill the spot welds in the 16 locations (LH), 17 locations (RH) in area C shown in the figure.
am3zzb00000742
|
6. Remove the crossmember No. 5 gusset.
7. Drill the spot welds in the 3 locations in area D shown in the figure.
8. Drill the spot welds in the 2 locations in area E shown in the figure from the rear wheel housing.
am3zzb00000399
|
9. Remove the rear side frame.