1. Rear seat cushion (See REAR SEAT CUSHION REMOVAL/INSTALLATION.)
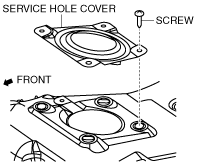
2. Service hole cover
am3zzw00006381
|
3. Fuel pump unit connector
FUEL PUMP UNIT REMOVAL/INSTALLATION [LF, L5]
id0114a7800900
1. Complete the “BEFORE SERVICE PRECAUTION”. (See BEFORE SERVICE PRECAUTION [LF, L5].)
2. Remove the battery cover. (See BATTERY REMOVAL/INSTALLATION [LF, L5].)
3. Disconnect the negative battery cable. (See BATTERY REMOVAL/INSTALLATION [LF, L5].)
4. Remove the following parts:
am3zzw00006381
|
5. Disconnect the joint hose of fuel tank side.
6. Disconnect the breather hose of fuel-filler pipe side.
7. Remove the following parts as a single unit. (See FUEL TANK REMOVAL/INSTALLATION [LF, L5].)
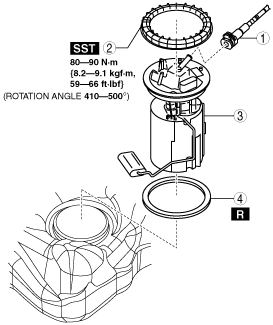
8. Remove the order indicated in the table.
LF (Fuel filter (high-pressure) is a built-in fuel pump unit)
am3zzw00005406
|
|
1
|
Quick release connector
|
|
2
|
Fuel pump cap
(See Fuel Pump Cap Removal Note.)
|
|
3
|
Fuel pump unit
|
|
4
|
O-ring
|
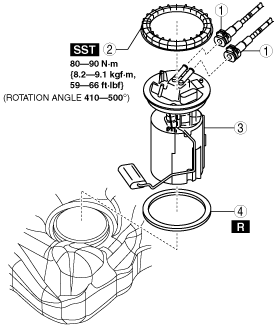
LF (Fuel filter (high-pressure) is not a built-in fuel pump unit)
am3zzw00007755
|
|
1
|
Quick release connector
|
|
2
|
Fuel pump cap
(See Fuel Pump Cap Removal Note.)
|
|
3
|
Fuel pump unit
|
|
4
|
O-ring
|
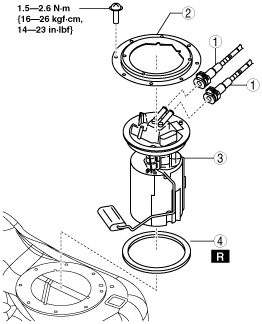
L5
am3zzw00007756
|
|
1
|
Quick release connector
|
|
2
|
Set plate
|
|
3
|
Fuel pump unit
|
|
4
|
O-ring
|
9. Install in the reverse order of removal.
10. Complete the “AFTER SERVICE PRECAUTION”. (See AFTER SERVICE PRECAUTION [LF, L5].)
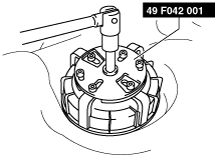
Fuel Pump Cap Removal Note
1. Remove the fuel pump cap using the SST.
am3zzw00008523
|
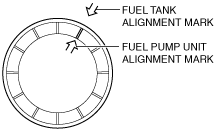
Fuel Pump Cap Installation Note
1. Align the fuel tank and fuel pump unit alignment marks.
am3zzw00008524
|
2. Set the SST as shown in the figure.
am3zzw00008523
|
3. Using the SST, tighten the fuel pump cap within the specified tightening torque without shifting the alignment marks.