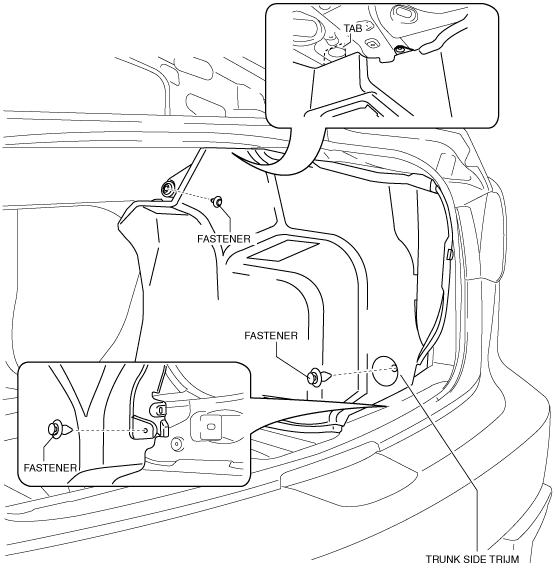
TRUNK SIDE TRIM REMOVAL/INSTALLATION
id091700803100
4SD
Left-side
1. Remove the following parts:
- (1) Rear scuff plate (See REAR SCUFF PLATE REMOVAL/INSTALLATION.)
- (2) Tire house trim (See TIRE HOUSE TRIM REMOVAL/INSTALLATION.)
- (3) Trunk mat (See TRUNK BOARD REMOVAL/INSTALLATION.)
- (4) Trunk board (See TRUNK BOARD REMOVAL/INSTALLATION.)
- (5) Trunk end trim (See TRUNK END TRIM REMOVAL/INSTALLATION.)
- (6) Service hole cover
2. Remove the fasteners.
3. Install in the reverse order of removal.
Right-side
1. Remove the following parts:
- (1) Rear scuff plate (See REAR SCUFF PLATE REMOVAL/INSTALLATION.)
- (2) Tire house trim (See TIRE HOUSE TRIM REMOVAL/INSTALLATION.)
- (3) Trunk mat (See TRUNK BOARD REMOVAL/INSTALLATION.)
- (4) Trunk board (See TRUNK BOARD REMOVAL/INSTALLATION.)
- (5) Trunk end trim (See TRUNK END TRIM REMOVAL/INSTALLATION.)
2. Remove the fasteners and tab.
3. Install in the reverse order of removal.
5HB
1. Disconnect the negative battery cable. (right-side only)
2. Remove the following parts:
- (1) Rear seat (See REAR SEAT BACK REMOVAL/INSTALLATION.)
- (2) Rear scuff plate (See REAR SCUFF PLATE REMOVAL/INSTALLATION.)
- (3) Tire house trim (See TIRE HOUSE TRIM REMOVAL/INSTALLATION.)
- (4) Trunk end trim (See TRUNK END TRIM REMOVAL/INSTALLATION.)
- (5) Trunk side upper trim (See TRUNK SIDE UPPER TRIM REMOVAL/INSTALLATION.)
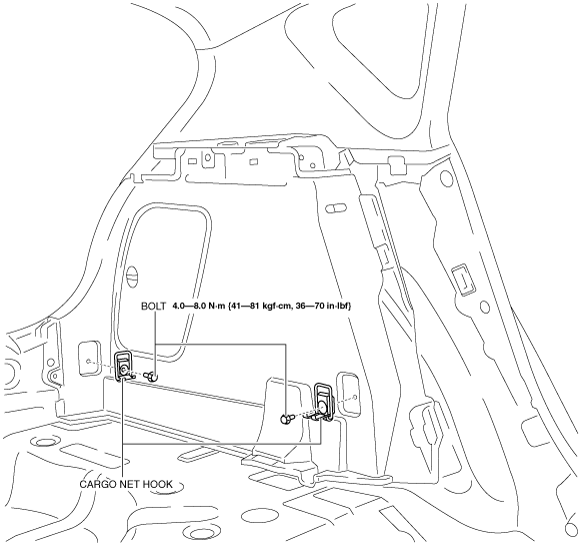
3. Remove the bolts, then remove the cargo net hooks.
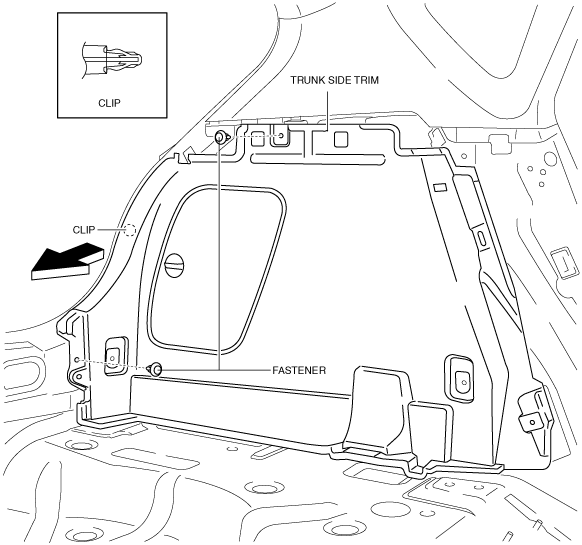
4. Remove the fasteners.
5. Pull the trunk side trim in the direction of arrow, while remove the clip.
6. Remove the trunk side trim.
7. Disconnect the cargo compartment light connector. (right-side only)
8. Install in the reverse order of removal.