 |
am3uuw00002599
INSTRUMENT CLUSTER DISASSEMBLY/ASSEMBLY
id092200801600
1. Perform the instrument cluster configuration when replacing it. (See INSTRUMENT CLUSTER CONFIGURATION.)
2. Disconnect the negative battery cable.
3. Remove the column cover. (upper) (See COLUMN COVER REMOVAL/INSTALLATION.)
4. Remove the instrument cluster. (See INSTRUMENT CLUSTER REMOVAL/INSTALLATION.)
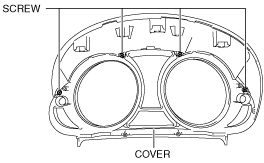
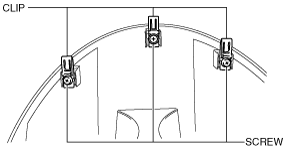
5. Remove the screws and clips.
am3uuw00002599
|
6. Remove the screws.
am3uuw00002598
|
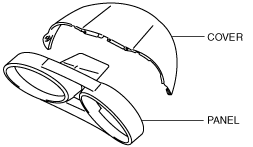
7. Remove the cover.
8. Remove the screws from the cover.
am3uuw00002600
|
am3uuw00002601
|
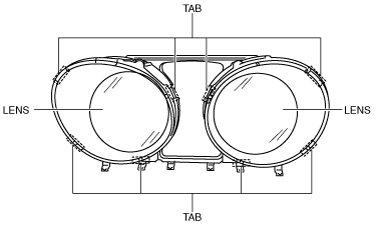
9. Detach the tabs.
am3uuw00004437
|
10. Remove the lens.
11. Assemble in the reverse order of disassembly.