 |
am3zzw00002303
VARIABLE VALVE TIMING ACTUATOR REMOVAL/INSTALLATION[ZJ, ZY, Z6]
id0110b1801100
1. Remove the camshaft component according to steps 1 to 18 in the valve clearance adjustment. (See VALVE CLEARANCE ADJUSTMENT[ZJ, ZY, Z6].)
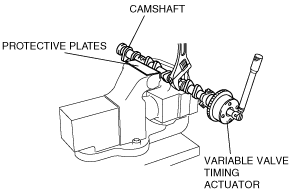
2. Secure the camshaft in a vise and fix the camshaft using a wrench on the cast hexagon as shown in the figure.
am3zzw00002303
|
3. Loosen the variable valve timing actuator installation bolt, and then remove the variable valve timing actuator.
4. Fix the camshaft using a wrench on the cast hexagon as shown in the figure.
am3zzw00002303
|
5. Tighten the variable valve timing actuator installation bolt.
6. Install the camshaft component according to steps 21 to 37 in the valve clearance adjustment. (See VALVE CLEARANCE ADJUSTMENT[ZJ, ZY, Z6].)