 |
am3uuw00011024
REAR TRAILING LINK REMOVAL/INSTALLATION
id021400800100
1. Remove the wheel and tire. (See WHEEL AND TIRE REMOVAL/INSTALLATION.)
2. Remove the floor under cover No.1. (See FLOOR UNDER COVER REMOVAL/INSTALLATION.)
3. Disconnect the rear parking cable. (Without electric parking brake) (See REAR PARKING BRAKE CABLE REMOVAL/INSTALLATION.)
am3uuw00011024
|
4. Remove the protector. (With protector)
am3zzw00018290
|
5. Remove in the order indicated in the table.
6. Install in the reverse order of removal. (See Suspension Link Installation Note.)
7. When replacing the rear trailing link, inspect the wheel alignment and adjust it if necessary. (See REAR WHEEL ALIGNMENT.)
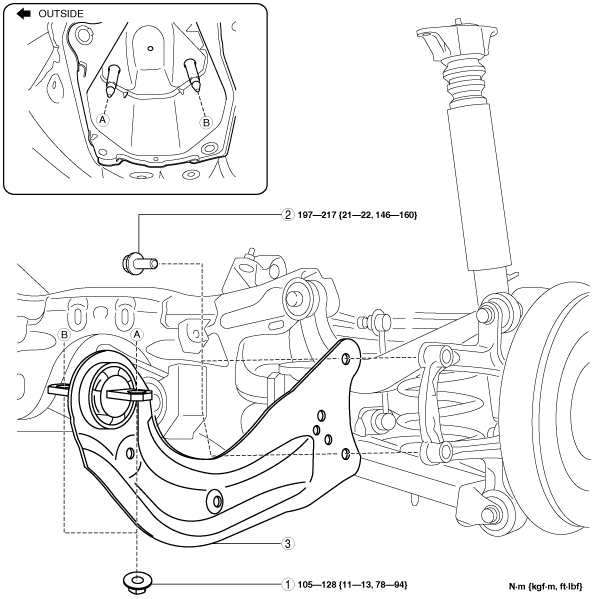
With Dynamic damper
am3zzw00018291
|
|
1
|
Dynamic damper
|
|
2
|
Rear trailing link installation nut
|
|
3
|
Rear trailing link installation bolt
|
|
4
|
Rear trailing link
|
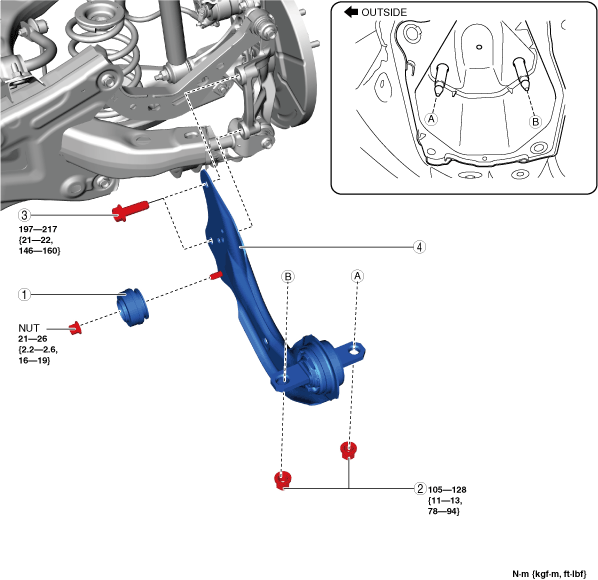
Without Dynamic damper
am3uuw00011025
|
|
1
|
Rear trailing link installation nut
|
|
2
|
Rear trailing link installation bolt
|
|
3
|
Rear trailing link
|
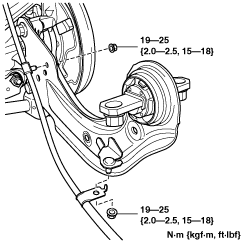
Suspension Link Installation Note
1. When installing the joint section with a rubber bushing, perform the following procedures.
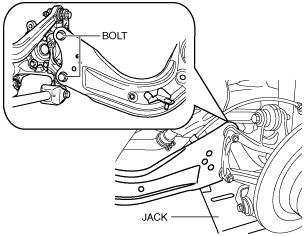
Rear Trailing Link Installation Note
1. Install the rear trailing link installation bolts using a jack.
am3uuw00011026
|
2. Install the rear trailing link installation nut.