|
am3zzw00018841
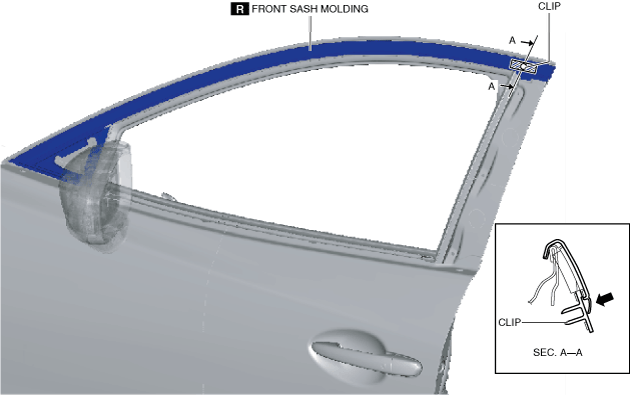
FRONT SASH MOLDING INSTALLATION
id091600807000
1. Carefully remove the adhesive remaining on the body using a razor blade.
2. Remove any grease or dirt from the adhesion surface of the body.
3. Peel off the backing of the double-sided adhesive tape.
4. Hook the tab to the body in the position where the clip aligns with the sash hole.
am3zzw00018841
|
5. Press the front sash molding in the direction of the arrow and install the clip to the body.
am3zzw00018842
|
6. Press the front sash molding from the vehicle rear in the direction of the arrow and install the tab.
am3zzw00018843
|
7. Install the following parts: