 |
am6zzw00004175
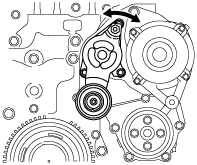
DRIVE BELT AUTO TENSIONER INSPECTION [MZR-CD 2.2]
id0110f2801700
1. Remove the drive belt. (See DRIVE BELT REMOVAL/INSTALLATION [MZR-CD 2.2].)
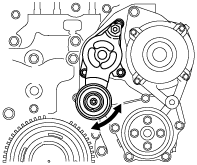
2. Remove the bolt inserted to the drive belt auto tensioner.
3. Verify that the drive belt auto tensioner moves smoothly in the operational direction.
am6zzw00004175
|
4. Turn the drive belt auto tensioner pulley by hand and verify that it rotates smoothly.
am6zzw00004176
|
5. Install in the reverse order of removal.
Drive Belt Auto Tensioner Removal Note
1. Remove the generator. (See GENERATOR REMOVAL/INSTALLATION [MZR-CD 2.2].)
2. Remove the crankshaft pulley cover and crankshaft pulley. (See FRONT OIL SEAL REPLACEMENT [MZR-CD 2.2].)
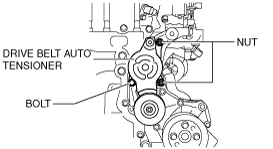
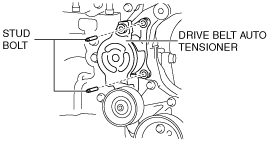
3. Remove the drive belt auto tensioner using the following procedure.
acxwzw00001134
|
acxwzw00001135
|
Drive Belt Auto Tensioner Installation Note
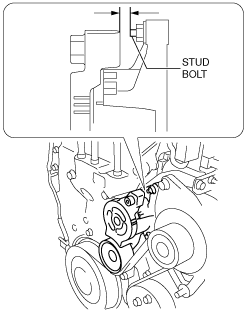
1. Align the drive belt auto tensioner with the installation position and install the stud bolts.
acxwzw00001135
|
2. Temporarily tighten the drive belt auto tensioner installation bolt and nuts.
acxwzw00001134
|
3. Tighten the drive belt auto tensioner installation bolt and nuts.
acxwzw00000166
|
4. Install the crankshaft pulley cover and crankshaft pulley. (See FRONT OIL SEAL REPLACEMENT [MZR-CD 2.2].)
5. Install the generator. (See GENERATOR REMOVAL/INSTALLATION [MZR-CD 2.2].)