 |
am6zzw00007707
RECLINER MOTOR REMOVAL/INSTALLATION
id091300876500
Removal
1. Disconnect the negative battery cable.
2. Remove the power seat switch knob. (See FRONT SEAT SIDE COVER REMOVAL/INSTALLATION.)
3. Remove the front seat side cover. (See FRONT SEAT SIDE COVER REMOVAL/INSTALLATION.)
4. Disconnect the position memory switch connector. (driver side)
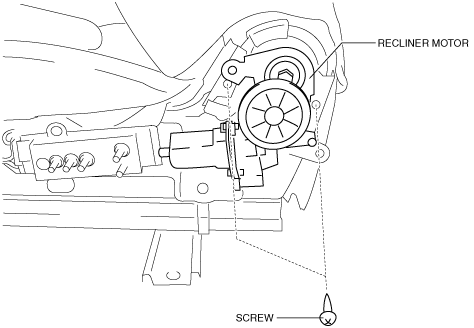
5. Remove the screws.
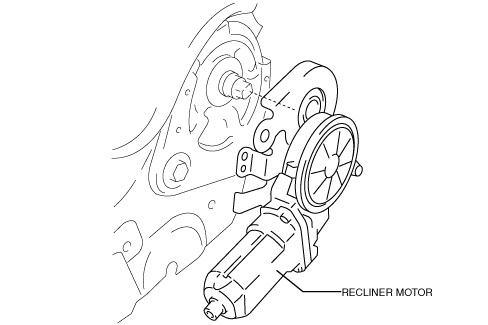
6. Remove the recliner motor.
am6zzw00007707
|
7. Disconnect the recliner motor connector.
Installation
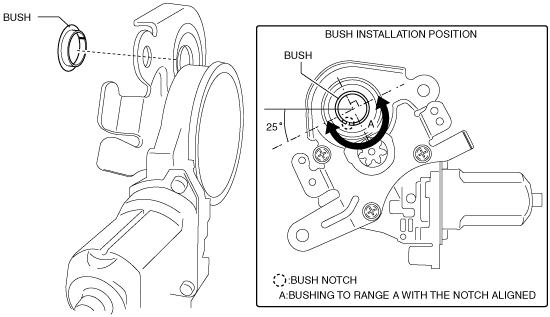
1. Install the bushing to range A shown in the figure with the notch aligned.
am6zzw00007708
|
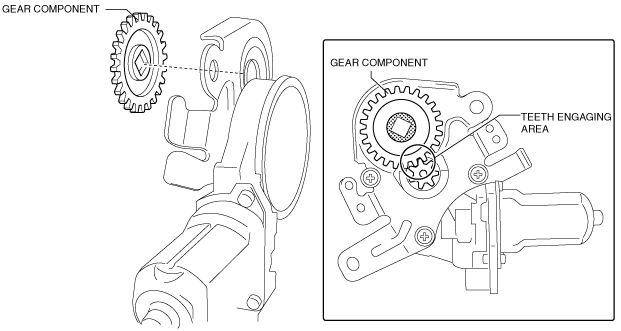
2. Insert the gear component to the bushing by lightly tapping the shaded area shown in the figure using a plastic hammer.
am6zzw00007709
|
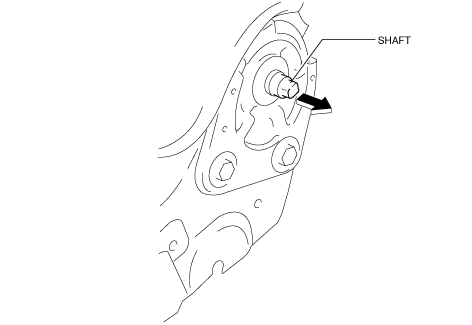
3. Remove the shaft in the direction of arrow shown in the figure.
am6zzw00007710
|
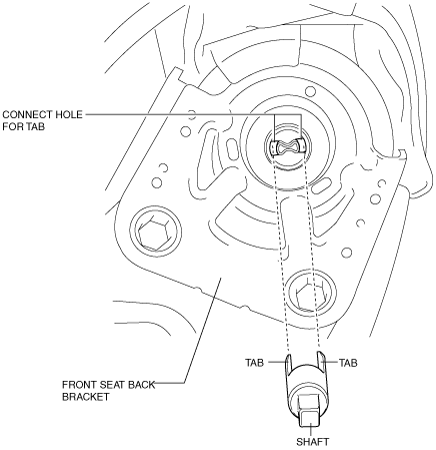
4. Insert the tabs to the position shown in the figure and install a new shaft to the front seat back bracket.
am6zzw00007711
|
5. Install the recliner motor. (See Recliner Motor Installation Note.)
am6zzw00007712
|
6. Install the screws.
am6zzw00007707
|
7. Connect the recliner motor connector. (See Wiring Harness Installation Note.)
8. Connect the position memory switch connector. (driver side)
9. Install the front seat side cover. (See FRONT SEAT SIDE COVER REMOVAL/INSTALLATION.)
10. Install the power seat switch knob. (See FRONT SEAT SIDE COVER REMOVAL/INSTALLATION.)
11. Connect the negative battery cable.
Recliner Motor Installation Note
1. When installing the recliner motor, adjust the position of the recliner motor by moving the front seat back and forth.
am6zzw00007713
|
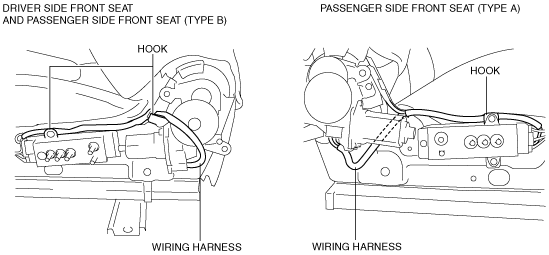
Wiring Harness Installation Note
1. After connecting the recliner motor connector to the recliner motor, secure the wiring harness to the hook shown in the figure.
am6zzw00007714
|