|
am6xuw00012662
UREA TANK REMOVAL/INSTALLATION [SKYACTIV-D 2.2]
id0116e1809000
Urea Tank Removal/Installation
1. Disconnect the negative battery terminal. (See NEGATIVE BATTERY TERMINAL DISCONNECTION/CONNECTION.)
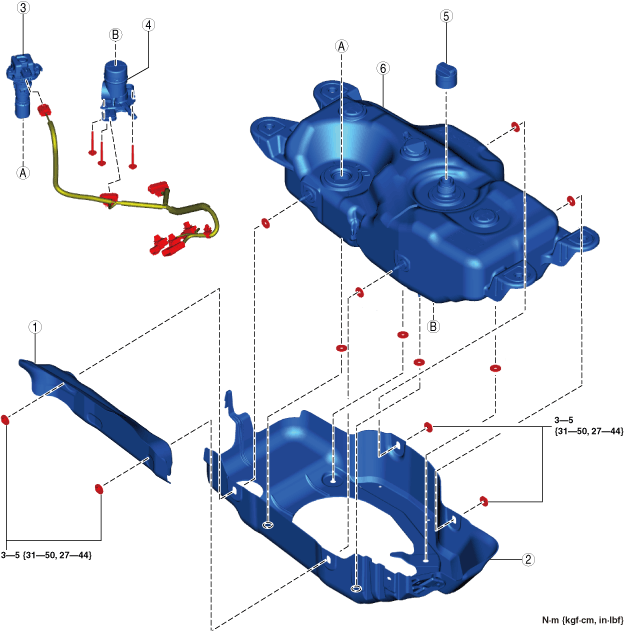
2. Remove in the order shown in the figure.
3. Install in the reverse order of removal.
4. If the urea tank is replaced, perform the “Operation After Replacing Urea Tank” procedure. (See SCR SYSTEM INSPECTION [SKYACTIV-D 2.2].)
Step 1
am6xuw00012662
|
|
1
|
Urea tank cover No.1
|
|
2
|
Protector
|
|
3
|
Urea tank cover No.2
|
|
4
|
Urea hose (built in urea hose heater)
|
|
5
|
Urea tank component
|
Step 2
am6xuw00012663
|
|
1
|
Urea tank insulator
|
|
2
|
Urea tank cover No.3
|
|
3
|
Urea quality sensor
|
|
4
|
Urea pump
|
|
5
|
Urea-filler cap
|
|
6
|
Urea tank
|
Urea tank cover No.1 removal note
1. Release the tab shown in the figure and remove urea tank cover No.1.
am6xuw00012671
|
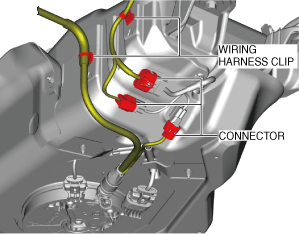
Urea tank component removal note
1. Disconnect the connectors and wiring harness clips shown in the figure.
am6xuw00011056
|
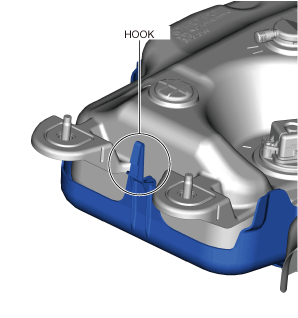
2. Release the hook shown in the figure and remove the urea tank component.
am6xuw00012665
|
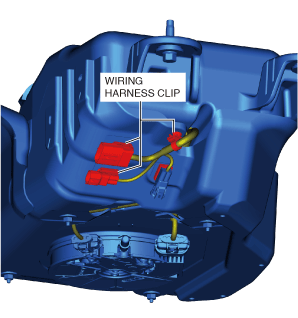
Urea tank cover No.3 removal note
1. Disconnect the wiring harness clip shown in the figure.
am6xuw00012666
|
2. Remove the urea tank cover No.3.