am6zzw00018350
|
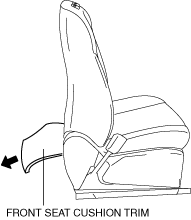
FRONT SEAT CUSHION TRIM REMOVAL/INSTALLATION
id091300911700
Removal
1. Switch the ignition off (LOCK).
2. Disconnect the negative battery terminal and wait for 1 min or more. (See NEGATIVE BATTERY TERMINAL DISCONNECTION/CONNECTION.)
3. Remove the front seat. (See FRONT SEAT REMOVAL/INSTALLATION.)
4. Remove the front seat side cover. (See FRONT SEAT SIDE COVER REMOVAL/INSTALLATION.)
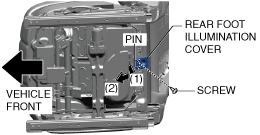
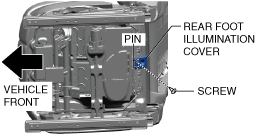
5. For vehicles with rear foot illumination, perform the following procedure.
am6zzw00018350
|
am6zzw00018351
|
am6xuw00013174
|
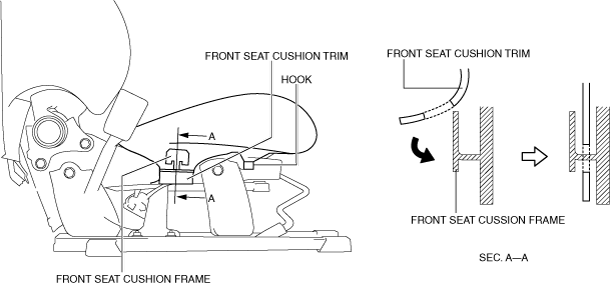
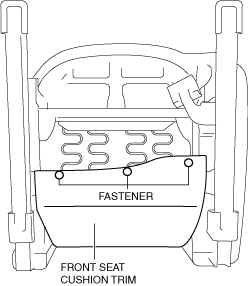
6. Remove the fasteners and set the front seat cushion trim away from the front seat cushion frame. (With power seat system/with position memory system)
am6zzw00018365
|
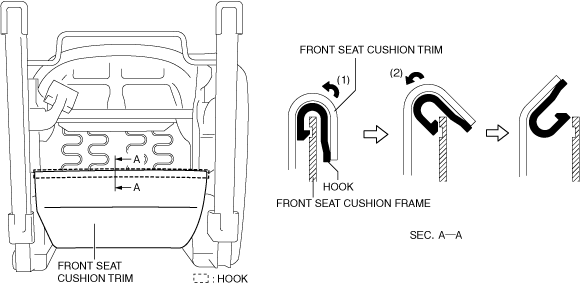
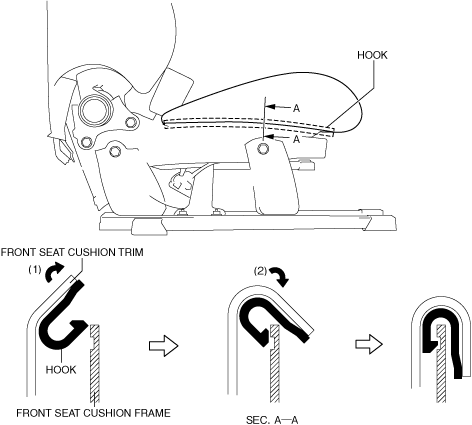
7. Move the hook in the order of arrows (1) and (2) shown in the figure and set the front seat cushion trim away from the front seat cushion frame. (Without power seat system/without position memory system)
am6zzw00018352
|
8. Remove the tab to the position shown in the figure. (With seat ventilation system)
am6zzw00018418
|
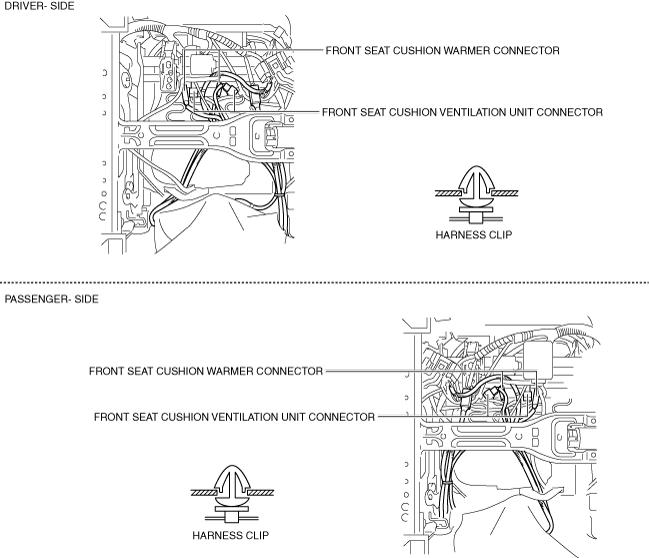
9. Disconnect the connectors shown in the figure. (With seat ventilation system/with seat warmer system)
am6xuw00013172
|
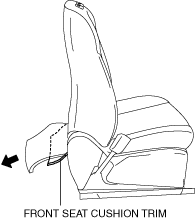
10. Move the front seat cushion trim in the direction of the arrow shown in the figure and set the front seat cushion trim away from the front seat cushion frame.
am6zzw00018397
|
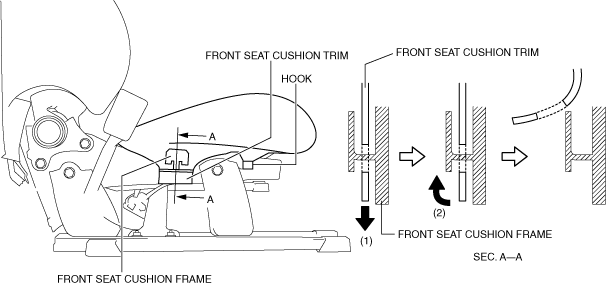
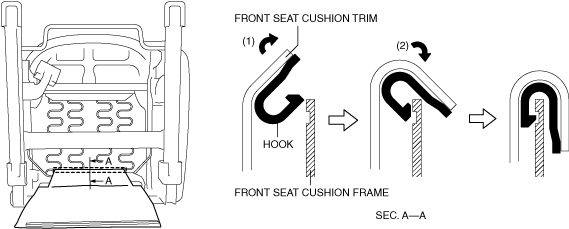
11. Remove the hook.
12. Move the hook in the order of arrows (1) and (2) shown in the figure and set the front seat cushion trim away from the front seat cushion frame.
am6zzw00018398
|
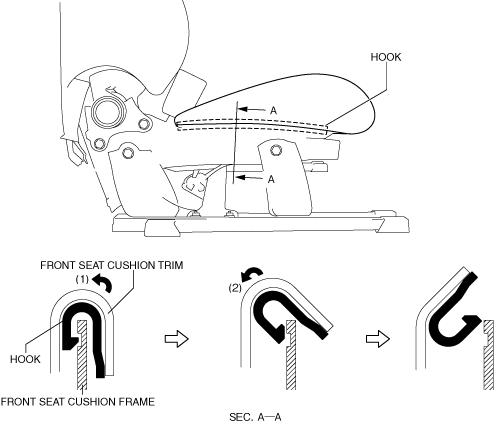
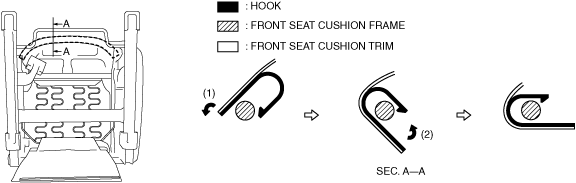
13. Move the hook in the order of arrows (1) and (2) shown in the figure and set the front seat cushion trim away from the front seat cushion frame.
ac5wzw00006998
|
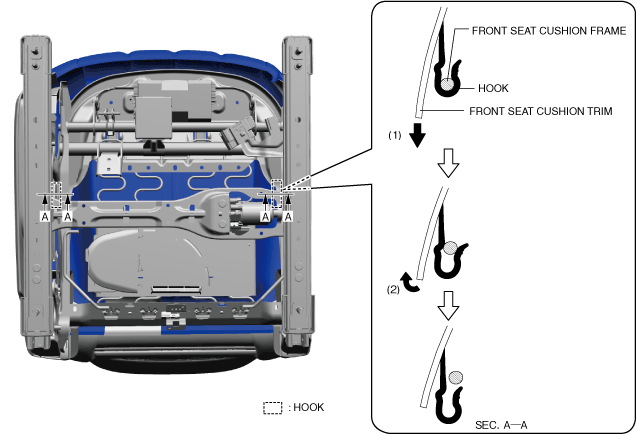
14. Move the hook in the order of arrows (1) and (2) shown in the figure and set the front seat cushion trim away from the front seat cushion frame.
am6zzw00018399
|
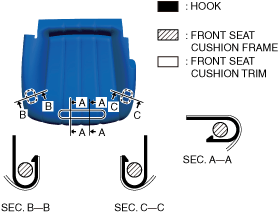
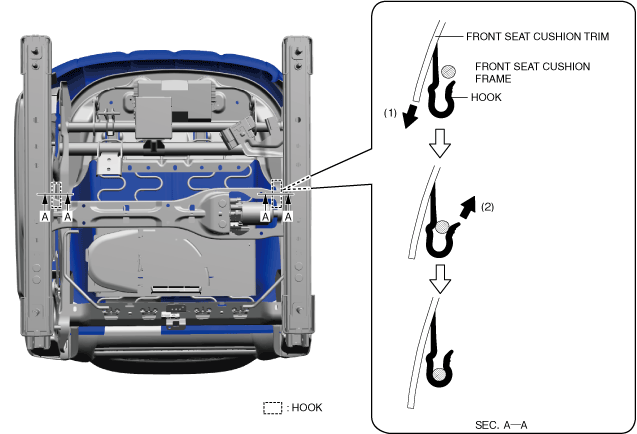
15. Move the hook in the order of arrows (1) and (2) shown in the figure and set the front seat cushion trim away from the front seat cushion frame.
am6zzw00018400
|
am6zzw00018401
|
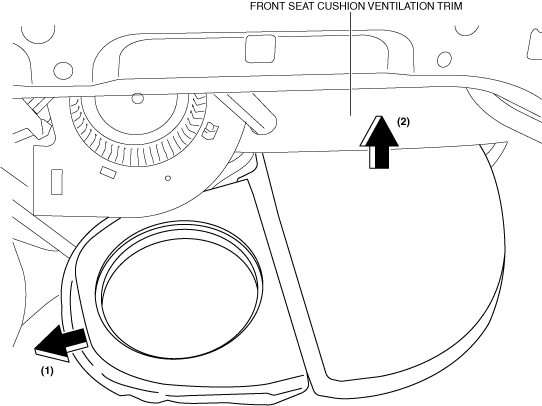
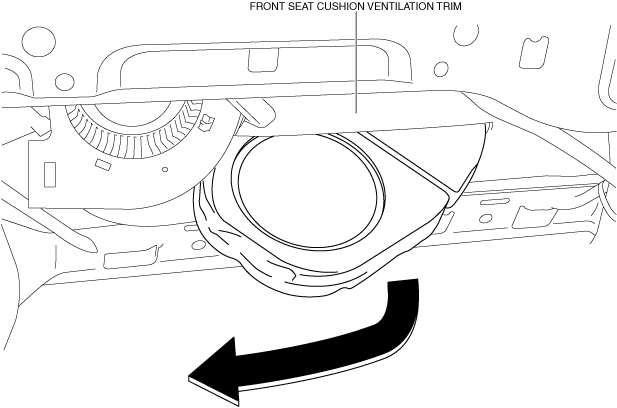
16. While pulling the front seat cushion in the direction of arrow (1) shown in the figure, push it in the direction of arrow (2) and remove it. (With seat ventilation system)
am6zzw00018402
|
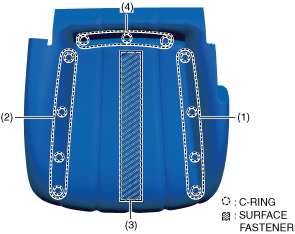
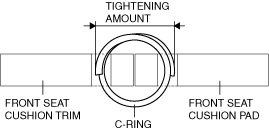
17. Remove C-rings as well as surface fastener in the order of (1), (2), (3), and (4) shown in the figure, and remove the front seat cushion trim from the front seat cushion pad.
am6zzw00018403
|
Installation
1. Align the front seat cushion trim with the installation hole of the front seat cushion pad, and install the C-rings as well as surface fastener in the order of (1), (2), (3), and (4) shown in the figure.
ac5wzw00007006
|
am6zzw00018404
|
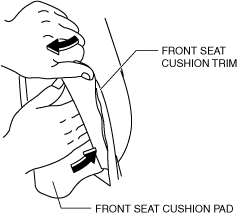
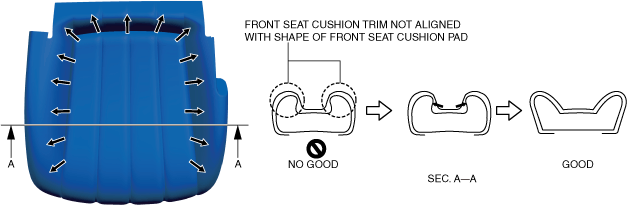
2. Press the front seat cushion pad inward while pulling the front seat cushion trim outward.
ac5wzw00007009
|
3. Align the front seat cushion trim with the shape of the front seat cushion pad while pressing the front seat cushion pad outward.
am6zzw00018405
|
4. Move the front seat cushion in the direction of the arrow shown in the figure and install it. (With seat ventilation system)
am6zzw00018406
|
5. Move the hook in the order of arrows (1) and (2) shown in the figure and install the front seat cushion trim to the front seat cushion frame.
am6zzw00018400
|
am6zzw00018407
|
6. Move the hook in the order of arrows (1) and (2) shown in the figure and attach the front seat cushion trim to the front seat cushion frame.
am6zzw00018408
|
7. Move the hook in the order of arrows (1) and (2) shown in the figure and attach the front seat cushion trim to the front seat cushion frame.
am6zzw00018409
|
8. Move the front seat cushion trim in the direction of the arrow shown in the figure and install the front seat cushion trim to the front seat cushion frame.
am6zzw00018410
|
9. Install the hook.
10. Pull the front seat cushion trim in the direction of the arrow shown in the figure and remove the wrinkles on the front seat cushion trim.
ac5wzw00007014
|
11. Move the hook in the order of arrows (1) and (2) shown in the figure and install the front seat cushion trim to the front seat cushion frame.
ac5wzw00007015
|
12. Pull the front seat cushion trim in the direction of the arrow shown in the figure and remove the wrinkles on the front seat cushion trim.
ac5wzw00007016
|
13. Connect the connectors shown in the figure. (With seat ventilation system/with seat warmer system)
am6xuw00013172
|
14. Attach the tab to the position shown in the figure. (With seat ventilation system)
am6zzw00018411
|
15. Install the fasteners and install the front seat cushion trim to the front seat cushion frame. (With power seat system/with position memory system)
am6zzw00018412
|
16. Move the hook in the order of arrows (1) and (2) shown in the figure and install the front seat cushion trim to the front seat cushion frame. (Without power seat system/without position memory system)
am6zzw00018413
|
17. For vehicles with rear foot illumination, perform the following procedure.
am6xuw00013174
|
am6zzw00018414
|
am6zzw00018415
|
18. Install the front seat side cover. (See FRONT SEAT SIDE COVER REMOVAL/INSTALLATION.)
19. Install the front seat. (See FRONT SEAT REMOVAL/INSTALLATION.)
20. Install the headrest.
21. Connect the negative battery terminal. (See NEGATIVE BATTERY TERMINAL DISCONNECTION/CONNECTION.)