 |
am6xuw00011873
SPEAKER GRILLE REMOVAL/INSTALLATION
id091700960700
Center Speaker Grille
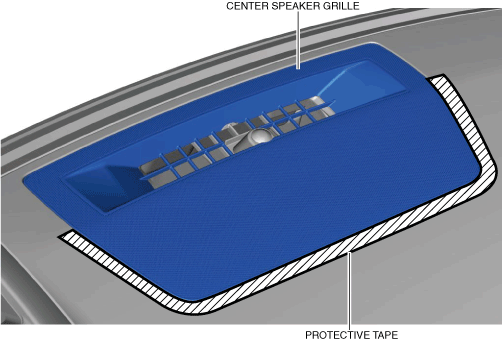
1. To prevent scratches or damage, affix protective tape to the position shown in the figure of the dashboard.
am6xuw00011873
|
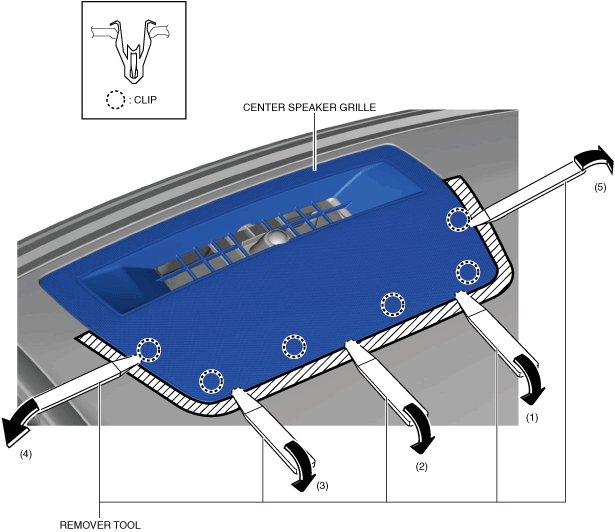
2. Insert the remover tool into the positions shown in the figure, move it in the order of arrows (1), (2), (3), (4), and (5) and detach the clips.
am6xuw00011874
|
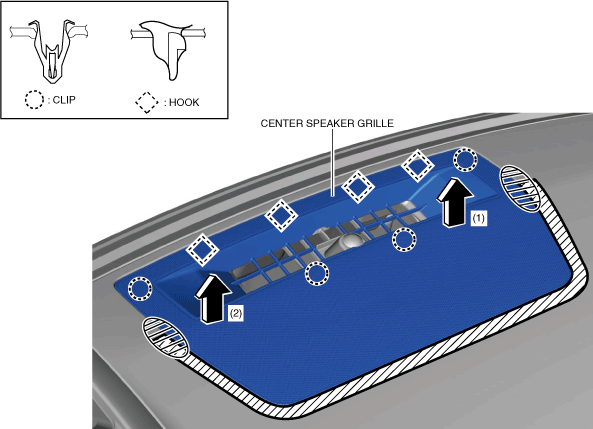
3. Hold the shaded areas shown in the figure, move the center speaker grille in the order of arrows (1) and (2) and remove it while detaching the clips and hooks.
am6xuw00012729
|
4. Install in the reverse order of removal.
Side Speaker Grille (LH)
1. Remove the meter hood No.2. (See METER HOOD REMOVAL/INSTALLATION.)
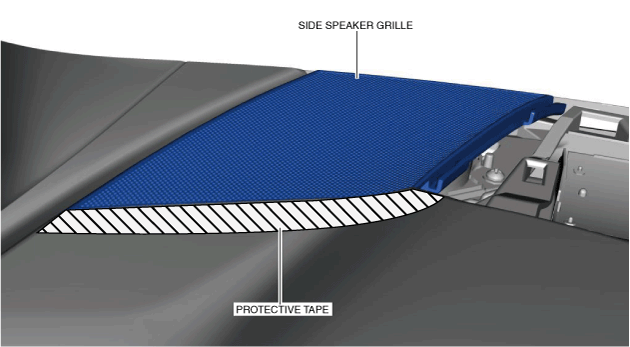
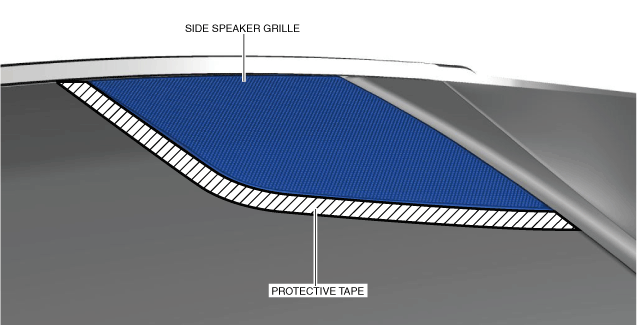
2. To prevent scratches or damage, affix protective tape to the position shown in the figure of the dashboard.
am6xuw00011876
|
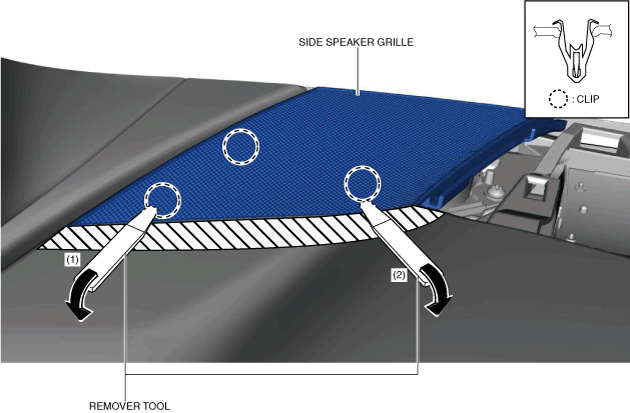
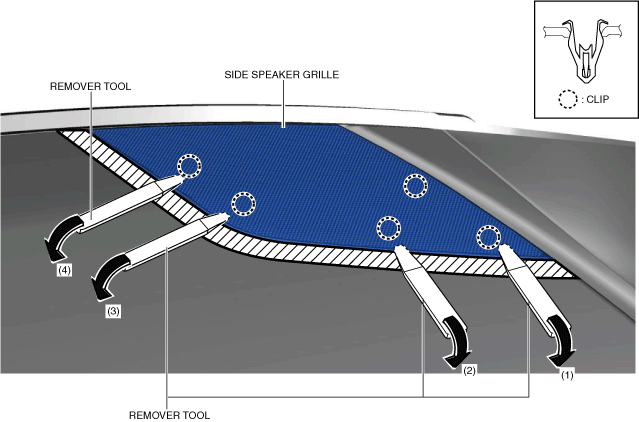
3. Insert the remover tool into the positions shown in the figure, move it in the order of arrows (1), (2) and detach the clips.
am6xuw00011877
|
4. Remove the side speaker grille.
5. Install in the reverse order of removal.
Side Speaker Grille (RH)
1. To prevent scratches or damage, affix protective tape to the position shown in the figure of the dashboard.
am6xuw00011878
|
2. Insert the remover tool into the positions shown in the figure, move it in the order of arrows (1), (2), (3), and (4) and detach the clips.
am6xuw00012730
|
3. Remove the side speaker grille.
4. Install in the reverse order of removal.