1. Disconnect the negative battery cable.
2. Remove the under cover.
3. Disconnect the joint shaft from the drive shaft (RH). (R.H.D.) (See DRIVE SHAFT REMOVAL/INSTALLATION.)
4. Remove the drive belt. (See DRIVE BELT REPLACEMENT [LF, L3].)
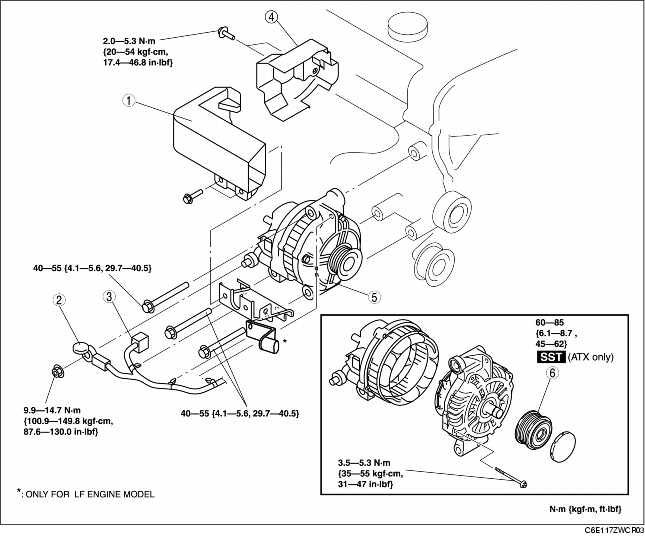
5. Remove in the order indicated in the table.
6. Install in the reverse order of removal.
|
1
|
Generator duct
|
|
2
|
B terminal cable
|
|
3
|
Generator connector
|
|
4
|
Generator heat insulator
|
|
5
|
Generator
(See Generator Removal Note.)
|
|
6
|
Pulley
|
1. Remove the generator from above. (L.H.D.)
2. Remove the generator from below. (R.H.D.)
1. Disassemble/assemble the pulley using the SST.
Tightening torque
