1. Configure the DSC HU/CM (when only replacing it). (See DSC HU/CM CONFIGURATION.)
2. Remove the battery, battery tray and battery tray bracket.
3. Remove the under cover.
4. Remove in the order indicated in the table.
5. Install in the reverse order of removal.
|
1
|
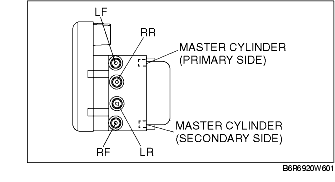
Brake pipe
(See Brake Pipe Removal Note.)
(See Brake Pipe Installation Note.)
|
|
2
|
Connector
(See Connector Removal Note.)
(See Connector Installation Note.)
|
|
3
|
DSC HU/CM and bracket
|
|
4
|
Bracket
|
|
5
|
DSC HU/CM
|
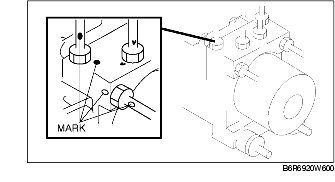
1. Mark the brake pipe connecting positions before removal for reference during installation.
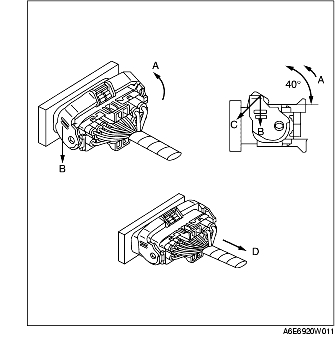
1. Rotate the lock lever 40° to the direction A, then push the lock lever to the direction B.
2. Verify that the lock lever is completely returned.
3. Remove the harness side connector to the direction D.
1. When removing/installing the DSC HU/CM from/to the vehicle, attach a strip of tape on the DSC HU/CM connector to prevent brake fluid from entering.
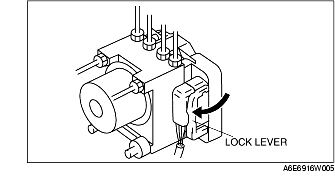
1. Verify that the connection part and waterproof packing are free of foreign material, then connect the connector.
2. Verify that the lock lever is completely pushed in.
1. When installing the brake pipe, align the marks made before removal with the DSC HU/CM as shown in the figure.