1. Disconnect the negative battery cable.
2. Discharge the refrigerant from the system. (See RECOVERY.) (See CHARGING.)
3. Remove the right side splash shield and mudguard (L.H.D. only).
4. Loosen the drive belt and remove it.
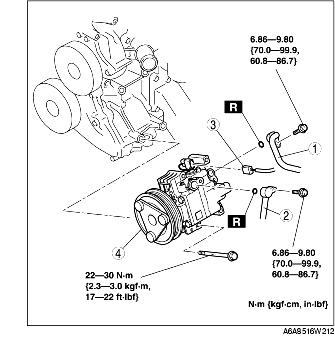
5. Remove in the order indicated in the table. Do not allow compressor oil to spill.
|
1
|
Cooler hose (HI)
|
|
2
|
Cooler hose (LO) (R.H.D.) or cooler pipe No.4 (L.H.D.)
|
|
3
|
Magnetic clutch connector
|
|
4
|
A/C compressor
|
6. Install in the reverse order of removal.
7. Adjust the drive belt.
8. Perform the refrigerant system performance test. (See REFRIGERANT SYSTEM PERFORMANCE TEST.)
1. Remove the following amount of compressor oil from the new A/C compressor when replacing the A/C compressor.