1. Cut away the old sealant using a razor so that 1-2 mm {0.04-0.07 in} thickness of sealant remains around the circumference of the frame.
2. If the sealant has come off completely in any one place, apply some primer after degreasing, and allow it approximately 30 minutes to dry. Then put on new sealant to create a 2 mm {0.08 in} layer.
3. Clean and degrease an approximately 50.0 mm {1.97 in} wide strip around the circumference of the glass and the bonding area on the body.
4. If installing reused glass, install pins at the ceramic void on the upper part of the windshield.
5. If installing reused glass, align the front windshield molding marking and the center of the upper section of the windshield, then install the molding to the winshield.
6. Use only glass primer on the glass, and body primer on the body and the molding. Allow it to dry for approximately 30 minutes.
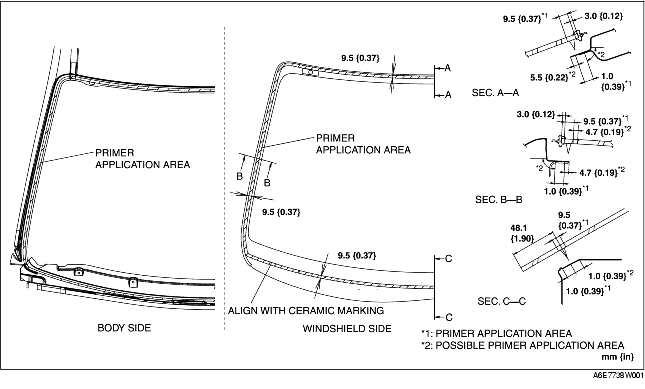
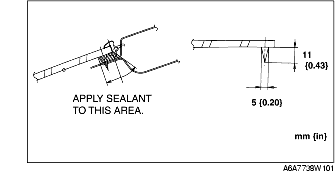
7. Apply sealant to the area of the glass surface as shown in the figure.
8. Set the windshield in place and insert the pins into the body. Install the windshield.
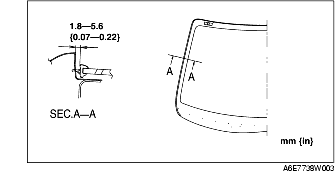
9. Verify that the gap of the A pillar part as shown the figure.
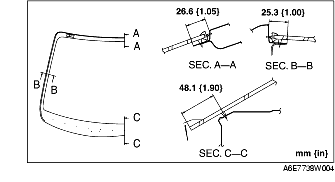
10. Keeping the measurement of the molding lip gap within specification, press completely along the perimeter of the glass.
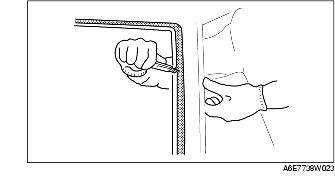
11. Install the seaming welt.
12. Install the cowl grille.
13. Install the headliner
14. Install the interior light. (See FRONT MAP LIGHT REMOVAL/INSTALLATION.)
15. Allow the sealant to harden completely.